How to Make a Name Tag for Free Online
Estimated reading time: 9 minutes
How to make name tags
Making name tags is simple and can be done in just a few steps. Here’s how:
- Choose a material and type, like clip-on or name badge labels.
- Personalize your name tags with names, titles, or designs.
- Print them yourself or get them professionally printed.
This method is quick, easy, and can be done online for free. Below, we’ll break down each of these steps in detail and answer FAQs. Our instructions include pictures as well as helpful videos, so be sure to bookmark this article for easy reference. If you’re looking for a way to make name tags offline, check out this tutorial for making name tags in Microsoft Word®.
The quicker, more professional way to make name tags
As previously mentioned, there are three basic steps to make a name tag online. 1) Choose a material, 2) Personalize your name tags, and 3) Print them yourself or get them professionally printed. These steps are basically the same no matter what software or material you use. However, for the purpose of this article, we will go step by step using Avery name tags and badges as well as free software and templates. If you’ve never made name tags with Avery, here are five good reasons to try them now:
- Free software. Avery Design and Print Online (ADPO) is free, cloud-based software that you can use online without downloading or installing anything on your device.
- Free templates. Avery offers thousands of free name tag templates and designs you can edit and personalize.
- Quality guarantee. Avery name tags and badges are backed by a 100% satisfaction guarantee and decades of label innovation.
- Material variety. We offer a wide variety of name tags that attach with adhesive, clips, magnets, pins, or hang around the neck.
- Customer support & resources. You can call our onsite Customer Care Center at 1 (800) 462-8379 and speak to a live person during regular business hours. We also have a robust, searchable online Help Center full of helpful articles.
How to make a name tag step-by-step
1) Choose a material
On the Avery website, you can choose between ordering printable name tags and badges or having them custom printed. Browse the list by the type of name tag (i.e., adhesive, clip-on, pinback, etc.) and choose the one that best fits your event. If you’re planning on printing them yourself, make sure you choose the type of material that works with your printer. For example, if you have a laser printer, choose name badges that are compatible with laser printers. If you’re not sure what type of printer you have, there are also many materials that we’ve designed to work with both laser and inkjet printers.
Avery name tag & badge material comparison
| Product | Material | Attachment | Customize |
|---|---|---|---|
| Adhesive name badges | Paper or Film | Fabric-safe adhesive | Laser printer Inkjet printer Ballpoint pen Permanent marker |
| Clip-style badges | Cardstock Plastic | Plastic holder with a clip on the back | Laser printer Inkjet printer Ballpoint pen Permanent marker |
| Pin-style badges | Cardstock Plastic | Plastic holder with a pin on the back | Laser printer Inkjet printer Ballpoint pen Permanent marker |
| Magnetic badges | Cardstock Plastic | Plastic holder with magnets on the back | Laser printer Inkjet printer Ballpoint pen Permanent marker |
| The Mighty Badge | Metal Plastic | Metal holder with magnets on the back | Laser printer Inkjet printer Permanent marker |
| Hanging badges | Cardstock Plastic | Plastic holder with cords | Laser printer Inkjet printer Ballpoint pen Permanent marker |
| Durable ID badges | Durable 11mil plastic | Hole for clip or lanyard | Laser printer Ballpoint pen Permanent marker |
2) Personalize your name tags
Find the perfect Avery template
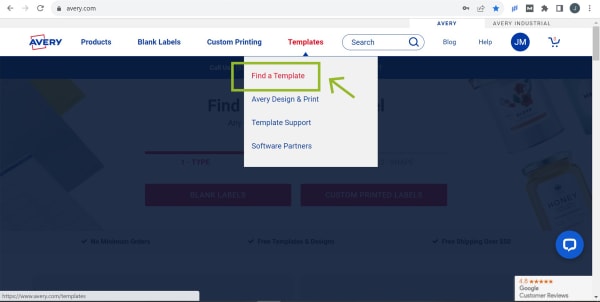
Go to the Avery template finder page and select “Find a Template” from the dropdown.
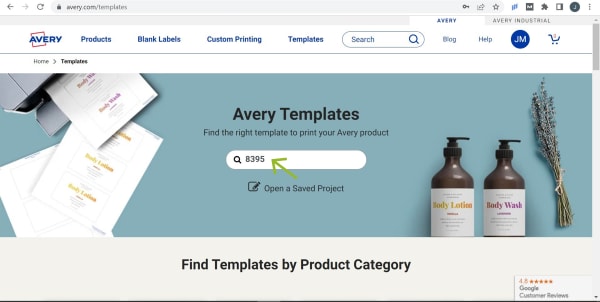
Enter the Avery product number for the name tags you want to use.
The Avery product number is a unique identifier for each type of name badge or name badge material that Avery sells. Because it is so important, the Avery product number is generally located at the top right of the front of the package of name tags you’ve purchased. The product number is also listed on each product’s page.
Once you have the Avery product number, you can enter it into our ADPO software to create your name badges. ADPO will use the Avery product number to show you blank and predesigned templates that are designed for the correct size, shape, and other settings for your name badges.
Start designing or editing a design
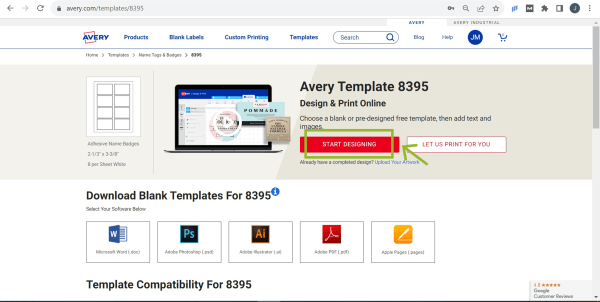
On the template page, click the big, red “Start Designing” button to open ADPO.
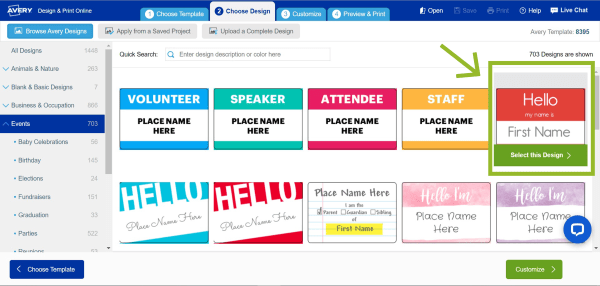
Use the left menu to browse by category, then click the template you want to use.
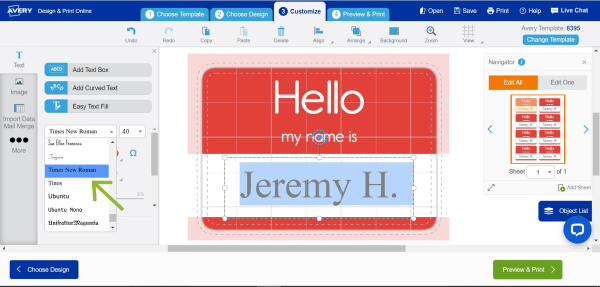
Click the text box to type new text. Once the text box is selected, you can also make other changes to the font, color, and/or size using the menu on the left.
Edit All changes all the name tags. This is best for making changes to your overall design (like font size, style, etc.).
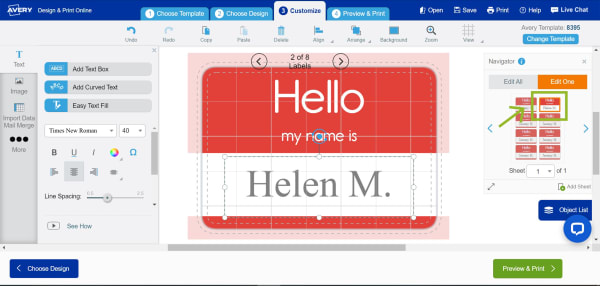
Edit One makes changes to just the name tag you have selected. It’s best to switch to this for manually typing in names.
Since ADPO is free cloud-based label-making software, you can create and print name badges without having to download anything. However, you will need to be signed in to your free Avery account in order to save and print your name badges, so it may ask you to sign in before opening.
After choosing a template, the editing tools are located on the left-hand side. Clicking any tool expands it to offer more specific options, like font style, color, and size. You can also edit shapes, colors, and backgrounds and add elements like images, QR codes, or sequential numbers, making it easy to customize your design.
What’s more, the Edit One/Edit All feature allows you to either apply changes to all name badges or to just one, which is perfect for projects that involve individual names. It’s recommended to start with Edit All for overall design changes, then switch to Edit One for adding specific details. If using Mail Merge to input names, stay in Edit All mode for a streamlined process.
Quickly import names
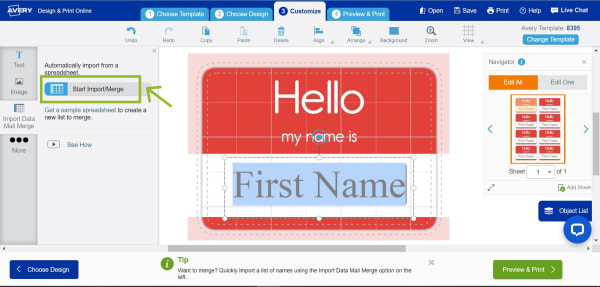
Instead of manually typing in names, you can import them from a spreadsheet.
Make sure Edit All is selected, then choose the lmport Data/Mail Merge tool. Click “Start Import/Merge” and follow the prompts.
On the left-hand menu mentioned above, you will also find the Import Data/Mail Merge tool. Mail Merge is a huge boon for creating name tags because it allows you to import names from a spreadsheet rather than manually type in each one. If you’re not familiar with using this function, this article takes the mystery out of the mail merge process.
Helpful design resources
- Video: Working with Images, Backgrounds & Shapes
- Video: How to Add and Format Text in ADPO
- Video: How to Use Edit One and Edit All
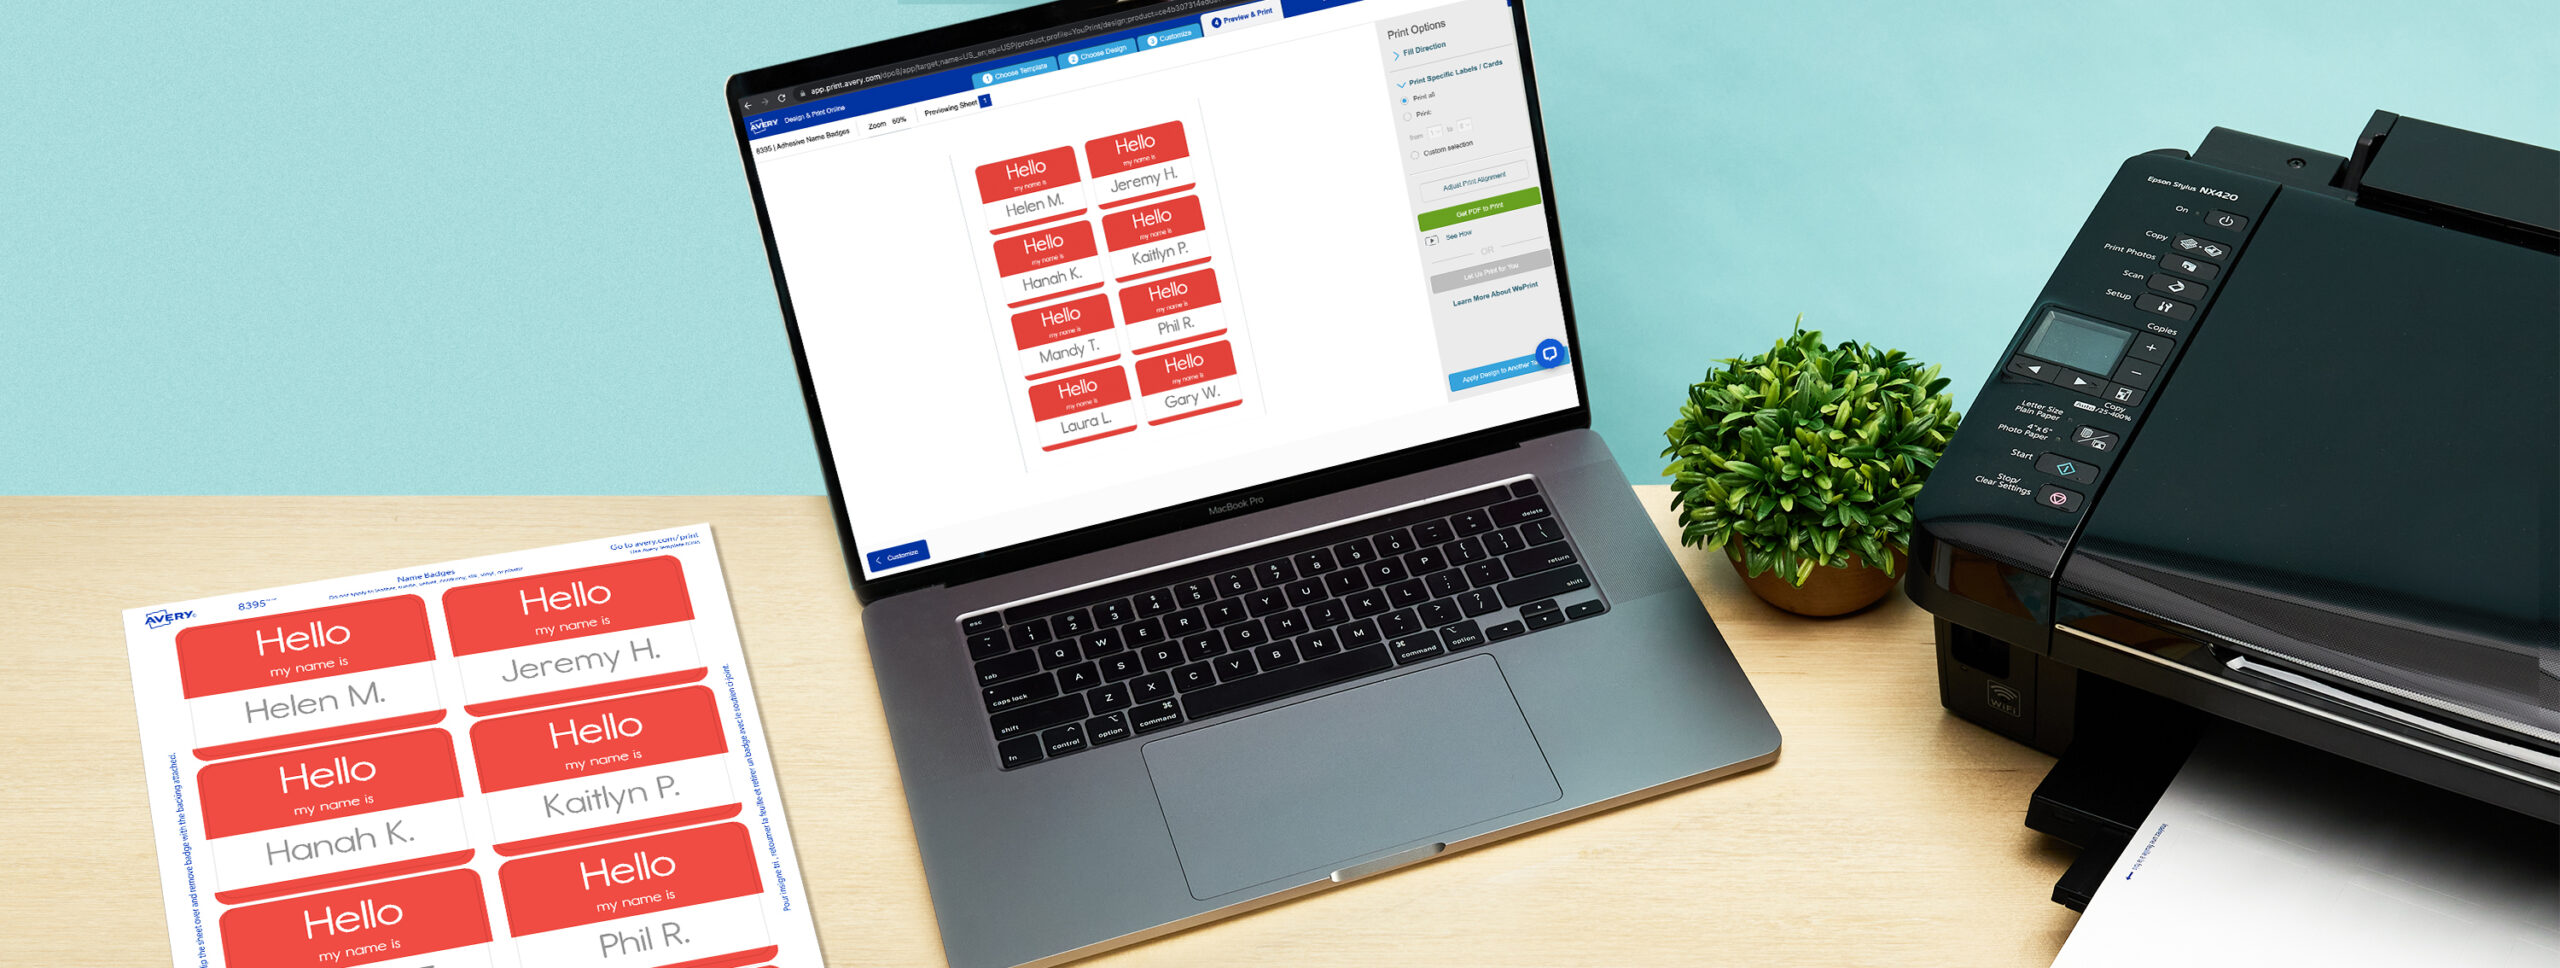
3) Print yourself or have them professionally printed
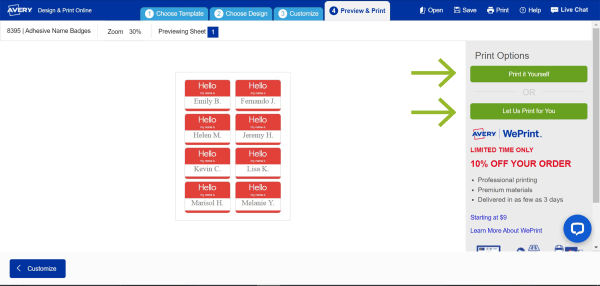
Choose to print yourself or use WePrint. Then save your project to your Avery account for free in the cloud.
Once you’ve saved your project, you can download a PDF and print it.
Most printable Avery products have the option to be custom-printed with the Avery WePrint® service. If the product is available for custom printing, there will be a button that reads “Let Us Print for You” when you progress to the “Preview & Print” tab. Once you make a choice, you’ll be prompted to save your name badge project. This is a great idea because you can make edits later, reprint, apply your design to a different Avery product, and even share projects via email.
IMPORTANT: When printing yourself, the steps are slightly different for different browsers. If you’re not familiar with printing from a browser, this article walks you through it and has specific instructions for different browsers, including Firefox, Microsoft Edge, Safari, and Google Chrome.
Frequently asked questions
Best material for name tags
The best materials for name tags are ones that are easy to print or write on and easy to wear. Examples include paper or film labels that stick to fabric, durable plastic name tags, or cardstock that goes in a plastic or metal name tag holder. Ideally, these materials would be printable and okay to write on with a permanent marker.
What is the average name tag size?
The average name tag is about the size of a credit card or slightly bigger. However, size can vary by type. For example, the most popular type of name tags are the “Hello, My Name Is” stickers that stick right on your shirt, such as the Avery 5141. Adhesive name badges like this are generally 2-3/16″ x 3-3/8″. Printable cards that go inside name tag holders (on lanyards, pins, clips, etc.) can be either about 2-1/4″ x 3-1/2″ or slightly bigger, around 3″ x 4″. In contrast, employee name tags might be quite a bit smaller, around 1″ tall by 3″ wide.
What font is best for name tags?
Name tags are meant to be read, so it’s best to opt for something easily readable. Serif and sans-serif fonts are ideal over script and handwritten ones for that reason. Larger fonts are also preferred and sometimes paired with all caps and/or bold formatting.
How to make professional-looking name badges
Creating name tags online is free and easy with Avery. This guide showed you three simple steps:
- Choose a material for your name tags: Avery offers a variety of materials and and name badges that attach in different ways, such as adhesive, clip-on, pinback, magnetic, or hanging around your neck.
- Personalize with ease: Choose from a variety of free templates and designs perfectly formatted for Avery name badges. Then use Avery Design & Print Online (ADPO) to add names, titles, logos, or even import names from a spreadsheet.
- Print yourself or have them professionally printed: Choose from high-quality name tag products you can print at home or let Avery handle it for you.
With Avery, you can create name tags that are functional, stylish, and perfect for any event. Don’t forget to check out the helpful resources linked throughout the article for more in-depth instructions and video tutorials! For name tag and event inspiration, follow us on Instagram and Facebook.