How to Create a QR Code for Business Cards the Easy Way
Estimated reading time: 8 minutes
Join me to create a QR code for my rebranded business cards
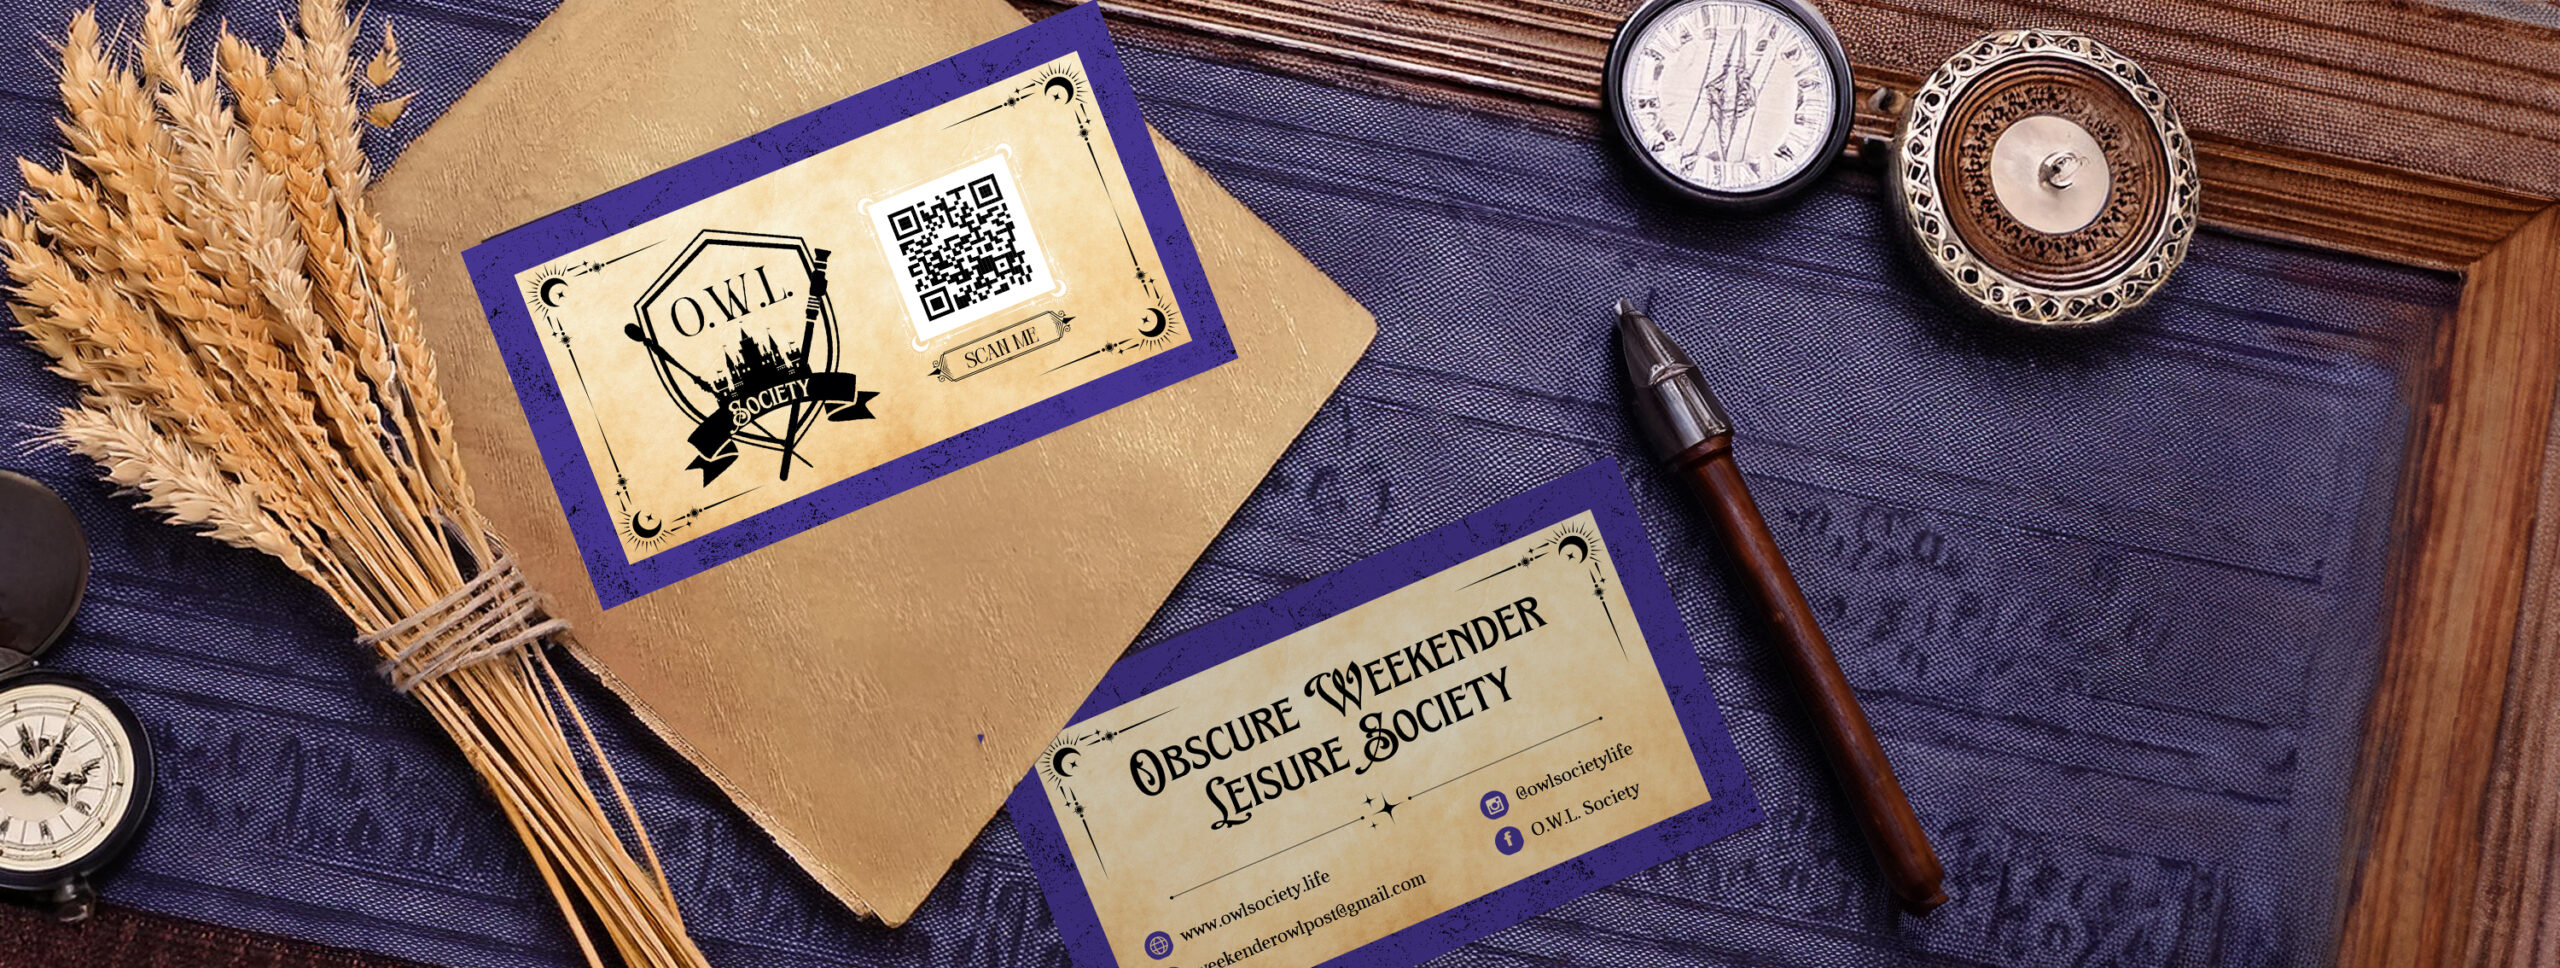
I run a local meetup group with over 700 official members, and after seven years we are rebranding. We’ve changed our name, so there are a lot of marketing assets I need to update. Luckily, creating a QR code for our business cards is easier than ever with Avery Design and Print Online (ADPO). Because I’m using ADPO, I won’t need an extra widget or app. All I have to do is just use the built-in barcode generator from the tools menu. Then, simply type our new URL, and the Avery QR code generator will handle the rest. I love this because I have the option to create my design from scratch in ADPO or upload a complete design. Either way, it only takes minutes to create and add a QR code to my business card design.
New to QR codes? Learn more about what they are and how to use them for your business.
Of course, ADPO is a great business card maker. It has tools to design from scratch as well as designs you can modify—all for free. You can also use ADPO with blank Avery templates to upload complete designs from Illustrator or Canva. Blank templates make it easier to place your design and QR code exactly where you want them to be when the cards are printed. This is true whether you print them yourself or have them custom printed with the fast and affordable Avery® WePrint Service.
Business card products and tools I will be using
For my rebranding project, I’ll be uploading a complete business card that I designed in Canva® and using ADPO to add the QR code. Then, I’ll finish by ordering custom-printed Avery business cards. Normally, I prefer the Avery Business Card Books™ because we do a lot of meetups at theme parks and they’re easy to just toss in my backpack. However, this time around I want the flexibility to print a few cards at home or order larger quantities custom printed. That being the case, I’ll start by putting my design on the template for Avery Clean Edge® business cards (28878). These are my favorite printable cards because when you break apart the sheet after printing, the edges are nice and smooth.
The best part is that once I save my business card design to my Avery account, I can reprint it at any time. I can even apply my saved design to other products, so ordering business card books later will be super easy. And I can share the project via email with my team so they can print cards for themselves as needed.
How to create a QR code business card for free (step-by-step)
As mentioned above, I’m starting my design on the blank template for Avery 28878 business cards. Since this article in the Avery Help Center covers how to find templates, I’m going to skip that part in this tutorial. Instead, I’m going to start with my Canva business card design already uploaded to the blank Avery template.
Pro Tip: I downloaded my Canva design as a “PDF for printing” and made sure it was set to CMYK colors. ADPO supports PSD, AI, EPS, TIFF, JPG, and PNG files, but I prefer PDF. I choose this option when I’m downloading Canva designs because CMYK colors will always print more accurately.
1) Open the built-in barcode generator
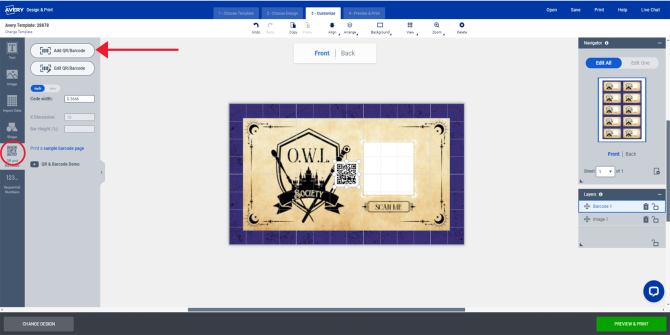
Once you have opened a template in APDO, the main editing tools are located on the left-hand side. When you choose a type of tool, the menu will further pop out, offering more choices. So to start adding a QR code to my business card, I clicked the “QR Code and Barcodes” icon. Next, I clicked the “Add QR/Barcode” button.
2) Choose QR code from the options
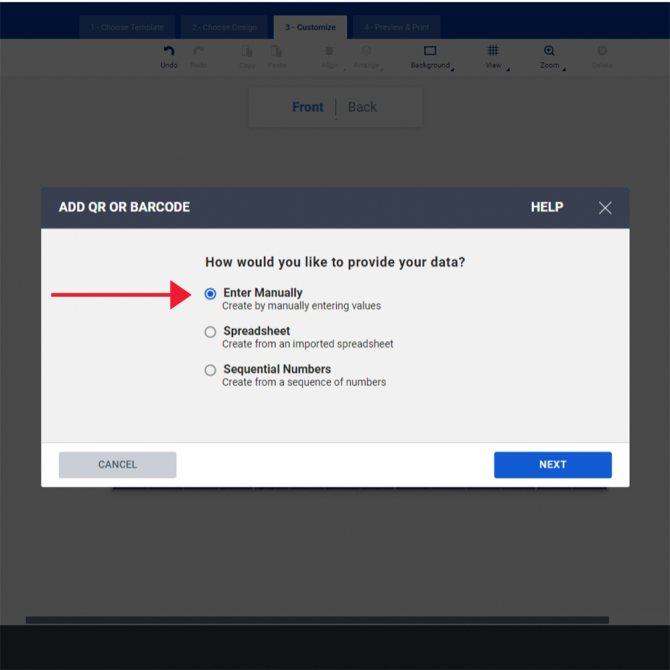
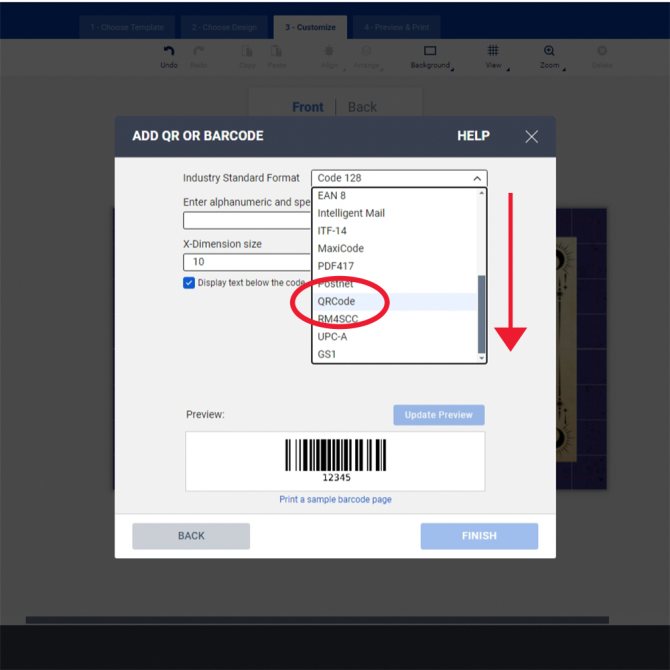
My favorite thing about using the built-in Avery barcode generator is that it can generate any type of barcode. That being so, there are a few choices you will be prompted to make in pop-ups. While barcodes often use imported data from spreadsheets, a QR code only requires a single data point, so I chose “Enter Manually.” In the next pop-up, I scrolled through the barcode types and chose “QRcode.”
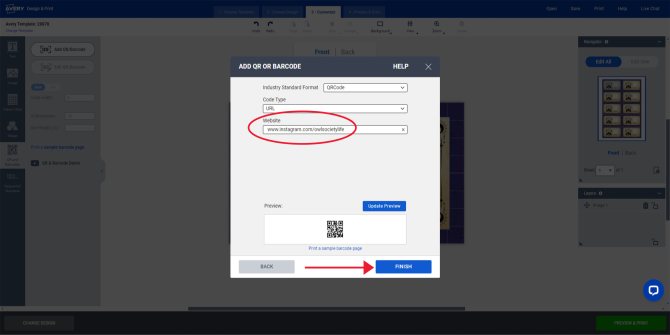
QR codes are awesome because they can link to any digital location. However, most people use them to link to a website (for example, I’m going to use it to link to our Instagram page). So I chose “URL” from the dropdown menu.
3) Enter the URL of the website you want to link

The next step to adding a QR code to your business card is to type in the web address of the site you want to link. When you type in the URL, be sure to type in the whole thing beginning with “www.,” otherwise your QR code will not work. I typed in the URL for our Instagram page and then clicked “Finish.”
4) Edit QR code placement on your business cards
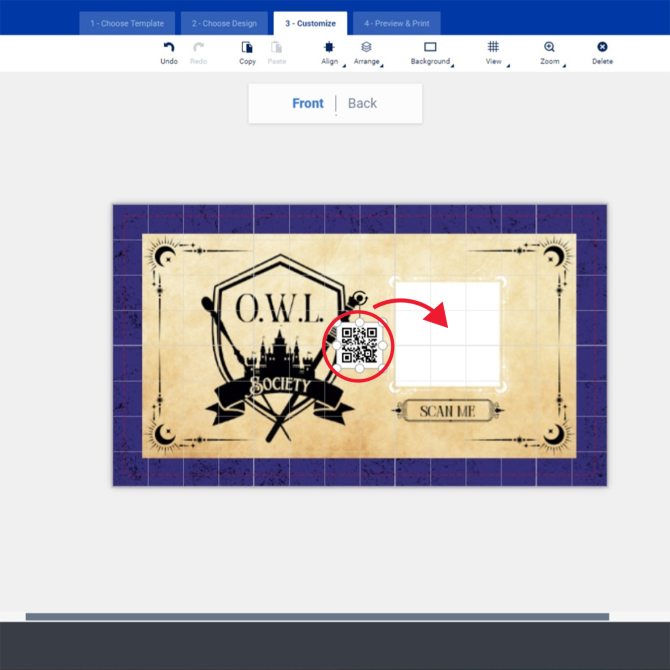
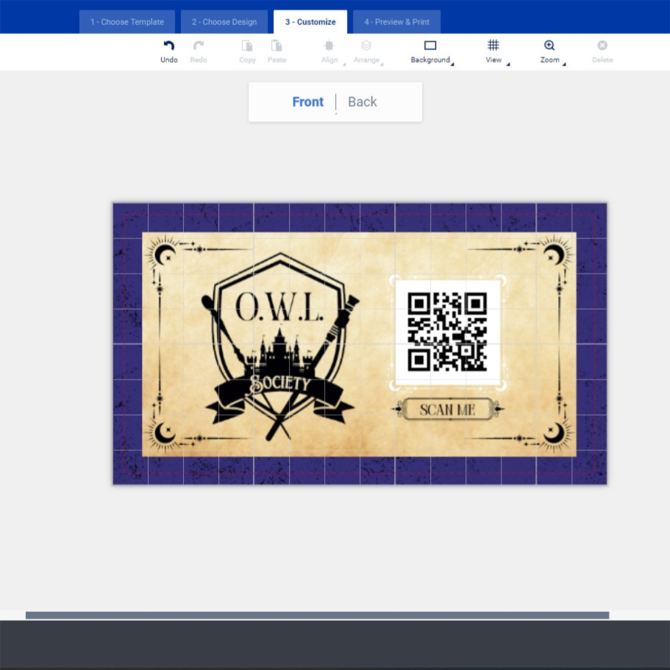
Once I added my QR code to the business card, I needed to arrange it so it worked with my design. To do so, I simply dragged and dropped the QR code where I wanted it to be and resized it as needed. In general, here are some good rules that I stick to about placing QR codes on business cards:
- Contrast is key. Barcodes rely on light bouncing back in a specific pattern, and dark and light colors reflect light differently. If the contrast is too low, like with a black QR code on a mid-to-dark blue background, your phone might not scan it properly.
- Do not overlap. Overlapping designs, textures, or images can also mess up the pattern that reflects off the QR code.
- No smaller than 1 inch. Technically, a QR code can be as small as 0.8 x 0.8 inches (2 x 2 cm) and still work. However, I prefer to use ones that are at least 1 x 1 inches to compensate for varying phone camera quality.
5) Review the other side of your business cards
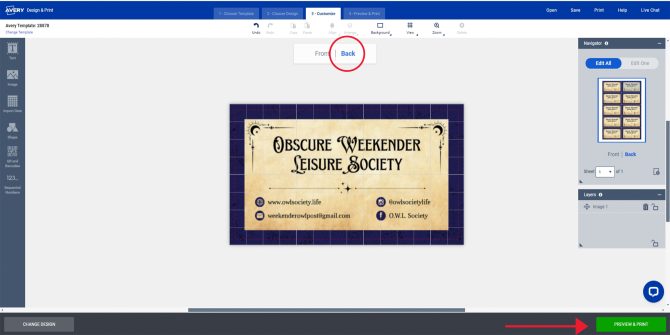
Even though I only added a QR code to the front, I still needed to check both sides of my cards. I used the “Back” button to make sure that the back design was placed perfectly, so I know it will look right when printed. Then I clicked the “Preview & Print” button.
6) Preview your finished QR code business cards
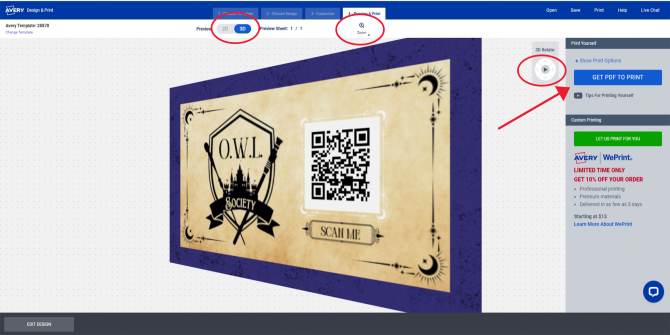
In the “Preview & Print” screen, there are a lot of tools to make sure your design looks right. First of all, you can view it in 3D and rotate your cards from front to back. That is my absolute favorite feature! You can also zoom in and, of course, you can view the exact PDF file that you will print from. If anything looks off, you can use the “Edit Design” button to go back and make changes. I recommend always reviewing your PDF file before moving on to printing, so that was my next step.
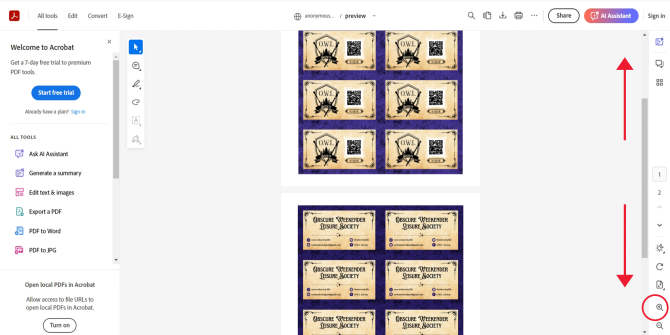
The PDF file opens in a new tab on your browser. I use Adobe Acrobat to open PDF files, so that’s what opened for me. I scrolled between the front and back to make sure everything looked good and zoomed in on some details. If you’re printing from home, you can save the file to your laptop or device and print later. You can also print directly from the PDF in your browser. Because the purple is new to our brand palette I wanted to test my design before ordering in bulk.
Resources for printing your own business cards
7) Print your cards or order them custom printed
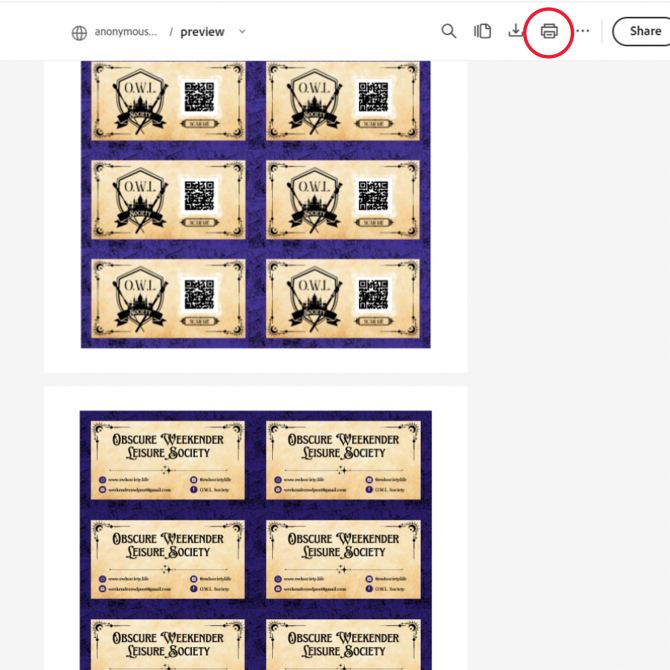
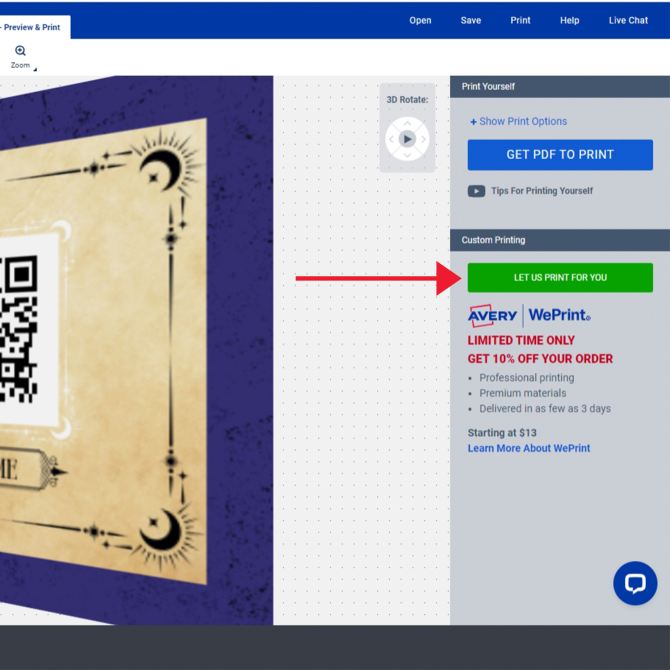
I printed one sheet of my QR code business cards right away from my open PDF using my home printer. The test print looked great, so I switched back to ADPO and clicked the “Let Us Print for You” button. From there, I ordered my desired quantity of QR code business cards to be custom-printed and delivered direct to my home.
My QR code business cards are ready to go!
Now that I’ve tackled new business cards, I’m reminded of how far we’ve come in the past seven years. Transitioning an established group to a new name with a new look has been a big step, but tools like Avery Design and Print Online (ADPO) have made the process smooth and way less stressful. Creating QR code business cards was a breeze, allowing me to focus on what truly matters—connecting with my community. Whether you’re rebranding or just starting out, ADPO gives you the flexibility to design, test, and print with confidence. Here’s to the next chapter!
For more ideas and inspiration, you can find Avery Products on Pinterest and Facebook. If you want to see my newly rebranded group in action, come check out O.W.L. Society on Instagram. And why not share your own stories and projects using #averyproducts—we love to see them!

