How to Create & Print Your Own DIY Gift Tags
Estimated reading time: 11 minutes
Introduction to making your own gift tags
In this article I’ll walk you through how to make gift tags for all your special occasions. Over the years, I’ve made DIY gift tags many times for both personal use and my small side-hustle business. Specifically, I usually make about 200 custom tags when I’m prepping for the holiday selling season. However, I also make just a couple dozen when wrapping gifts for friends and family. For my maker business, I’m usually more focused on packaging that enhances the “giftability” of my items. However, depending on your industry, I’ve found that using personalized gift tags can be a great way to put together thoughtful business gifts.
Whatever your needs are, Avery has some amazing tools to help you create personalized gift tags. For example, I like using our free online software to easily create designs or upload them from Canva®. We also have tons of free editable design templates. However you personalize your designs, it’s easy to bring them to life by printing tags yourself or letting us print for you.
More articles you might like:
How to make gift tags
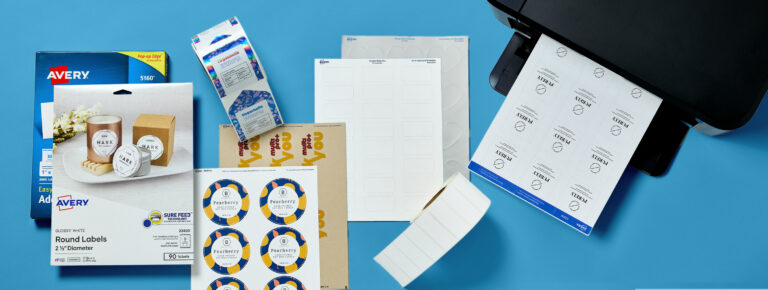
First, you’ll need tags. Our printable tags come in a wide variety of shapes and materials. Some examples include round, square, and Kraft brown material for DIY gift tags with a modern, trendy look. Or, scalloped shapes for a charming, playful, and slightly vintage vibe. My personal favorites are the classic Avery printable tags and a similar version with gold borders. You can also shop our professionally printed gift tags for additional finishes.
Whether printing or ordering custom DIY gift tags, we offer free tools for design and personalization. First and foremost, Avery Design and Print Online (ADPO) is our free software for designing tags, labels, cards, and more. With ADPO you can design from scratch on blank Avery templates that are perfectly formatted for Avery products. Or, modify free predesigned Avery templates with custom text, graphics, logos, and so much more. You can also design your gift tags offline by downloading blank Avery tag templates for Microsoft Word® and the Adobe® suite.

Step 1: Go to Avery Design & Print Online
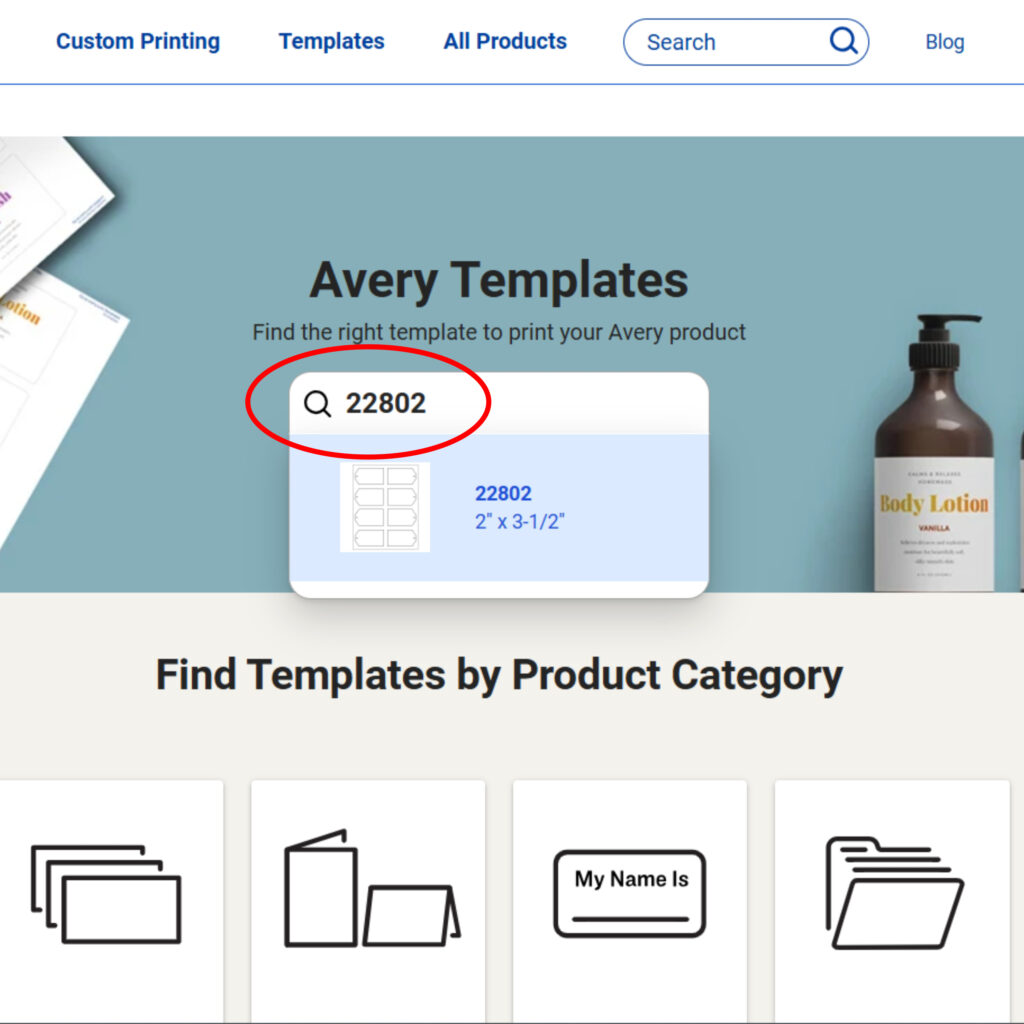
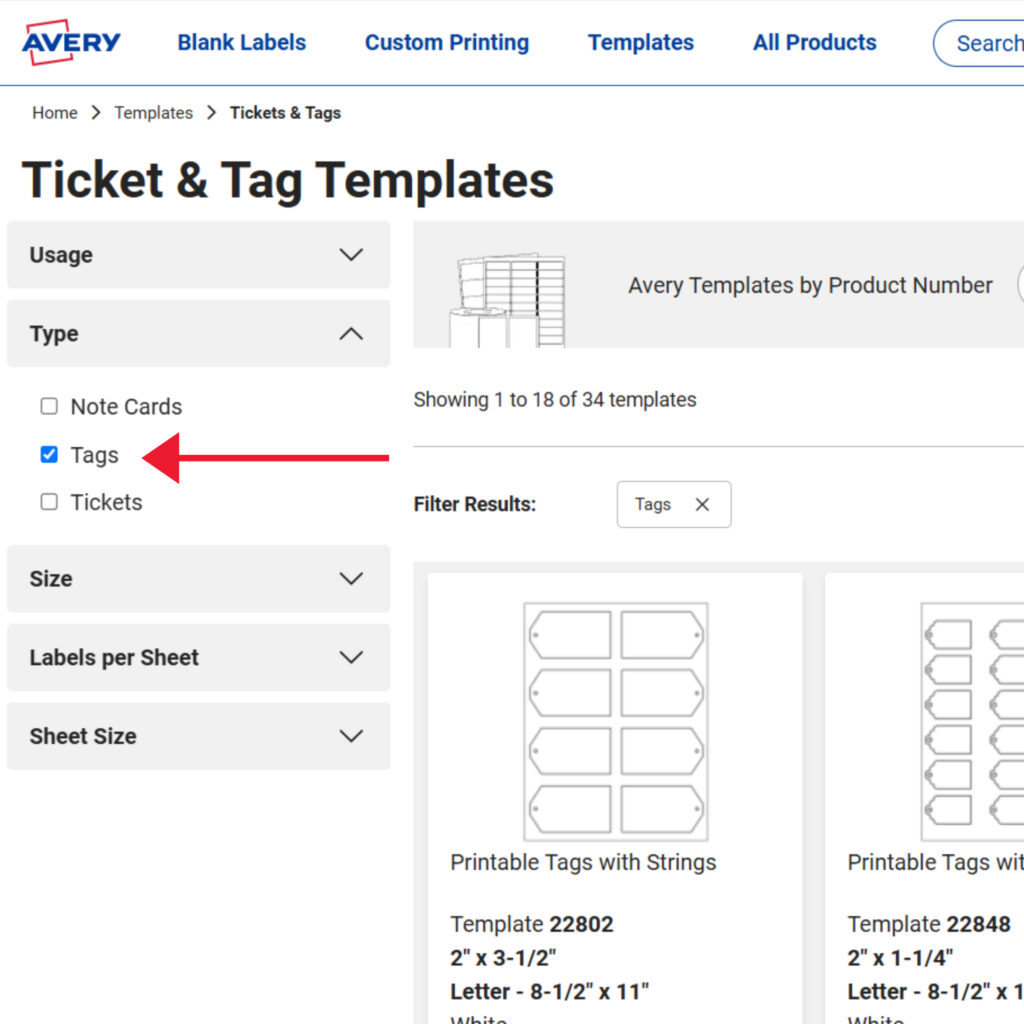
Start a new project for DIY gift tags by opening a template in Avery Design and Print Online. One way to find templates for Avery products is by entering the product number in the Avery template finder page. From this page, you can also browse all tag templates by product shape.
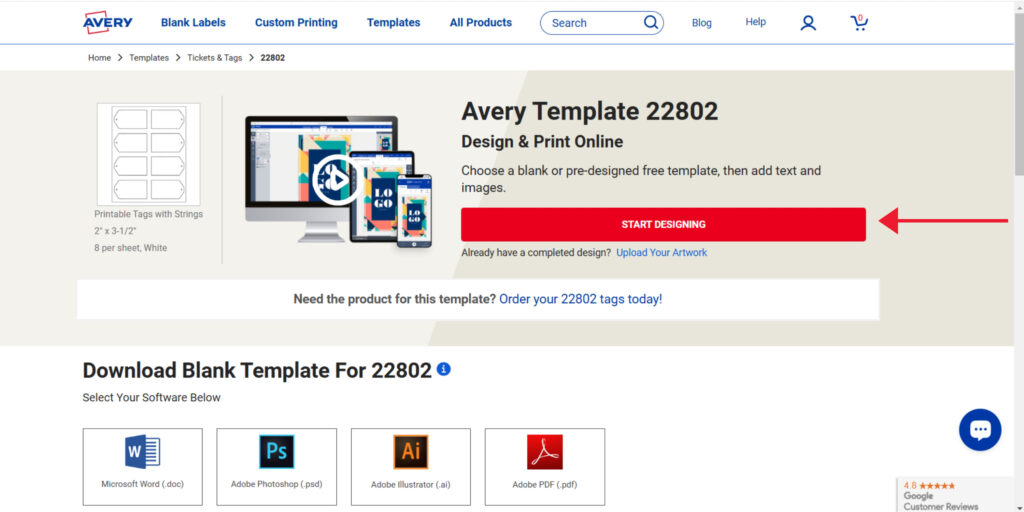
Once you find the template for your product, click “Start Designing” to begin to create DIY gift tags. For custom-printed hang tags, simply click your desired shape and size to begin.

Step 2: Select the layout of your tags
From my experience, the variety of layout options for DIY gift tags depends on the product I choose. Some tag shapes will require you to choose an orientation. For all the tags I’ve worked on, I’ve had to choose whether my design would go on one or both sides.
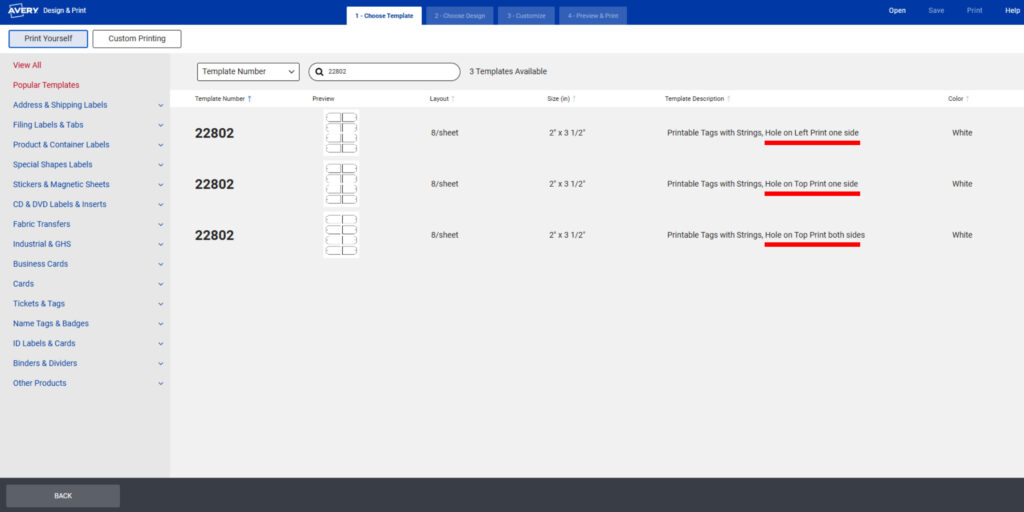
Rectangle, banner, and banner tags with scalloped edges are perfect examples of tags with uneven sides. When I’ve used these types of DIY gift tags, I’ve been able to choose an orientation and whether to print on both sides in tall orientation.
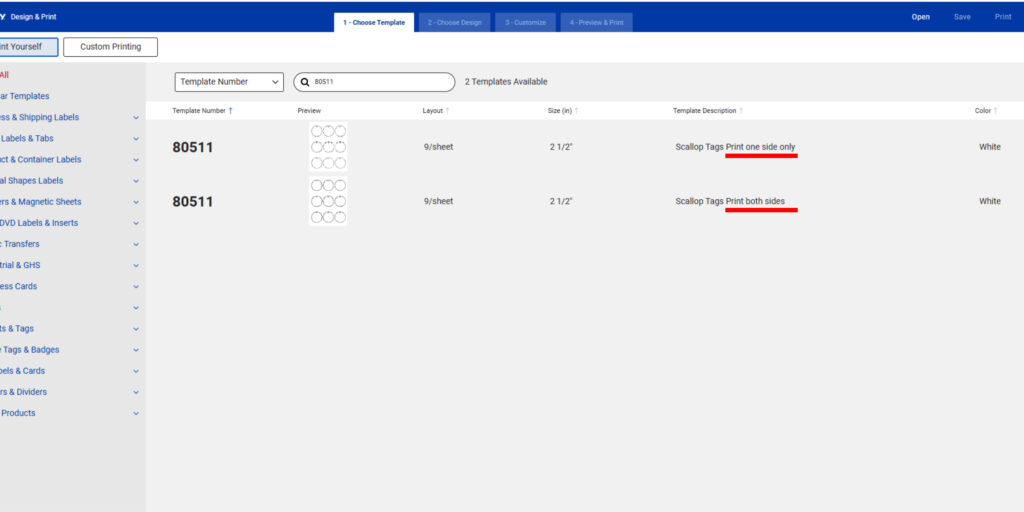
Tags with even sides (circles, squares, scalloped circles, etc.) will only require you to choose whether you want to print on one or both sides.
Step 3: Choose the design
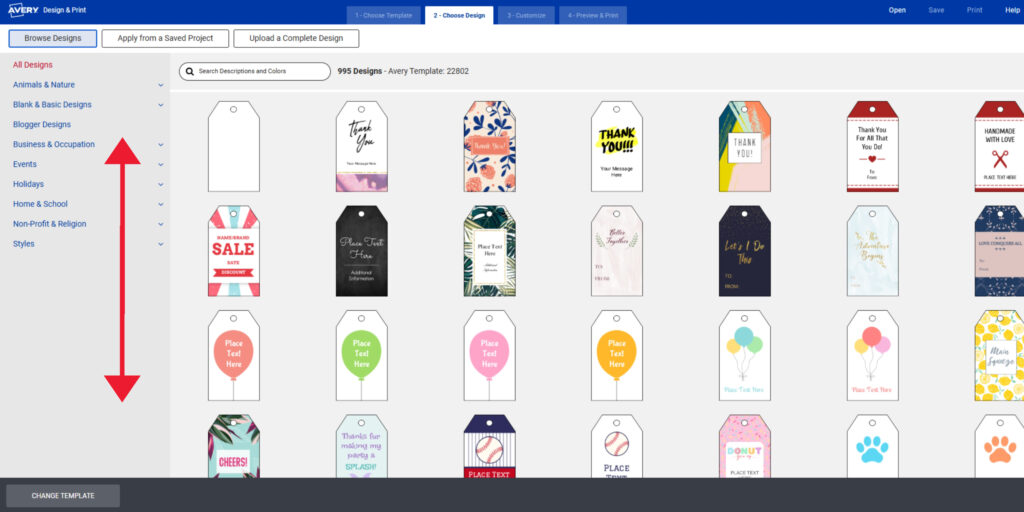
Next, select a predesigned DIY gift tag template or choose a blank template. The first option displayed will be the blank template, which is ideal if you plan on uploading a design from Canva® or Adobe Illustrator®. Scroll to find more predesigned templates or use the menu on the left to browse designs by theme categories.
Step 4: Personalize your tags
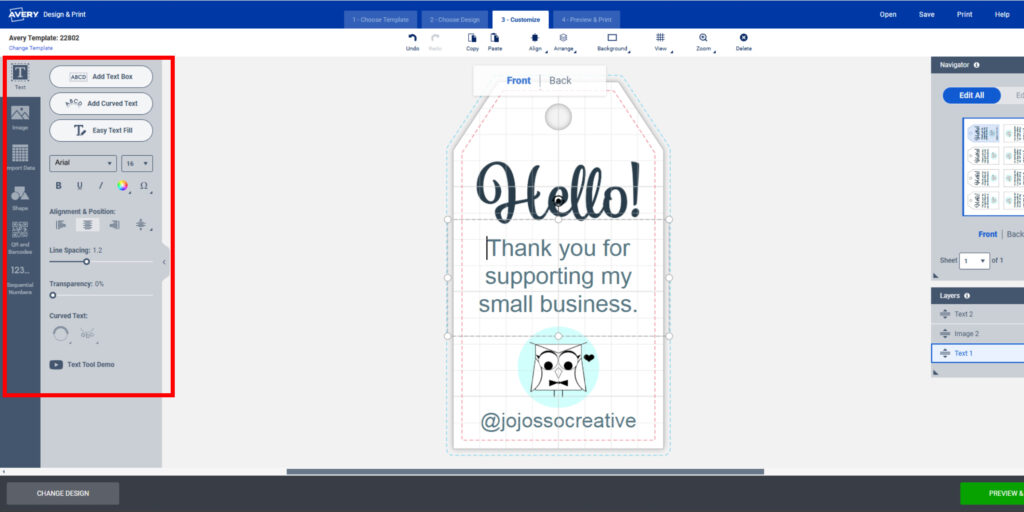
Once you’ve chosen your template, you’ll see a closeup of the tag on the editing desktop. Your editing tools are on the left-hand side, and you can do things like add images or logos, change colors, add or edit text, etc. You can even add barcodes and QR codes to your DIY gift tags using our free, in-app barcode generator.
All of these tools can be used to:
- Design from scratch on a blank template.
- Modify a predesigned Avery template.
- Upload complete designs from Canva or Adobe Illustrator.
Design resources to help you personalize your tags
- Video: How to Add Images & Backgrounds in ADPO
- Video: How to Add & Format Text with ADPO
- Read: How to Design a Logo for Your Business
Editing individual tags
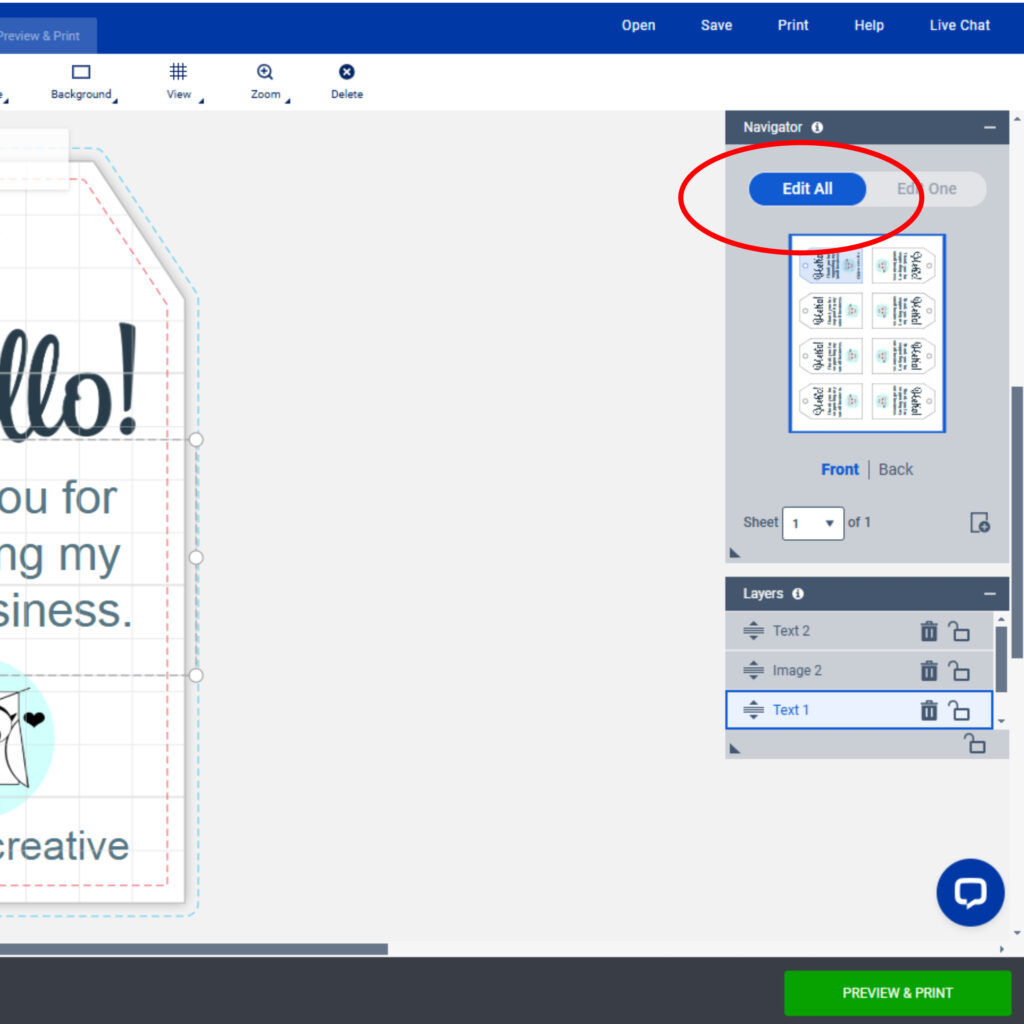

What’s more, the navigator on the right-hand side has an Edit All and Edit One feature. This allows you to make changes to all your tags or just one. If, say, you want to make a change to the overall design of your gift tags, you would click Edit All. If you want to make changes to individual tags, you would click Edit One. I find this feature ideal for adding individual names to Christmas gift tags or personalizing party favors birthday parties.
You can also use the Import Data (Mail Merge) tool in ADPO to import information from a spreadsheet. For example, if you want tags to have individual names on them, you can import names from a spreadsheet, and Import Data will apply them to individual tags! This article walks you through how to use the Mail Merge tool.
Step 5: Preview, print and save
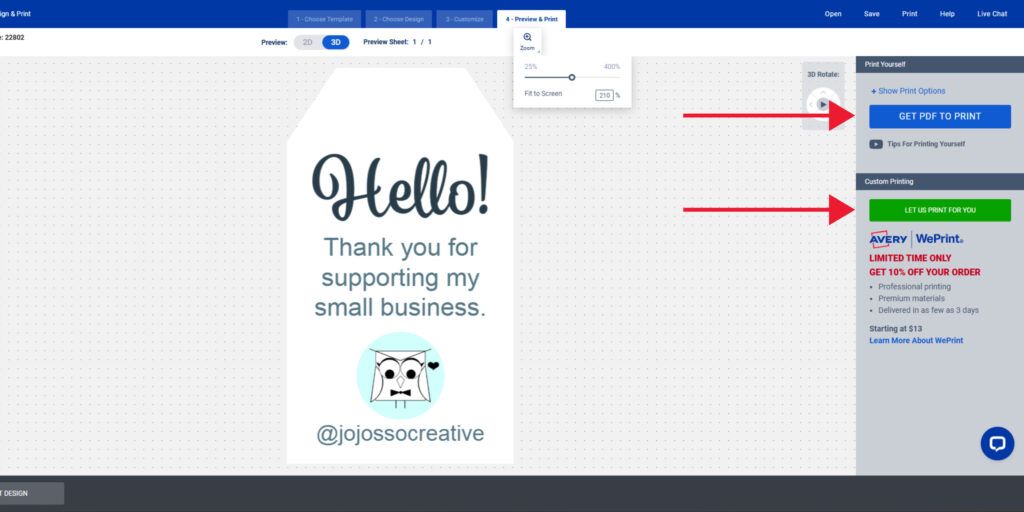
Click “Preview & Print” to review your design. You will see a simple preview of your personalized tags and two printing options on the right: Print it Yourself and “Let Us Print For You” (custom printing with Avery WePrint®).
Whichever printing option you choose, you will be prompted to save your project to your free Avery account. This is a great idea because saved projects are stored in the cloud and can be shared via email or even applied to other Avery products. Additionally, we recommend always reviewing the PDF file of your project before printing. The PDF displays an exact preview of how your tags will print and shows you the full sheet layout.
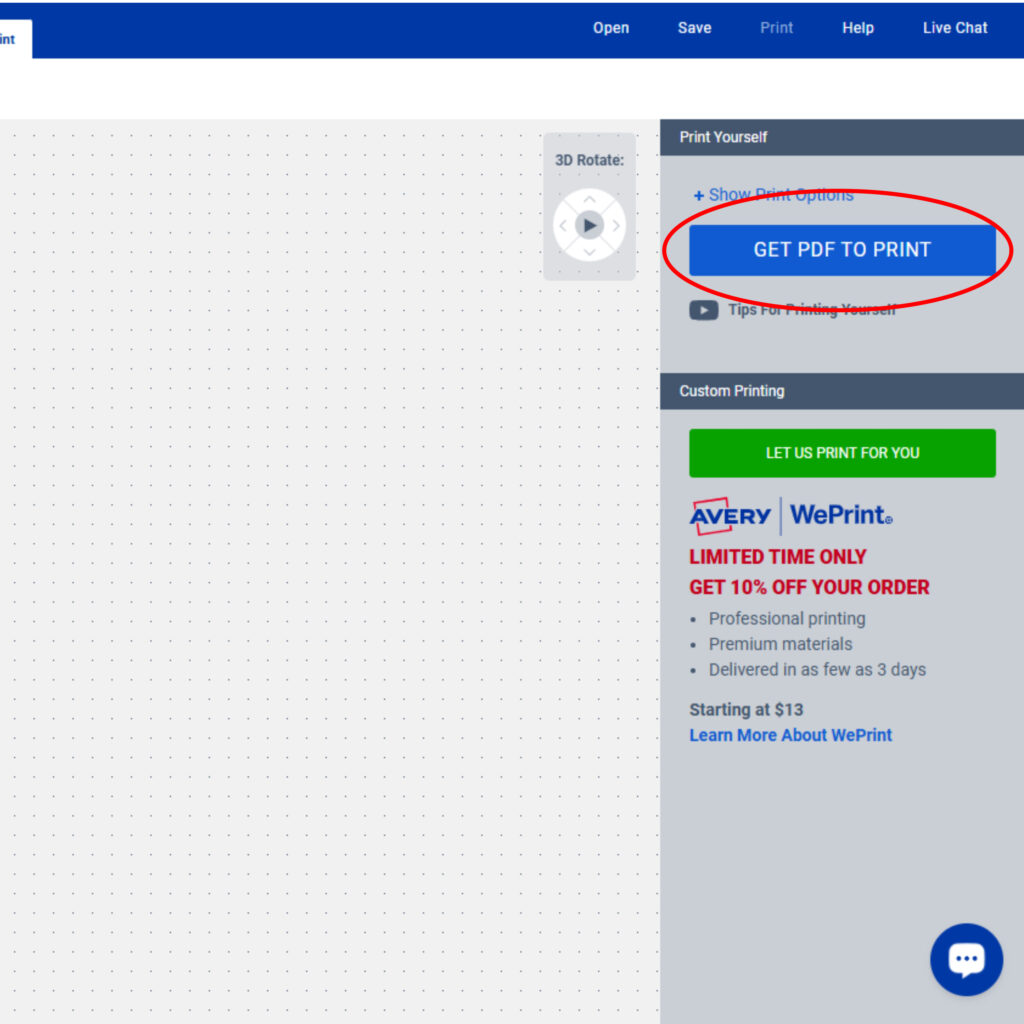
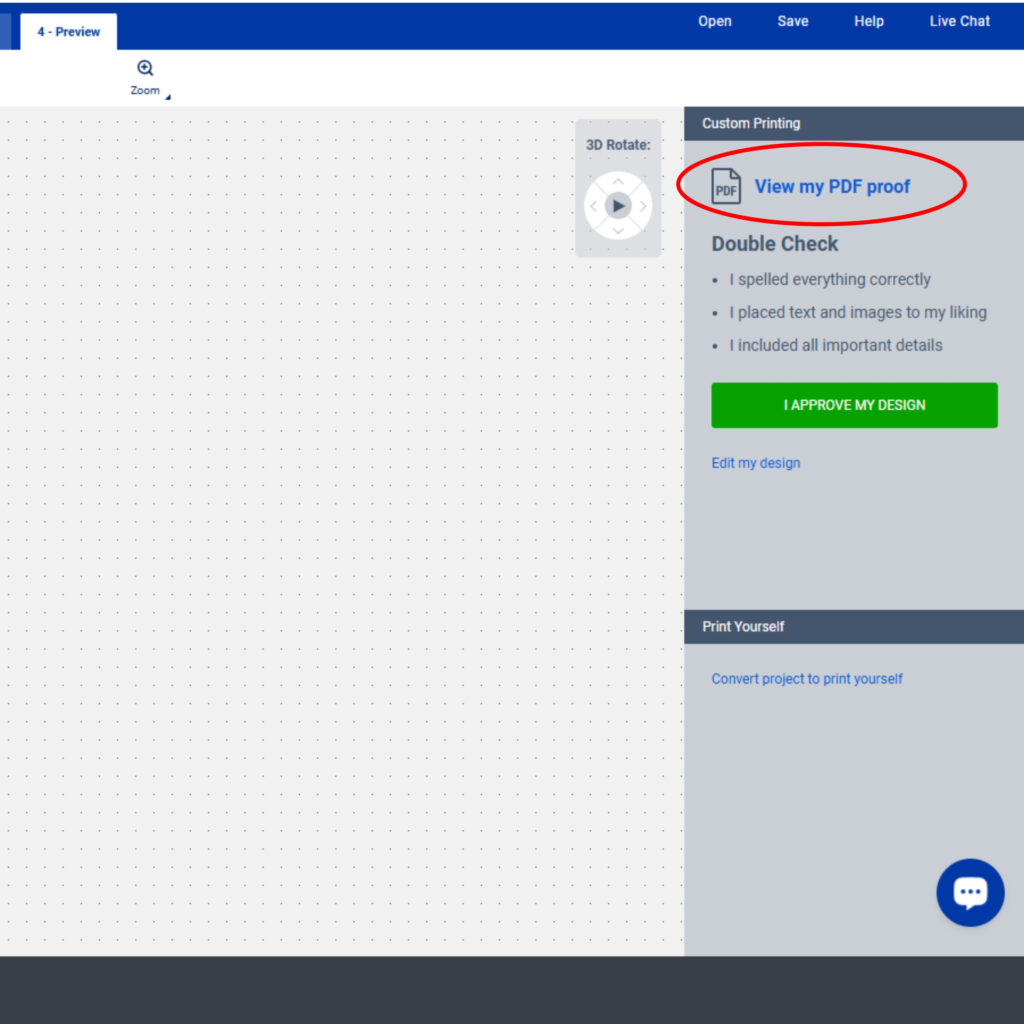
To review your PDF when printing yourself, click “Get PDF to Print.” If you choose to let us print for you, you will see an option to “View My PDF Proof.” If you need to make any changes, click “Edit My Design” to go back to the editing screen.
Best tips for printing DIY gift tags
If you’re printing DIY gift tags on a home or office printer, Avery printable tags with Sure Feed® Technology are always going to be your best bet. This is because Sure Feed technology is a patented “grip” strip that’s designed to help printable sheets move more smoothly through average desktop printers. Here are some printing tips that have helped me achieve better results, no matter what I’m printing:
- Set the scale: Under the printer settings, check that the scale is set to 100%, default, full page, or the equivalent.
- Do a test print: Print on plain paper first, lay it over your Avery product, then hold them up to a light to ensure your design aligns correctly.
- Change paper type: Select the “Cardstock,” heavyweight,” or “labels” from the paper type setting so your printer can adjust for the thicker material.
Of course, if you’re looking for the ultimate “hands-off” printing experience, let our experts do the printing for you. The Avery WePrint service uses professional digital presses and ships orders in as few as 3 business days. Just design your DIY gift tags, and we’ll take care of the rest.
Help Center resources for printing
- Browser compatibility for printing PDFs of your design
- Troubleshooting when your design isn’t printing correctly
Tips for making DIY gift tags in Microsoft Word®
It’s very easy to make designs for Avery products in MS Word because all of our printable products have a blank Word template you can download. In fact, each printable product has blank templates for a variety of software favorites like Adobe PDF®, Photoshop, and Illustrator. You can find these templates on the template page for your product using the steps I outlined in step one of this guide.
Once you’ve downloaded your Word template, open it in Word and design using the available tools. Using Avery templates when designing in MS Word ensures that your gift tag designs are formatted to fit Avery printable tags perfectly. When you’re happy with your design and are ready to print, select “File” at the top left of the page, then select “Print.” This will open a print dialog where you can choose the printer that you want to use. Advanced settings for the paper type (i.e., cardstock, paper, labels, etc.) and which feed tray to use are available under “Printer Properties.”
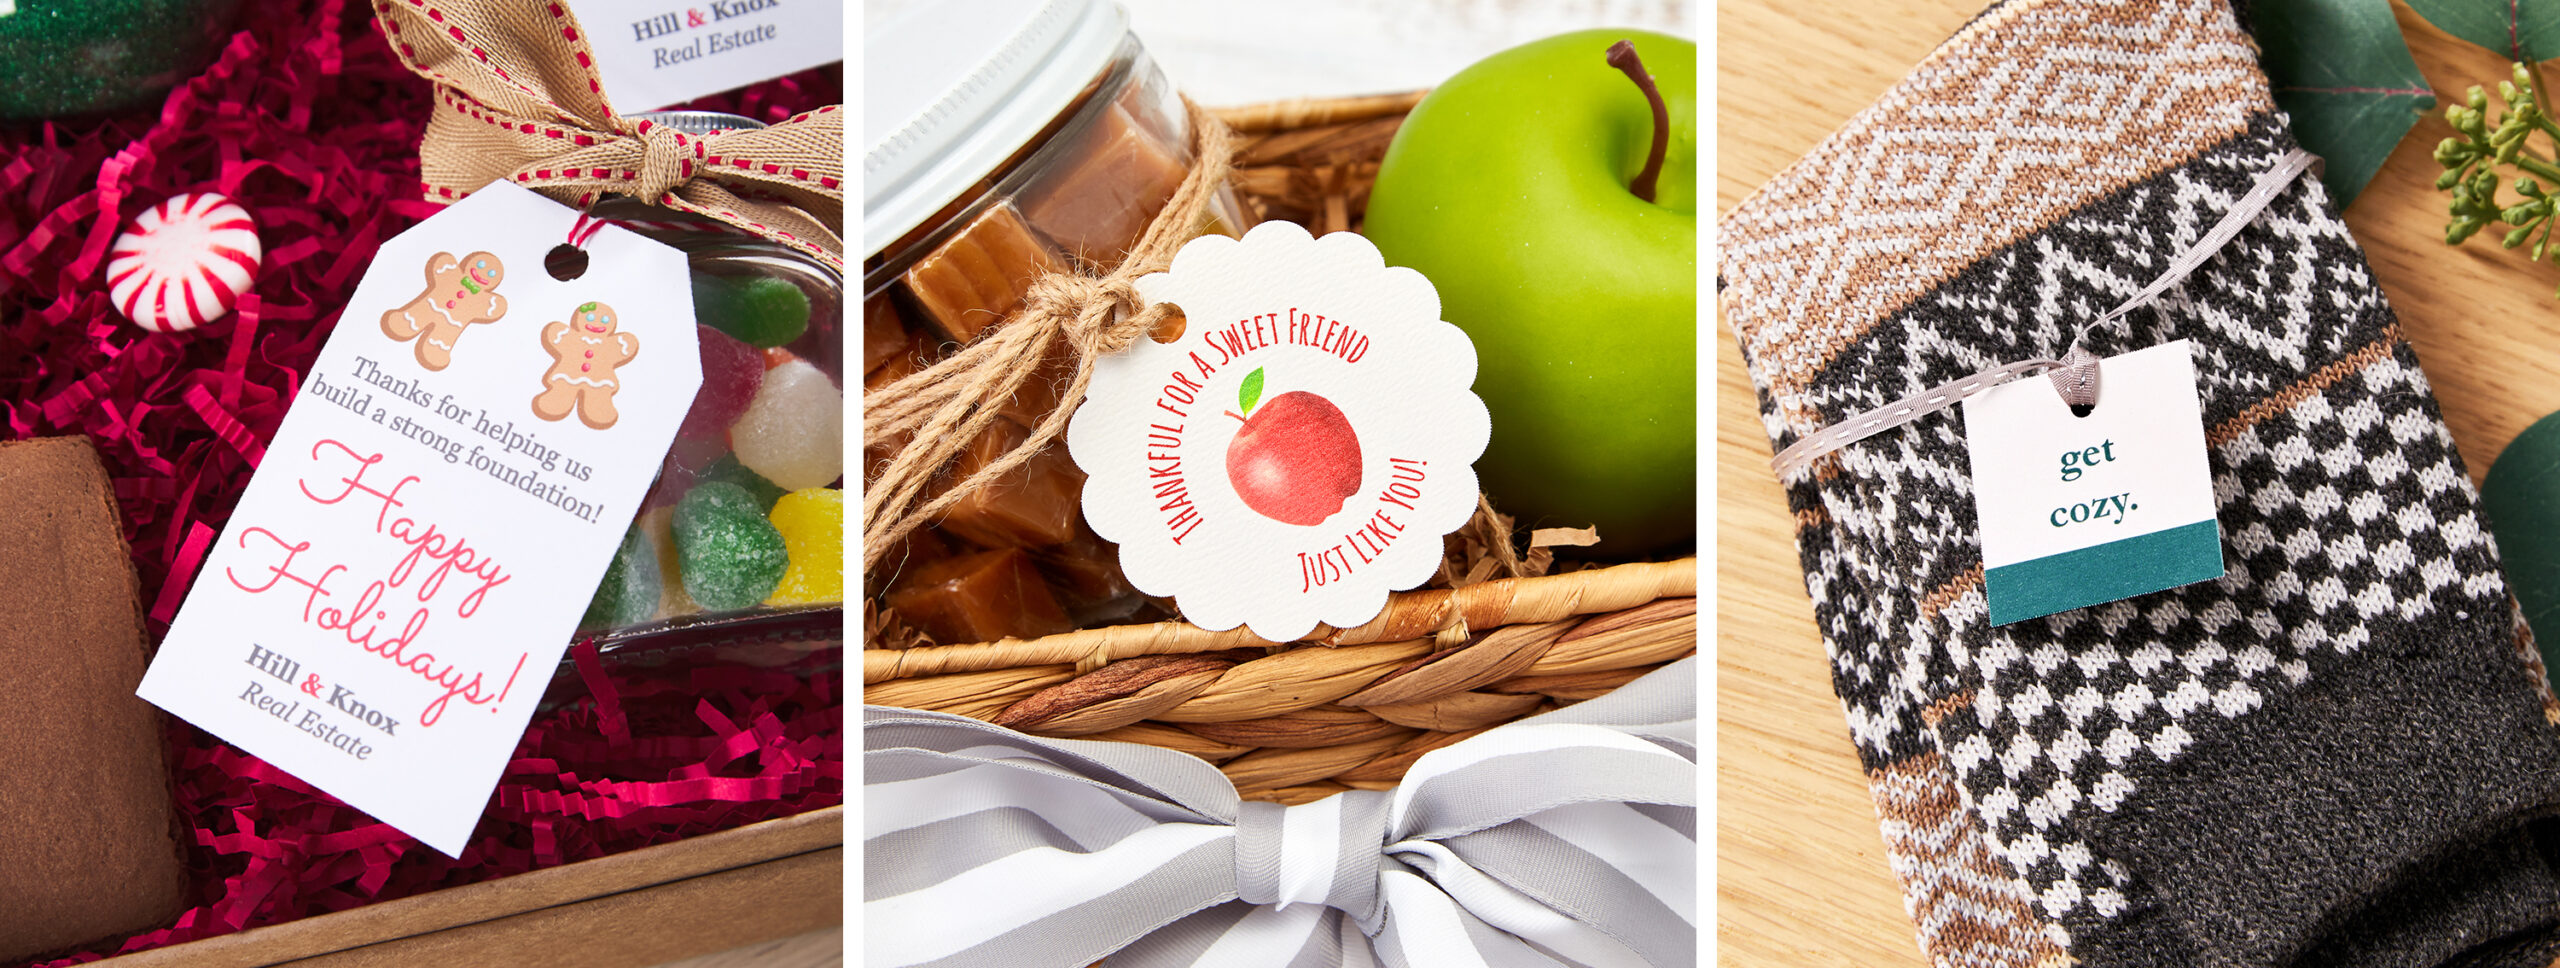
Creative DIY Christmas gift tag ideas for small businesses
The holiday season is a critical time for small business owners, especially those selling on platforms like Etsy, Shopify, or Amazon Handmade. DIY Christmas gift tags can make your products stand out, whether you’re packaging holiday orders or adding a special touch to festive gift-wrapping. Here are some ideas and tips:
- Christmas gift tag ideas: Incorporate holiday design elements like snowflakes, holly, or Santa hats. Or opt for different materials to achieve different moods. For example, Kraft brown tags have a more rustic, cozy feel, while these tags with a gold border feel festive and elegant.
- How to make Christmas gift tags: In addition to free Christmas tag designs, Avery has some great online tools to design holiday-themed tags. You can upload your own artwork, branding, or Canva designs, add personal seasonal messages, and find free holiday graphics in the Avery Graphics library.
- Creative gift tag ideas: Go beyond the basics by trying unique shapes like scalloped circles, round, or square tags. Take it over the top by adding a QR code to your design and attaching your tags with festive ribbons to make your tags truly memorable.
For me, these small touches have helped create a premium, professional look for my products and left a lasting impression on my customers.
Create and print or order your own personalized gift tags
Creating your own gift tags is such a rewarding way to add a personal touch to your gifts or elevate your product packaging. Whether you’re making a few for loved ones or hundreds for your small business, the process is as enjoyable as it is impactful. With tools like Avery Design and Print Online and free templates to inspire your creativity, you can design tags that perfectly suit your needs and style.
So why not give it a try? A thoughtful, DIY gift tag can make a gift feel even more special or turn your products into memorable keepsakes. No matter the occasion, your handmade touch will stand out and make a lasting impression.
You can find many more helpful tutorials on the Avery YouTube page and get inspired to personalize your business with ideas from our TikTok and Instagram.