

Make Name Tags in Word: A Clear Step-by-Step Guide
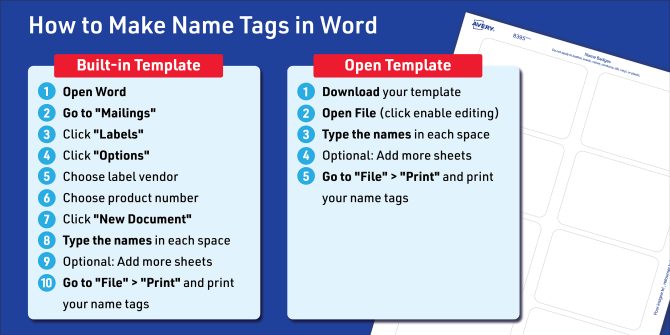
How to make name tags in Word
If you’re looking for a clear guide on how to make name tags in Word, you’re in the right place. The quickest and easiest way to make name tags or name badges in Microsoft Word® is to use a specific template. For example, you can download a free Avery name tag template and then open it in Word. Here’s how to do that:
- Download your template
- Open File (click enable editing)
- Type the names in each space
- Optional: Add more sheets
- Go to “File” > “Print” and print your name tags
Read on for a more detailed step-by-step guide for making name tags in Word, complete with pictures. You’ll also find helpful tips for printing, adding more pages, and formatting names.
Alternate method with built-in Word templates
If you haven’t downloaded a template, you can also find some within Word. For example, many popular Avery name tag templates are already available within Word. However, if you want to make name tags in Word using only the built-in templates, there are a few more steps to follow:
- Type the names in each space
- Optional: Add more sheets
- Go to “File” > “Print” and print your name tags
What to know before you get started
No matter what material you plan to use for printing your name tags, first you should decide which template method you want to use. One consideration is that built-in Word templates are available when you don’t have internet access or can’t download a file for any reason. You can even find built-in templates in Word for a variety of popular Avery products, including name tags. On the other hand, downloading a free Avery template to open in Word takes only half the steps. All in all, using Avery templates is the quickest and easiest way to create professional name tags using Word.
Whichever method you choose, you will need to know the Avery product number for the name badge product you plan to print. It’s important to match your Avery product and template so that your design prints correctly. Moreover, Avery templates are designed so that you can get the most accurate vision of what your name tags will look like when printed. View the embedded video above to learn how to find and download the free templates for your Avery product, including ones you can use with Word. If you are working with built-in Word templates, this video will walk you through how to find Word templates for Avery products.
How to make name tags in Word with Avery templates
If you’re looking for how to make name tags in Word using Avery templates that already exist within that program, please skip to this section.
1) Download your Avery name tag template for Microsoft Word
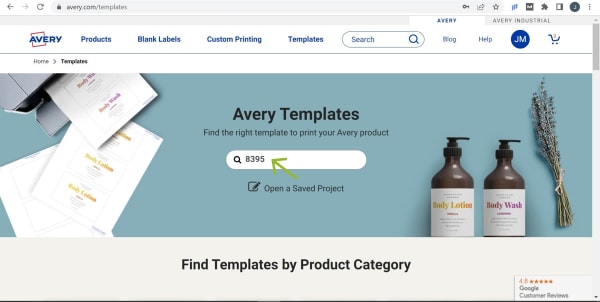
Go to our template finder page and enter the Avery product number for the name tag or badge product you want to use.
If you don’t know your Avery product number, you can call our onsite Customer Care Center or check out this article in our online Help Center.
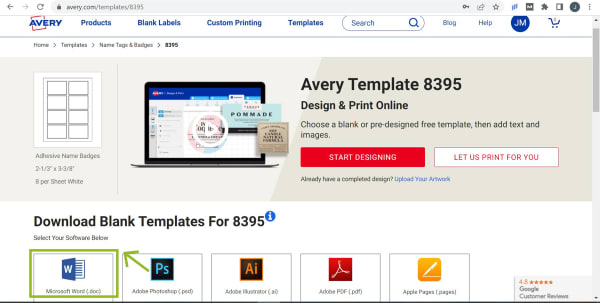
Click the Microsoft Word icon under the options for downloadable blank templates.
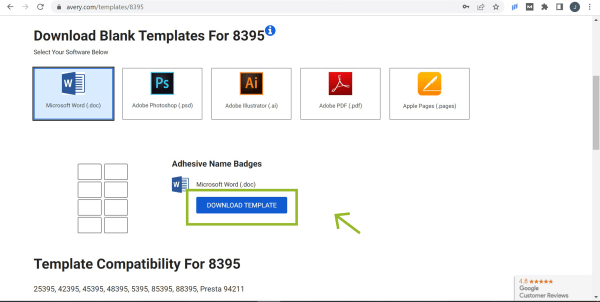
Click “Download Template.”
If you need more help, check out our article with instructions for downloading a Word template from the Avery website.
2) Open the Word file and enable editing
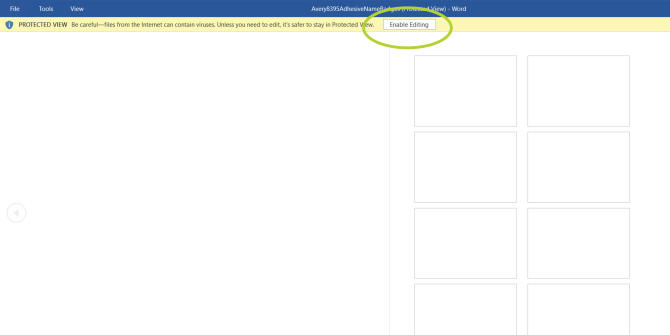
When you download an Avery template for Word, it will be in protected view. All you have to do is click the “Enable Editing” button to start making your name tags.
3) Type the names in each space
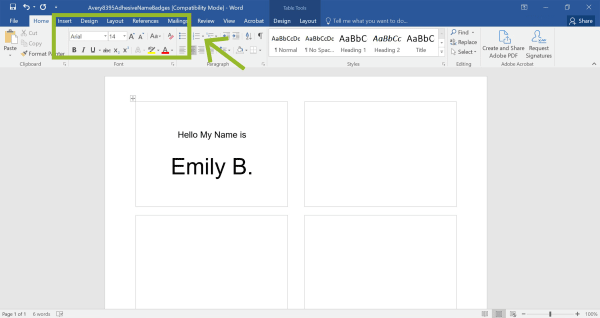
Click inside each name tag and use the Word editing tools to add text, images, or shapes.
4) Optional: Add more sheets

Place your cursor at the end of the text on the last name badge in the bottom right. Then press the Tab key until an additional sheet of blank name tags appears.
Copy and paste your design and fill in more names as needed. Use this article for more help adding pages in Microsoft Word.
5) Go to “File” > “Print” and print your name tags
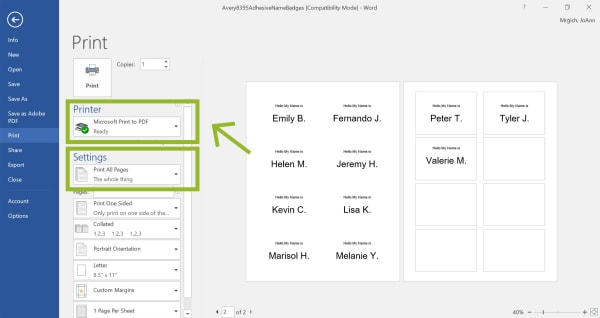
Don’t worry if the name badge borders don’t show for each sheet; it’s just how some versions of Word display name tags.
However, before you print on your actual name badge sheets, it’s always a good idea to check your printer settings and print a test sheet on regular paper. This article in our online Help Center is a great resource for checking and troubleshooting printer settings.
Once you’re satisfied with your name tag design and alignment, click “print” and follow your usual steps for printing a document.
How to use built-in Word templates to make name tags
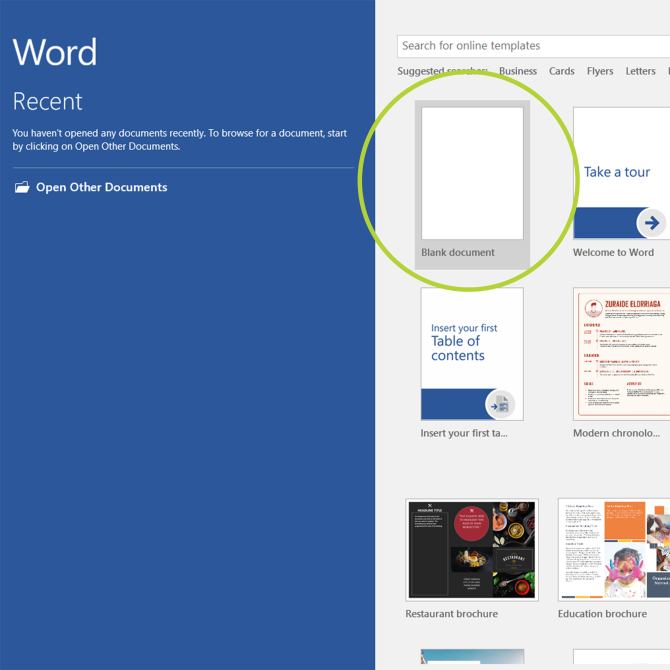
1) Open Word
Choose the option to open a blank document.
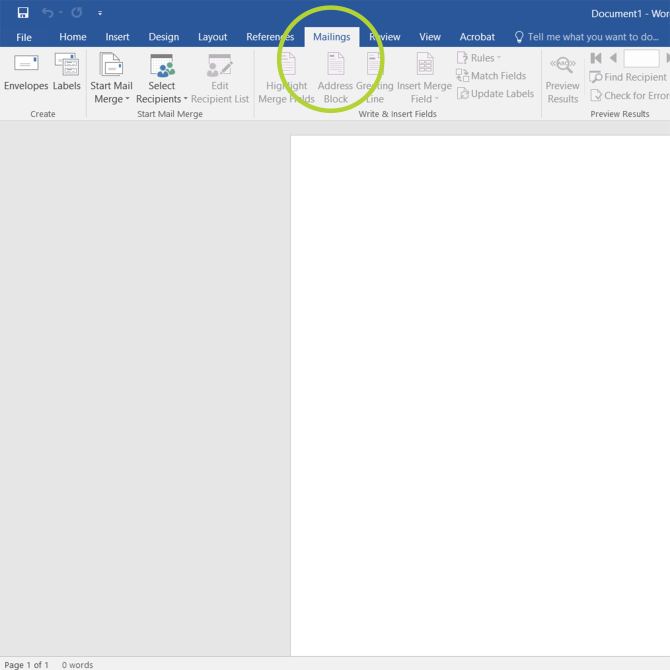
2) Go to “Mailings”
Open the “Mailings” tab from the top menu.
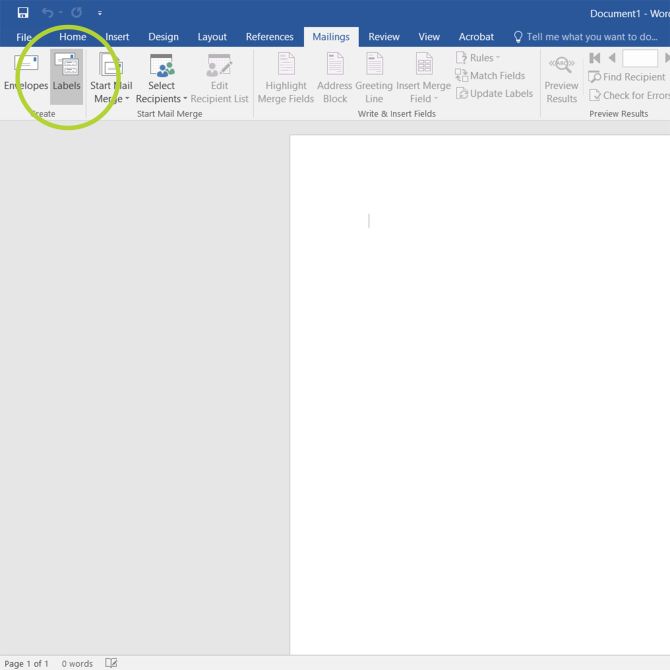
3) Click “Labels”
Under the “Mailings” tab, select “Labels.”
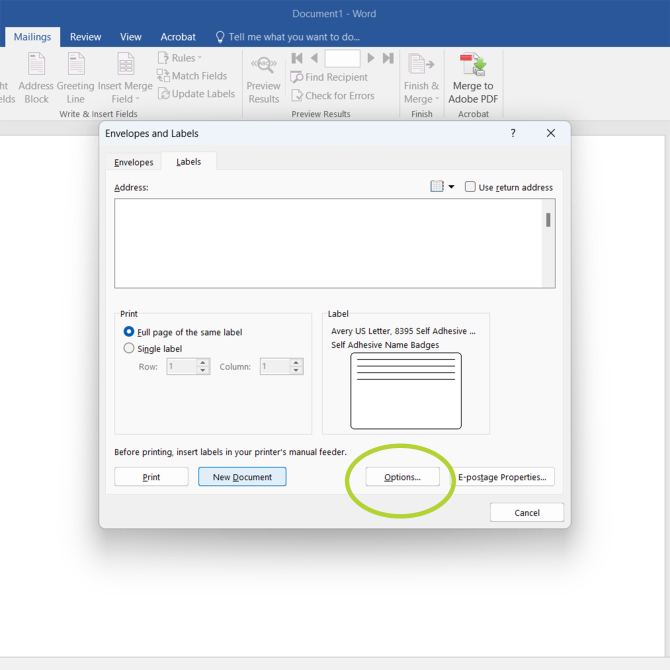
4) Click “Options”
In the pop-up window, choose the “Options” button.
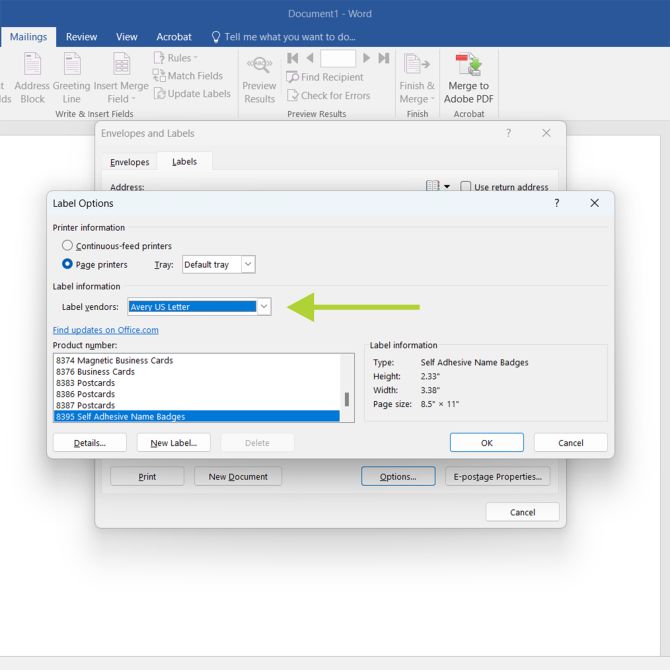
5) Choose label vendor
Use the drop-down “Label Vendor” menu to choose a label vendor, such as Avery.
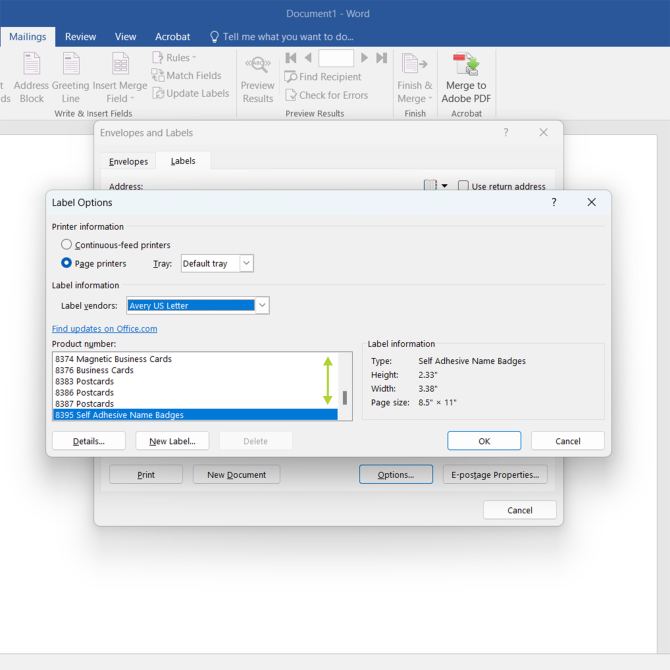
6) Choose product number
Next, scroll through the product numbers to choose the exact product you want to print your name tags on.
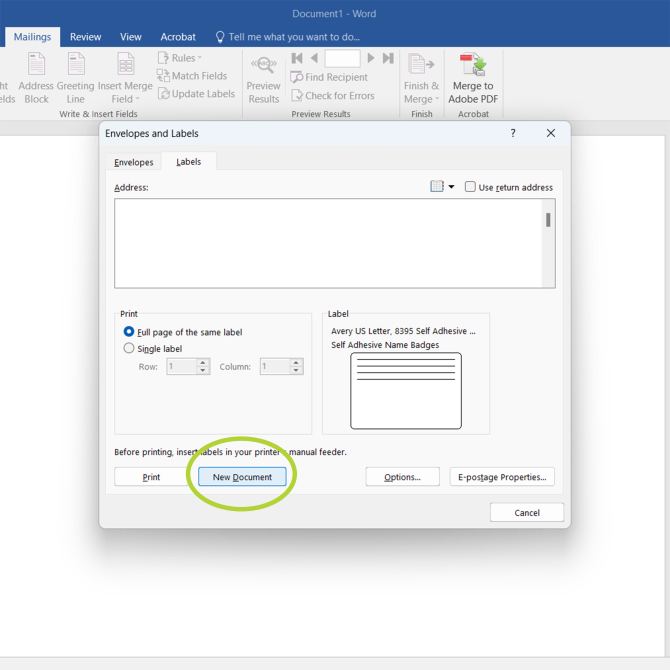
7) Click “New Document”
Finally, choose “New Document” to open up the built-in Word template for your name tags.
Once you have a template open in Word, the next steps are the same. So from here you can jump to step three of the instructions above for making name tags in Word using Avery templates.
Helpful tips for making your own name tags in Word
How do I add a logo to a name tag in Word?
There are three steps to add a logo to a name tag in Word:
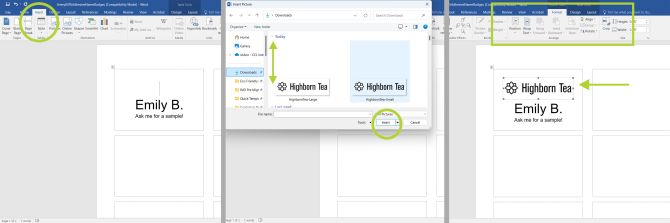
- Click the “Insert Tab” and choose the “Pictures” icon.
- Choose your logo image file, then click “Insert.”
- Format the image using your mouse or the toolbar.
If you don’t have a logo, you may want to check out our article with tips for designing one.
Tips for adding images in Word
For the most professional-looking name tags, make sure your logo image file is compatible with printing. First, check that your file type is compatible with Word: JPG (or J-PEG), PNG, or PDF. Next, make sure the image is at least 192 pixels by 192 pixels with a DPI (dots per inch) setting of 300 or greater. A DPI lower than 300 will result in blurry or pixelated images on your name badge.
How to make sure your name tags all look the same
When using Word to make name badges, the easiest way to make sure they all look the same is to start with one name tag. Format the text, layout, color, and your logo until everything is placed exactly how you prefer. Once that’s settled, you can copy/paste the design into every name tag, then simply go back and change each name.
Wrapping up: How to make name tags in Word with ease
Making name tags in Word is simple, especially when you use Avery templates. Whether you download a template directly or use the built-in options in Word, you can create professional-looking name tags in just a few steps. By following our detailed guide, you’ll be able to customize and print name tags quickly and efficiently. Don’t forget to preview and print a test sheet to ensure everything aligns perfectly. With the right template and a little customization, you’ll have name tags ready in no time—perfect for events, meetings, or any occasion where professional name tags are needed.
Check out our YouTube tutorials for more helpful instructions and walkthroughs for a variety of DIYs. Or find inspiration for your next project on our Instagram and Pinterest pages.
