Easy Guide: How to Make File Folder Labels for Free
Personalize printable or custom-printed file folder labels for free
Are you ready to organize your files but not quite sure where to start with file folder labels? Don’t worry, I’ve felt the same way as a person with a full-time career and part-time side hustle. In fact, I’ve had to organize a lot of files in my time, and making file folder labels online is by far the easiest way. Not only is it faster, but my file folder labels look more professional too.
In this article, I’ll walk you through the process step-by-step so you can create printable file folder labels that perfectly match your needs. With Avery, you have several options, from retail packs and labels sold by the sheet to professionally printed labels for larger projects. Plus, our templates and online software are free! Follow along for an easy guide to personalizing your filing system exactly the way you want.
1) Plan your filing system
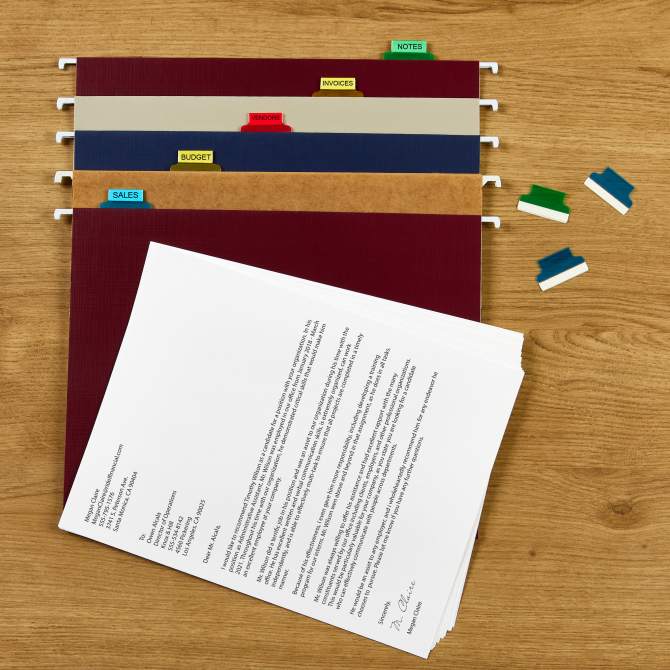
You might already have an idea of how you want your file folders organized, but take a moment to map out your system. Think about how many labels you need and how often you’ll be updating or replacing file folder tabs. Consider if your file cabinet labels should hold multiple lines of text or if organizing them by categories would make finding files easier. Personally, I like short and sweet text on my file folder labels, and I like to color code them for quick reference.
To figure out what you like, try making a quick list of the documents you need to file and sorting them into categories. This will make it easier to see if color-coding, icons, or different textures would help streamline your workflow. I’ve already mentioned that I like to color-code, and these color-coded file folder labels (Avery 5266) are my favorites. As a small business owner, you may also want to plan for flexibility—consider how this system might adapt as your business grows. And if you’re looking for quick tips for organizing paper clutter, check out our article about organizing business receipts. When I’m unorganized, it feels like all my time is spent filing expense receipts for future taxes!
2) Measure the file folder tabs
Once you have a filing plan, it’s time to pick the right label size. Most file folder tabs use a standard 2/3″ x 3-7/16″ label, but double-check with a ruler to ensure it matches your file folder dimensions. If you need a larger size, some folders can accommodate a 15/16″ x 3-7/16″ label, giving you extra room for printing file labels with more details. No ruler? No problem, we have a printable ruler you can download for free.

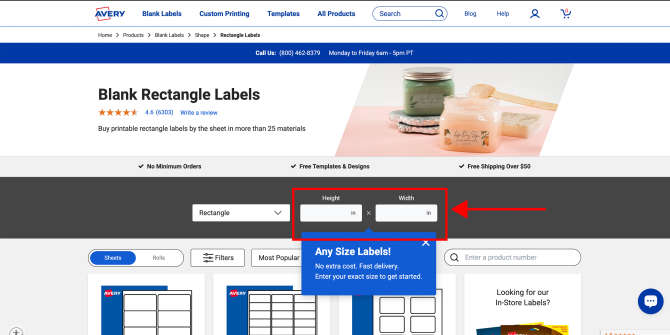
File folder labels sold in retail packs are a great option for standard sizes because they come in commonly ordered quantities too. However, you can also get labels in any size when you buy blank labels by the sheet or order them custom-printed. All you have to do is type in the dimensions you want—choosing a custom size is free!
3. Choose your label material
Classic white labels are a safe, reliable choice for most projects. And most white Avery file folder labels come with some cool features. My personal favorite is TrueBlock® technology, which makes it easy to use old folders by hiding previous text. Sure Feed® technology is another feature. It helps the label sheets move more smoothly through your printer. But if you’re looking to customize further, consider these options:
- Clear printable labels blend seamlessly with the folder for a sleek, clean look.
- Colored file folder labels with preprinted strips make sorting by color a breeze.
- Eco-friendly file folder labels crafted from recycled materials.
- Removable file folder labels are ideal for frequently reused folders.

And if you’re aiming for something unique, check out our range of printable hanging file folder labels. Avery hanging file folder labels are awesome because they’re so easy to reuse. The plastic index tab part is self-adhesive and sticks to the folder, then you print the inserts and replace them as needed.
For the most material options, check out blank labels by the sheet or custom-printed labels. You can order custom-printed labels for file folders in any material from Kraft brown to waterproof, metallic, and holographic options in all shapes and sizes!
4. Find the right template

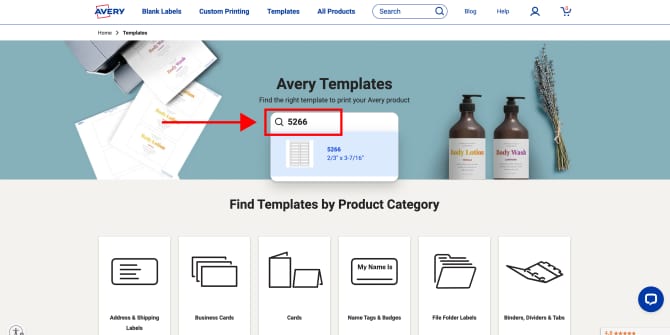
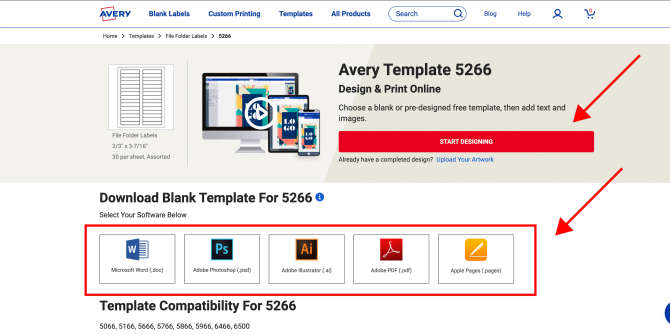
The easiest way to get started with templates is by searching for the product number on our template finder page. You can find the Avery product number on the label packaging or on each label sheet. With this number, you can open templates in our free software by clicking the “Start Designing” button. You can also download templates for programs like Microsoft Word, Adobe Photoshop, and Apple Pages by clicking the matching icon.

When you click the “Start Designing” button, the template will open in Avery Design and Print Online (ADPO). This is our free online software that stores your saved projects in the cloud. What’s more, when you save your project to your free Avery account, you can also share it via email or apply the design to a different Avery product. The latter is actually my personal favorite feature because I don’t want to start over every time. I also find it super useful that you can start with blank or predesigned templates and personalize them with text, images, or even sequential numbering.
5. Printing your file folder labels
Ready to print? Before hitting “Print,” there’s a few extra steps that I do that can make a big difference in your results. First, I make sure the scale is set to 100% so that the file folder labels print at the correct size. Then, I do a test print on regular paper to confirm alignment and layout before using my Avery sheets. Finally, I set my printer to “heavyweight” or “labels” so that it adjusts to handle thicker materials smoothly. Honestly, these are really great printing tips for any labels, cards, or tags, not just file folder labels.
Once everything looks good, go ahead with printing your file labels. If you’re working with printable hanging file folder labels, make sure you’ve stuck the index tab part on the hanging folders so that they align with your file cabinet layout. And if you need tips on how to print hanging folder tabs (the index kind with inserts), we’ve got you covered!
How to make file folder labels for an organized workspace
Organizing your files doesn’t have to be a chore—I actually find it to be pretty satisfying, especially when my file folder labels make everything easy to find. With Avery, you have the tools to create your own filing system that looks professional and works exactly how you need it to. From planning your file folder tabs to choosing materials and printing, each step brings you closer to an organized workspace. And as someone who’s balancing multiple roles, I can tell you that a tidy filing system saves time and helps me feel less overwhelmed. So go ahead, personalize those printable file folder labels, and make your workspace work for you!
Have a question about file folder labels? Let us know on on TikTok and Instagram. For more organizing ideas, check out our helpful organization board on Pinterest.