How to Inspect and Tag a Ladder for Safety
Inspection checklist, free ladder tag templates
In brief, it’s important to understand how to inspect a ladder in order to keep employees safe and comply with OSHA regulations. Indeed, as a business, it’s in your best interest to proactively identify and fix potential hazards before they escalate into accidents. For these reasons, a qualified person should inspect ladders before every use. In this article, we will cover the importance of ladder tags, how to inspect a ladder step by step, and how to create your own ladder tags.
- Examine ladder labels and tags.
- Assess structural integrity.
- Check for damage, wear, substances.
- Evaluate locking mechanisms & moving parts.
- Inspect ladder feet and leg levelers.
- Label and tag ladders after inspection.
Understanding ladder tags: legal requirements and importance
Needless to say, the number one reason you should know how to inspect a ladder is for the safety of anyone using it. Moreover, this newsroom article on the CDC website states that “each year in the U.S., more than 100 people die and thousands more are injured from ladder-related falls.” Additionally, ladder inspection is a legal requirement per OSHA standard 29 CFR 1926.1053. Indeed, non-compliant ladder use and/or failure to adequately inspect them regularly land on the list of top-ten OSHA violations, which we have previously written about.
Unsurprisingly, every expert that we spoke to about ladder safety identified inspection as essential. Richard Dixon, founder of Team Emergency Plumber, puts it simply: “Never use a ladder that is damaged or in poor condition.” Dixon is not only the founder of Team Emergency Plumber, but he is also the current Business Operations Head. Additionally, Dixon has two decades of experience in the plumbing industry and a Master of Science degree focused on civil engineering technologies from the University of Southern California.
What are ladder tags?
In contrast to labels, which you affix to ladders with adhesive, you can attach ladder tags with string, wire, or nylon cable ties (a.k.a. zip ties). Moreover, ladder tags are temporary indicators of inspection and/or status. Meanwhile, ladder labels provide static information, such as instructions and weight ratings.
Are ladder tags a legal requirement?
Per OSHA 1926.1053(b)(16), yes. When you find a ladder that is damaged, defective, or otherwise unsafe to use, you must immediately mark it in a way that “readily identifies [it] as defective.” That is to say, you must add a tag that reads, “Do Not Use” or similar language unless you have physically blocked the ladder from use.
OSHA regulations for ladder tags
There are three sections within OSHA regulations that explicitly spell out rules for ladder tags. Firstly, 1926.1053(b)(17)(i) specifically mandates that you must tag unsafe ladders with “Do Not Use” or similar language. Secondly, 926.1053(b)(17)(ii) states that you must mark an unsafe ladder in such a way that anyone looking at it knows it’s defective. Lastly, 1926.1053(b)(17)(iii) covers what it means to physically block unsafe ladders, which is the only substitution for tagging.
How often should ladders be tagged?
In short, you should tag ladders with a “Do Not Use” tag anytime you have determined them to be unsafe. Furthermore, you should always keep the inspection tag on a ladder until you completely fill it, then switch it out for a new one.
How to inspect a ladder step by step
1) Examine ladder labels and tags
Straightaway, if the inspection tag is missing, that is a red flag and a sign to inspect the ladder even more closely. Certainly, keep an eye out for a “Do Not Use” tag that may have fallen off. Then, check that instruction labels, such as the weight rating, are intact and legible so that the employee using the ladder has the information they need to use it safely. To that point, Phi Dang, the director of Sidepost Home Services, says, “Make sure you check the rating before using a ladder to ensure it can support your weight plus any tools or materials you’ll be carrying up with you.”
2) Assess structural integrity
Once you’ve checked the ladder tags and labels, inspect the ladder for structural integrity. To begin with, check that the ladder does not have rust, corrosion, decay, or any loose and/or missing pieces. Then, examine the rails, steps, and rungs to determine that there aren’t any sharp surfaces, splinters, or burrs. After that, check that the pail shelf is present and not bent or broken. Finally, check that all hardware and fittings, such as screws, bolts, and hinges, are secure.
3) Check for damage, wear, substances
Thoroughly check all ladder parts for damage and signs of wear, as well as grease, dirt, or slick substances that could pose a slip hazard. In particular, you should check the steps, rungs, endcaps, and top shelf or platform.
4) Evaluate locking mechanisms & moving parts
After that, check that all moveable parts operate properly and smoothly. Firstly, check that the spreaders, bracing, and/or extension locks are not damaged and that they work properly. Then, check the pulley and ropes for damage and fraying, and ensure they work properly as well. Lastly, check that the rung locks are in place and that none are missing or broken.
5) Inspect ladder feet and leg levelers
Lastly, verify that the ladder’s slip-resistant shoes and feet are undamaged and function properly. Basically, the ladder should be fully stable when resting on an even, dry surface, with no wobbling. At the same time, “surface conditions should be thoroughly evaluated when preparing for ladder setup. Sloping ground, unstable substrate, and poor housekeeping and clutter can potentially affect a ladder’s stability,” explains Anthony Warenzak, the safety and compliance manager at Trutech Wildlife Service.
6) Label and tag ladders after inspection
Equally important to the inspection process is labeling and tagging the ladders afterwards. At the end of the day, tagging damaged ladders is the law. However, we recommend updating damaged or missing labels after inspection as well. All things considered, Jen Stark, founder of Happy DIY Home, has this advice:
“Before using any ladder, make sure that it is properly labeled with a legible tag noting its date of inspection, weight capacity, and type of ladder. This will help ensure that your workers are aware of the potential risks associated with using this particular type of ladder.”
Best practices for ladder tagging: choosing the right tags
Best tags to use when you inspect ladders
As shown above, tagging unsafe ladders is a must for OSHA compliance. For that reason, it’s important to use the best tags for the job. In other words, you should use tags that are durable enough to last in heavy-duty environments. For example, our printable tags, which we manufacture with durable plastic, can resist up to 50 pounds of pull strength. This means it won’t tear easily if pulled or yanked. Moreover, the plastic resists UV rays, chemicals, water, abrasion, and tearing. This means that you can use them on outdoor ladders for up to two years.
Additionally, you can customize our tags for free on your desktop and print them on a standard laser printer. The tags come on 8.5″ by 11″ sheets that you can easily load into your printer for printing on both sides. After printing, simply use the scored edges to break them apart.
Blank printable tags vs. tags with preprinted headers
While our blank printable tags are extremely versatile, you will need a color printer to add OSHA or ANSI headings. The trade-off is that you can use them to create ladder inspection tags and/or “Do Not Use” tags. What’s more, you can also use them to create any kind of tag you need on the job. Another option are our printable tags with preprinted OSHA/ANSI headers. These types of tags come with full-color OSHA/ANSI headings, so all you need is a laser printer with black ink.
Creating custom ladder tags: tools and templates
With our free tools, you can easily design your own ladder tags. And you can do it right from your desktop with Avery Design and Print Online (ADPO) software and Avery templates. ADPO is free, cloud-based software that contains all the standard design tools you would expect. This includes tools for adding text, images, colors, shapes, and the like. However, there are a few extra tools we offer that are very helpful, such as a free barcode generator. And, of course, our subscription-based GHS Wizard® tool. GHS Wizard is indispensable if you need to create GHS labels for, say, secondary chemical containers.
You only need three things to start designing your own ladder tags. A free Avery account, an internet connection, and a smart device. You can even share saved projects with your team via email or apply a saved design to other Avery products. What’s more, within ADPO, you will find blank templates (if you want to design from scratch) or predesigned templates that you can modify.
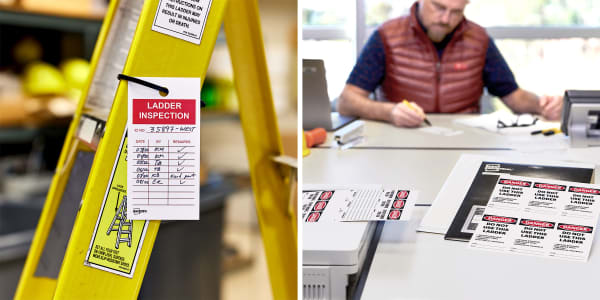
Templates for Avery printable plastic tags
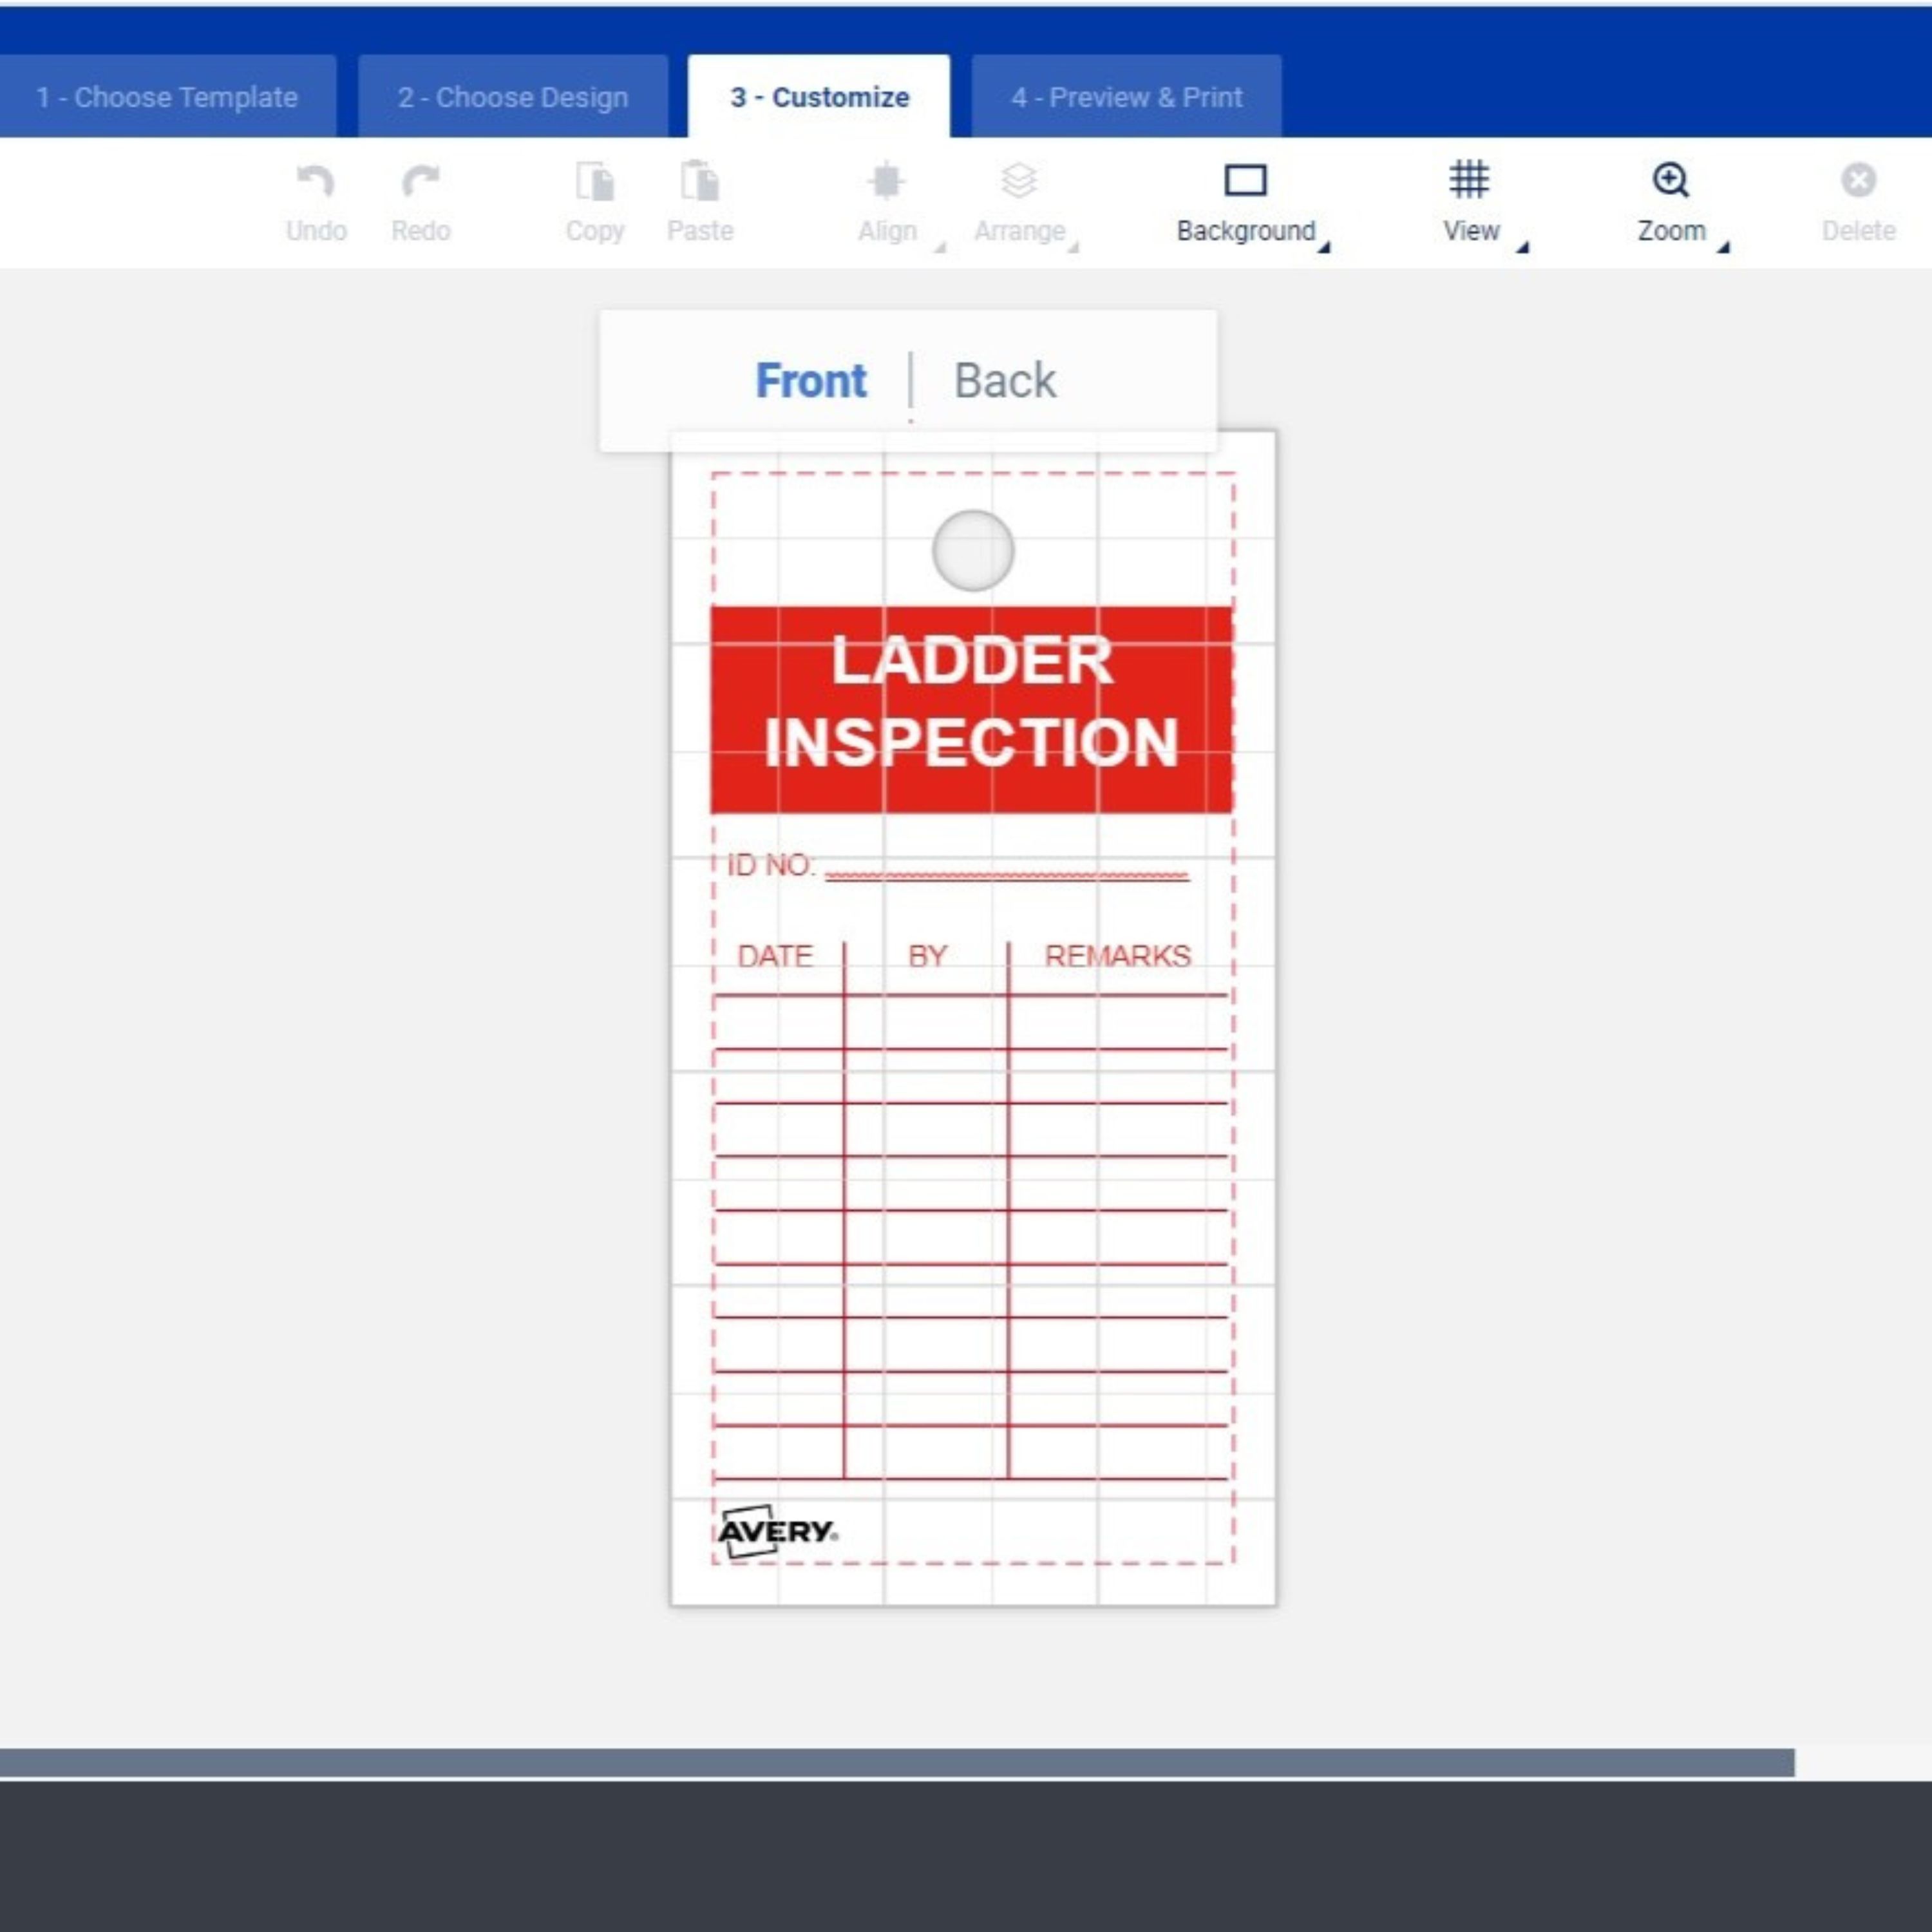
Customize this design for ladder tags for free. Then, print it on Avery 62400 blank white plastic tags using a color laser printer.
Use the “Front” and “Back” buttons to customize both sides.
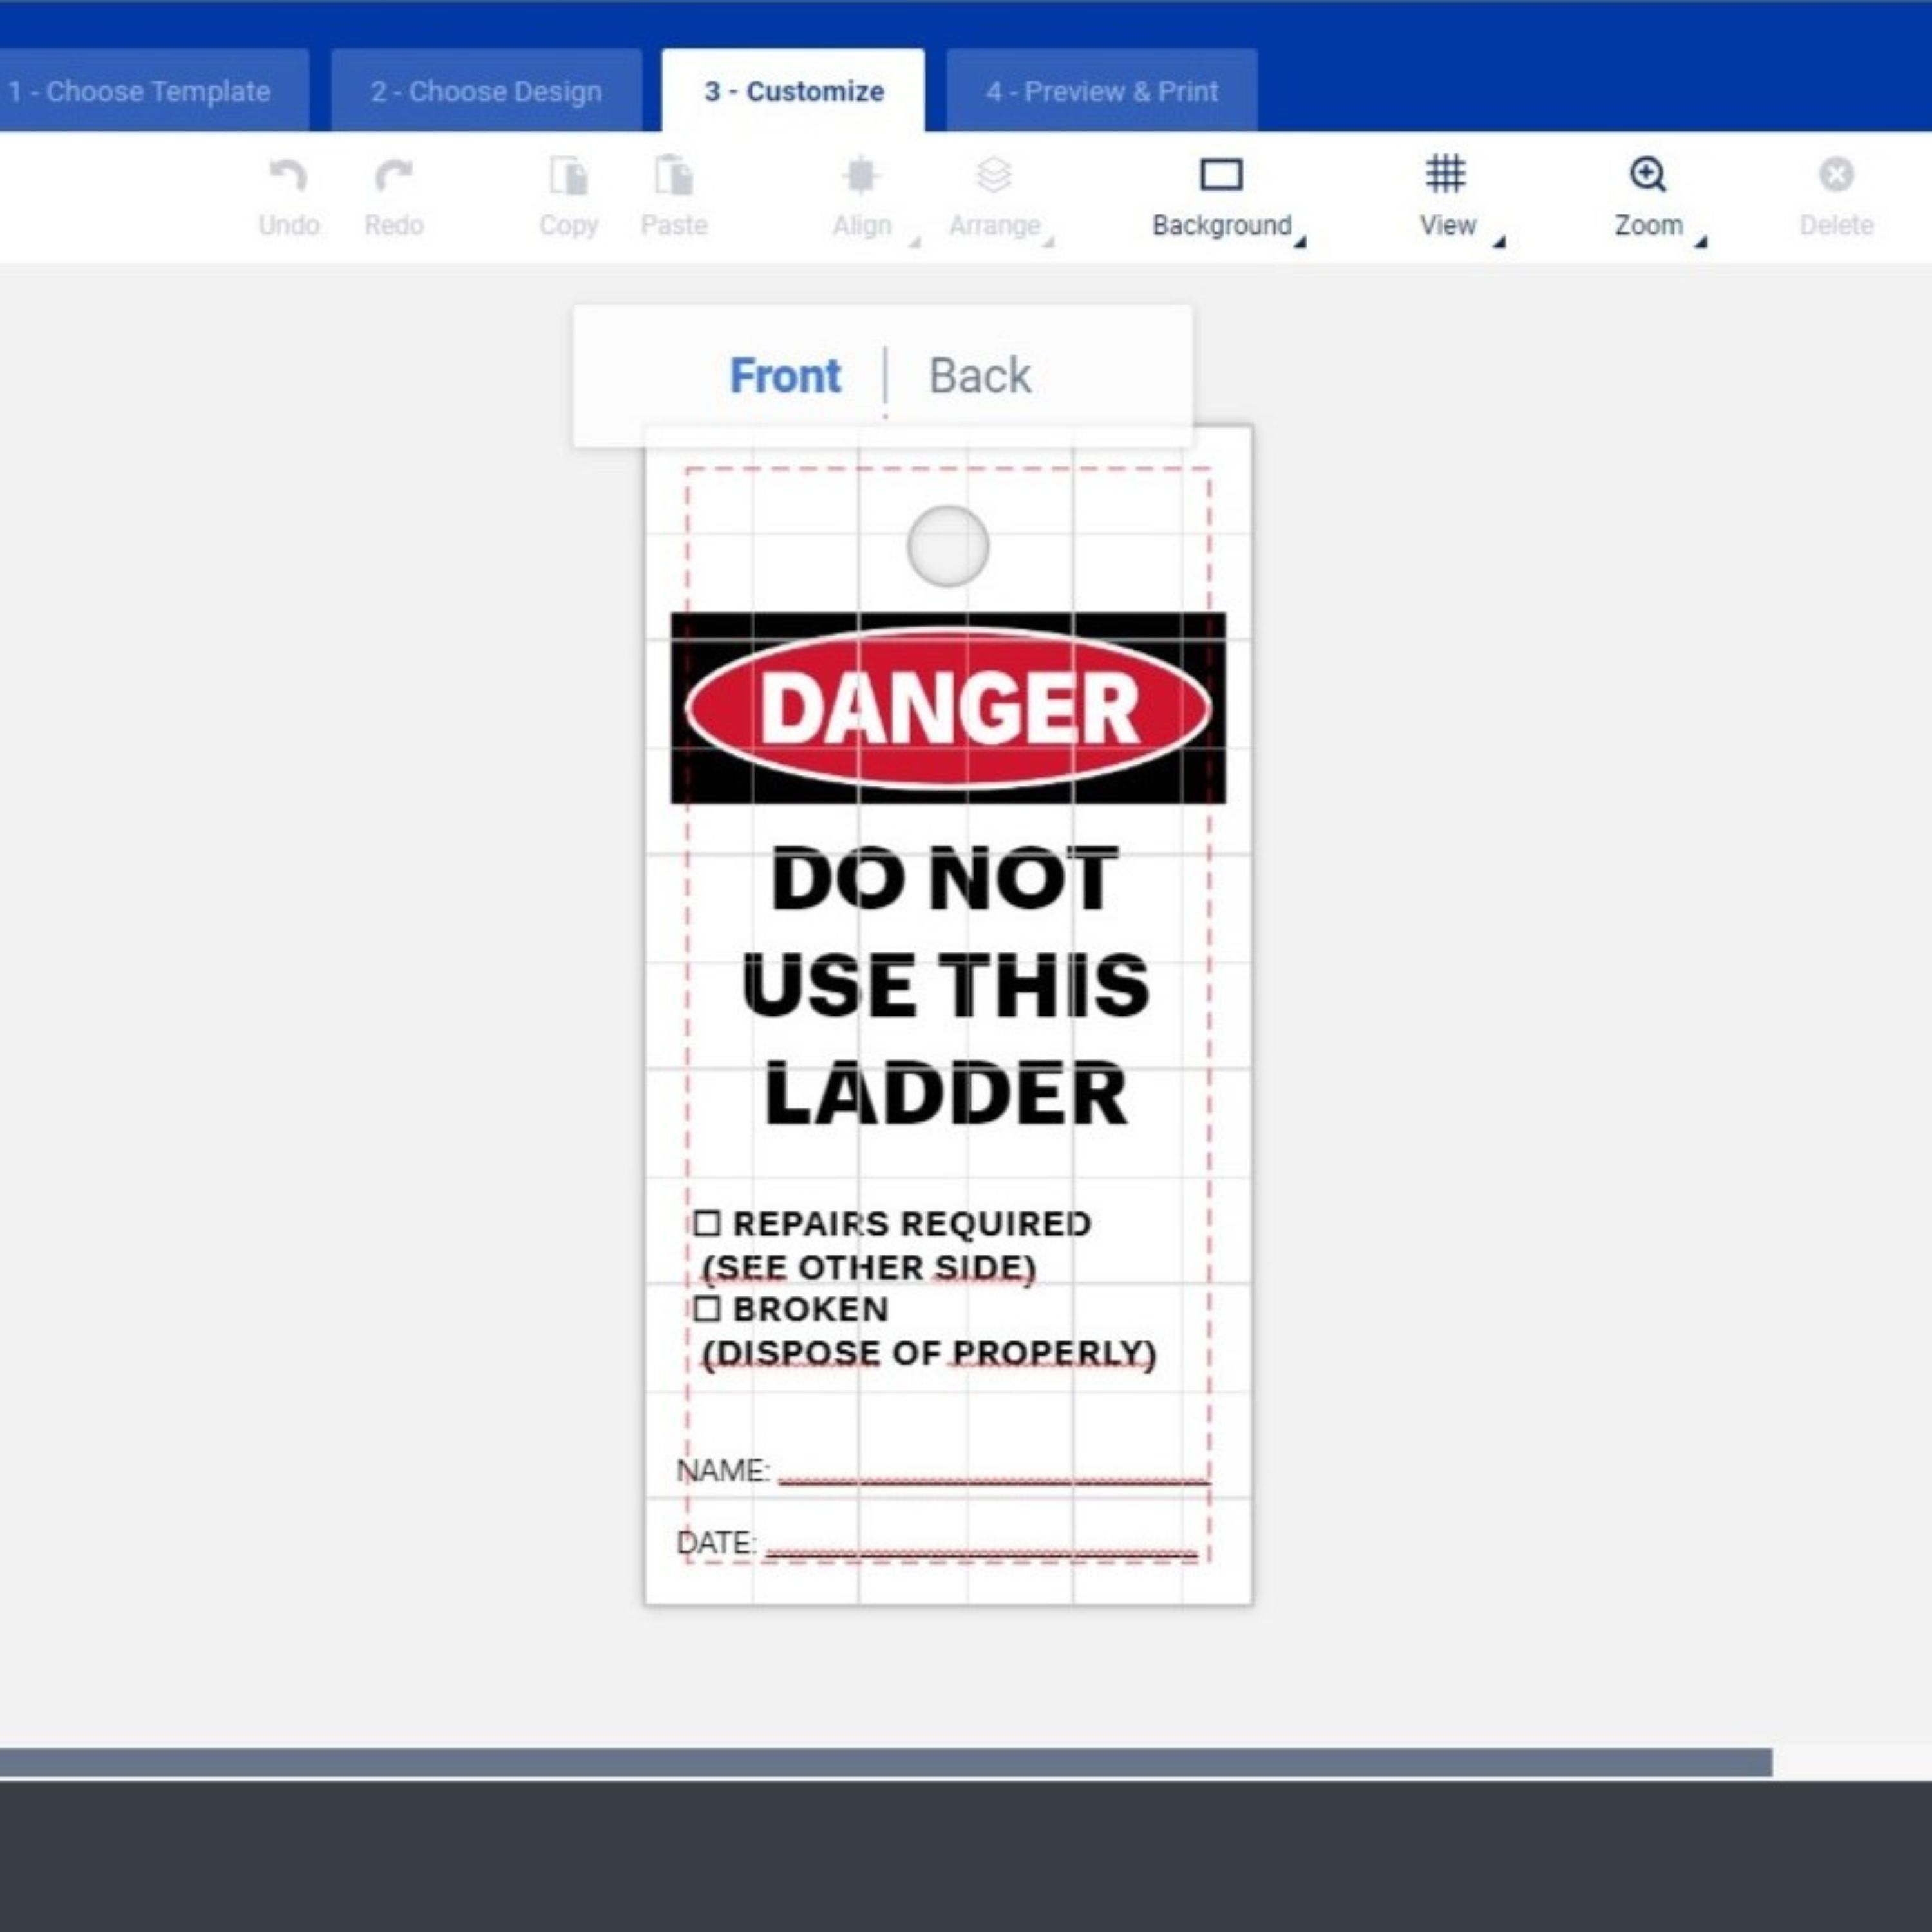
Customize this design for ladder tags for free. Then, print it on Avery 62400 blank white plastic tags using a color laser printer.
Use the “Front” and “Back” buttons to customize both sides.

Use a blank template to upload your own design or design from scratch on both sides of the tag. ADPO includes free safety graphics and pictograms in the Avery Gallery.
Print your design on Avery 62400 blank white plastic tags using a color laser printer.
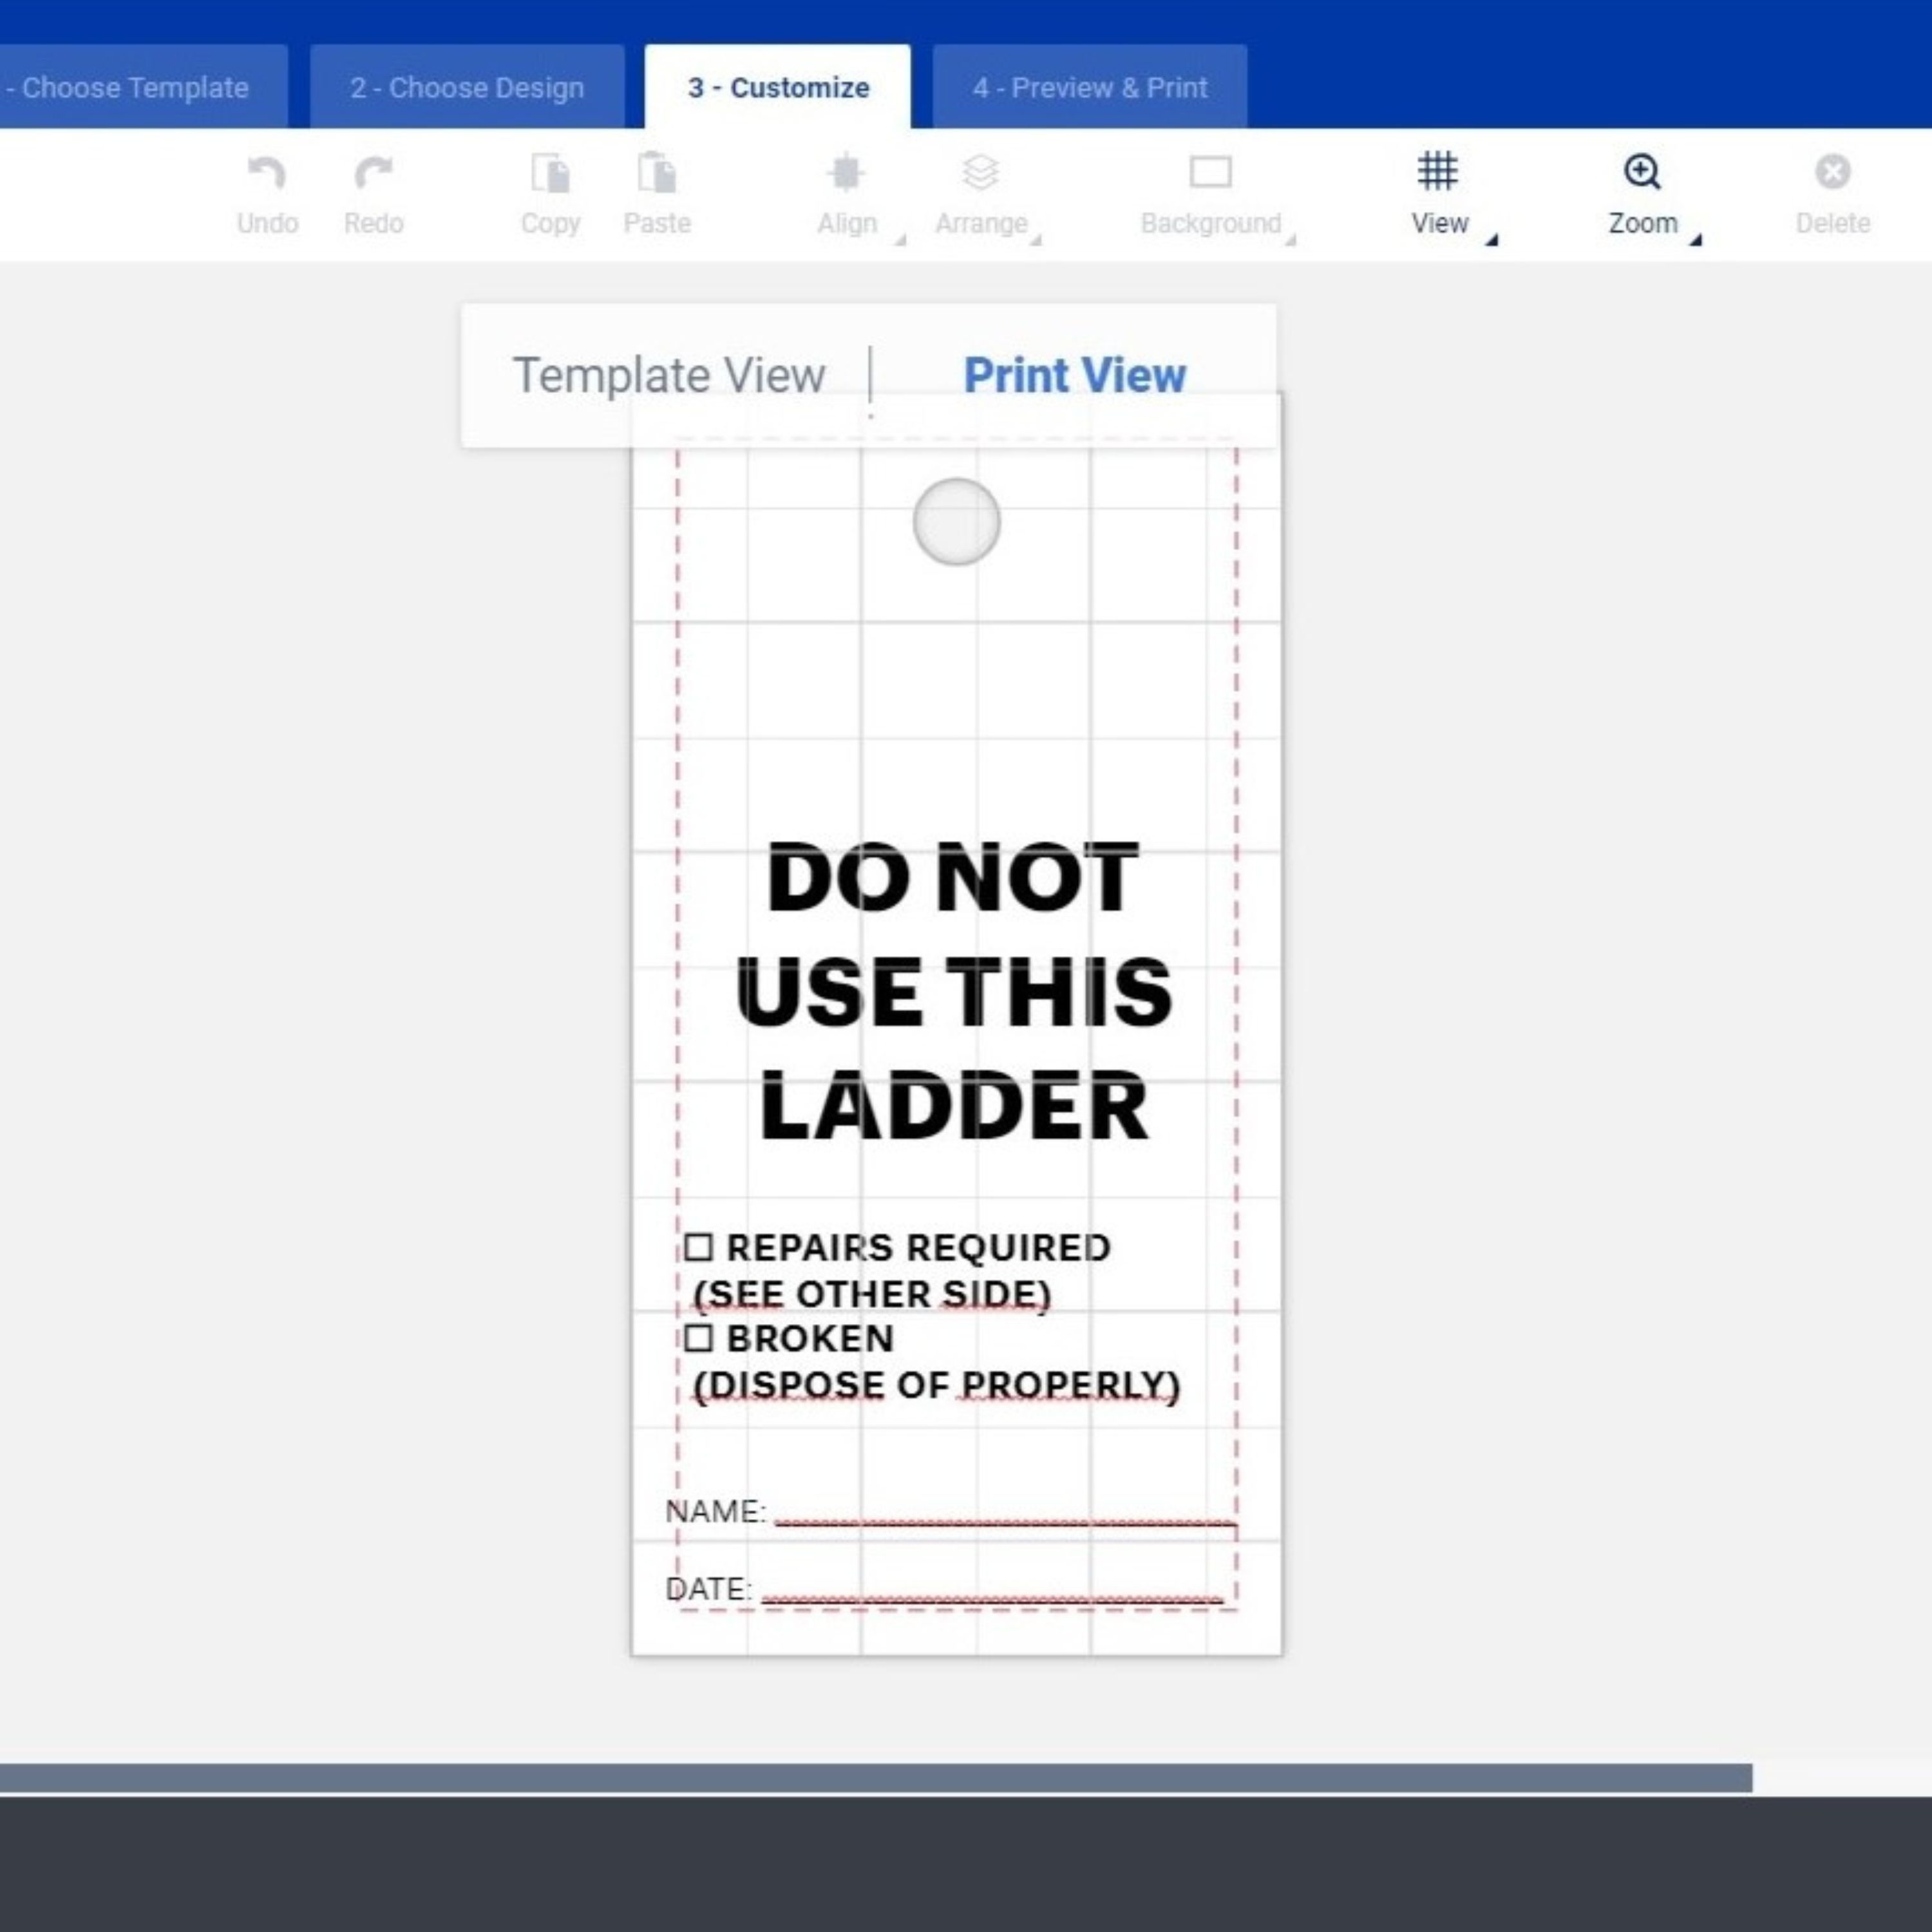
Customize this ladder tag design for free. Then, print it on Avery 62401 plastic tags with a “Danger” header.
The full-color header comes preprinted on the tags, so you only need a laser printer with black ink.
Use the “Template View” and “Print View” buttons to see your design with and without the full color header.
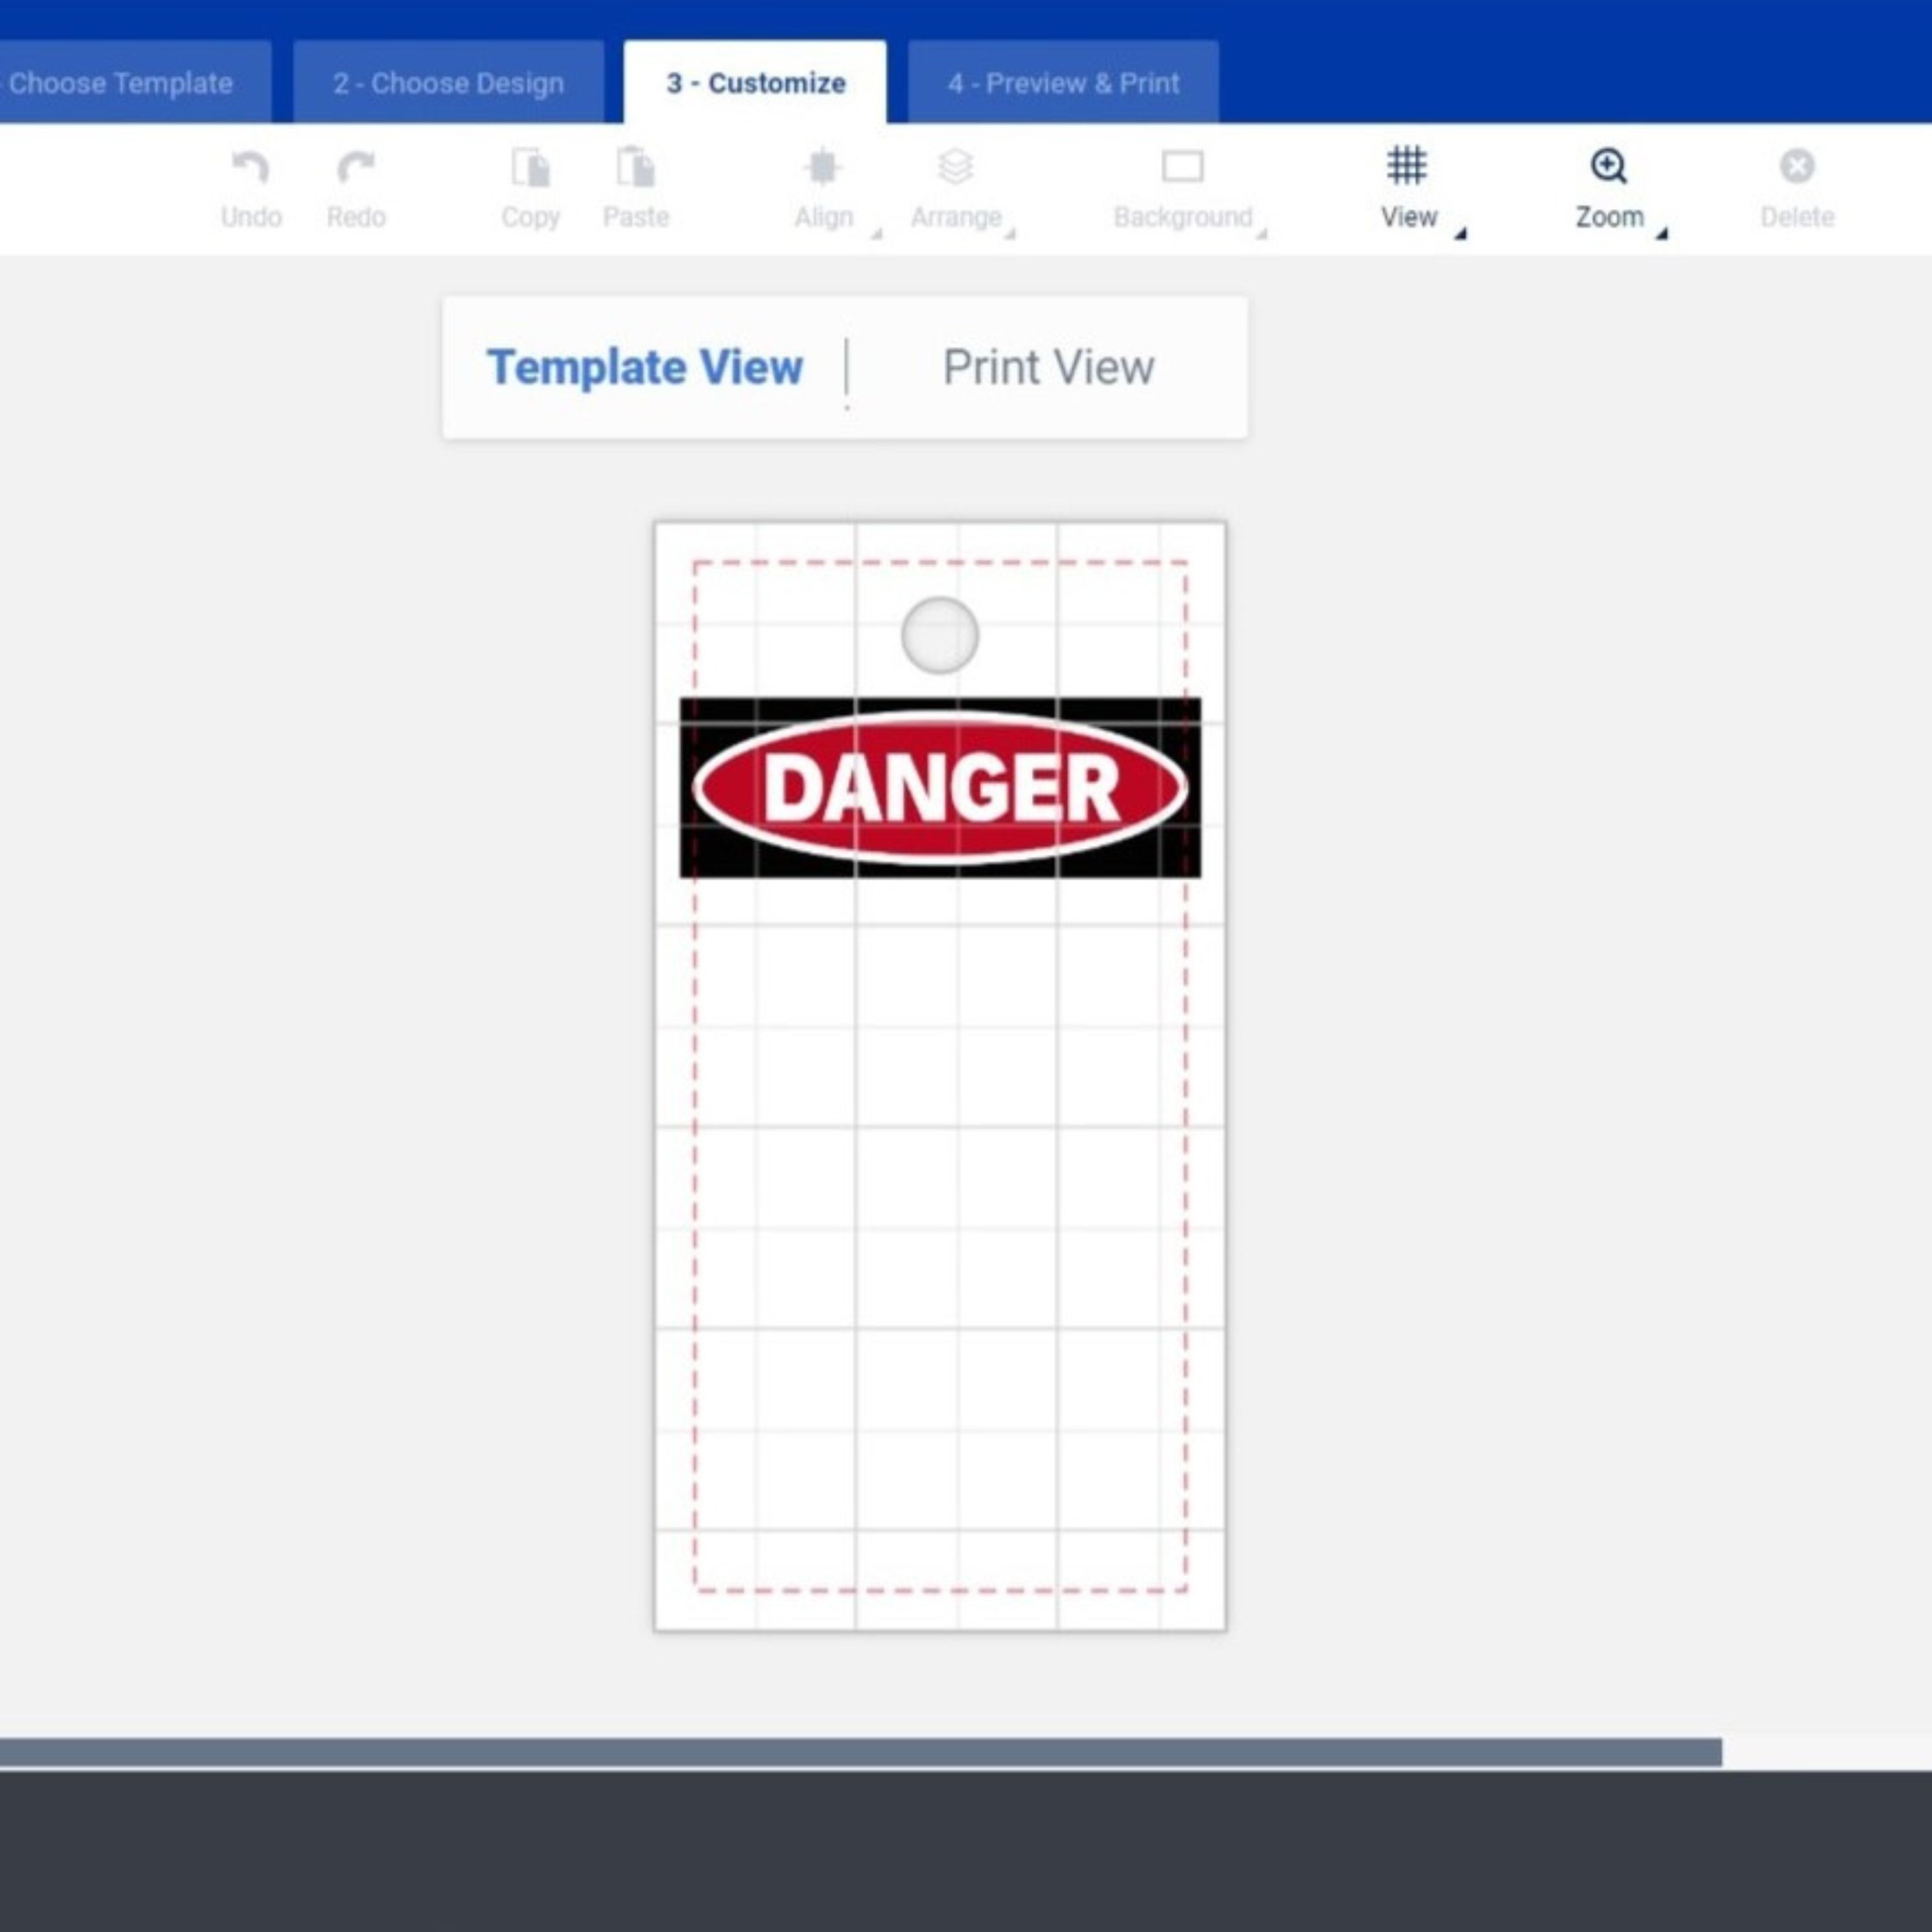
Create a custom design to print under the preprinted header. Then, print it on Avery 62401 plastic tags with a “Danger” header.
The full-color header comes preprinted on the tags, so you only need a laser printer with black ink.
Use the “Template View” and “Print View” buttons to see your design with and without the full color header.
How to inspect and tag a ladder: key takeaways
In summary, prioritizing ladder safety in the workplace is pivotal for safeguarding employees and staying compliant with OSHA regulations. Fortunately, by following the inspection guidelines outlined in this article, businesses can proactively identify and fix potential hazards before they escalate into accidents. Additionally, incorporating the use of ladder tags provides a simple yet effective way to communicate the inspection status of equipment, thereby minimizing the risk of using unsafe ladders.
Understanding the legal obligations associated with ladder inspections is essential, but it doesn’t have to be daunting. By embracing the guidance provided by OSHA standards and leveraging accessible resources like customizable templates and inspection checklists, organizations can easily implement robust tagging systems. Furthermore, by adopting these proactive measures and fostering a culture of safety, businesses can not only ensure compliance but also create a workplace where employees feel confident and protected.
What could you do with printable, durable tags? Join the conversation on LinkedIn and Facebook.
Please note, the contents of this article and related safety and/or compliance articles are for informational purposes only, are general in nature, and are not intended to and should not be relied upon or construed as a legal opinion or legal advice regarding any specific issue or factual circumstance.