How to Make Labels
A step-by-step guide from an Avery designer
If you found this article, it means you want to know how to make labels? As a designer at Avery, I can tell you that creating your own personalized labels is easier than you might think. Whether you’re a small business owner looking to create unique product labels, someone planning a special event, or just want to add a little personal flair to your organizing labels, we’ve got the perfect tools for you. With our simple tools, you can create labels right from your favorite device and have them professionally printed by Avery WePrint or print them yourself at home using Avery blank labels or retail packs.
More articles you might like:
No matter your project—be it product packaging, mailing labels, or DIY projects like wedding favors—Avery has a range of label options just waiting for your creative touch. Keep reading below to see how to make personalized labels for all your projects. Let’s dive in!
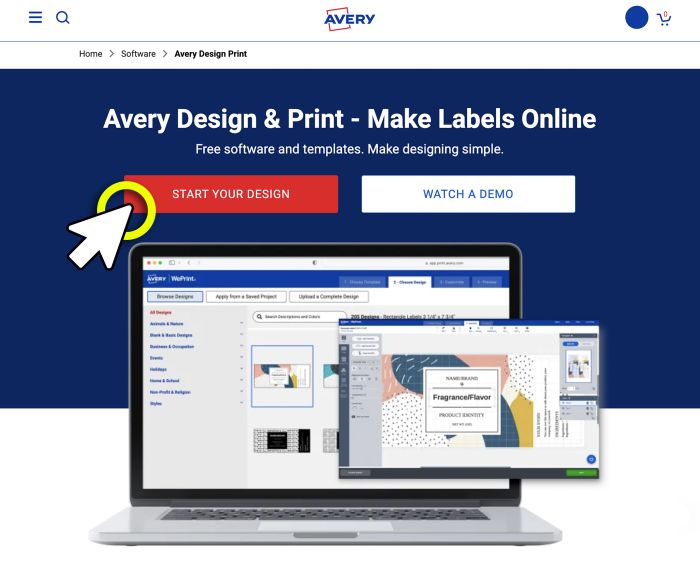
Step 1: Head over to Avery Design & Print
Start by opening Avery Design & Print. If you have a specific Avery product in mind, simply enter the product number to get started. Otherwise, you can browse through our selection and choose the type of label or product you want to design.
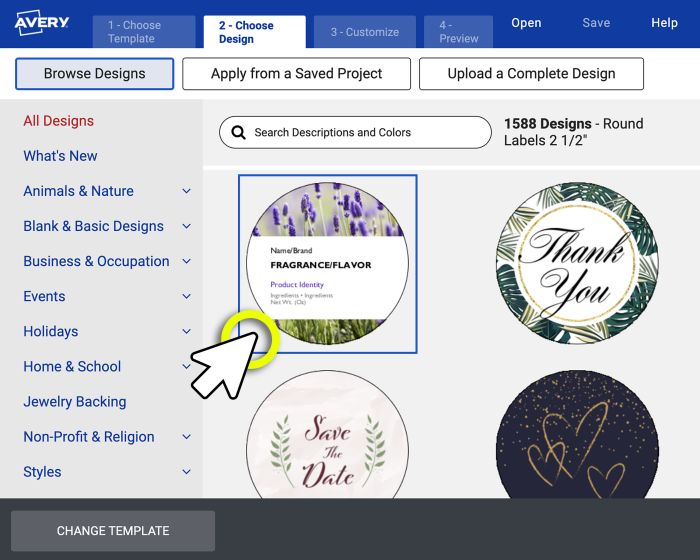
Step 2: Choose your template
Browse through a wide selection of design templates, or start with a blank canvas if you prefer to create your label from scratch. There’s something for every project!
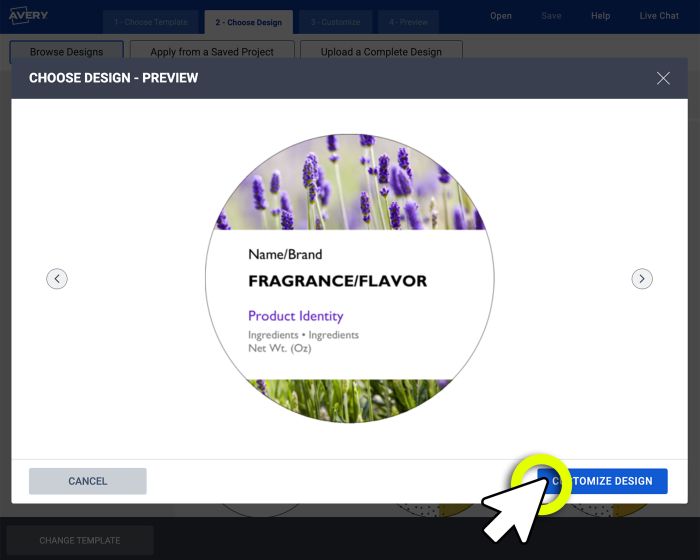
Step 3: Personalize your labels
Edit text
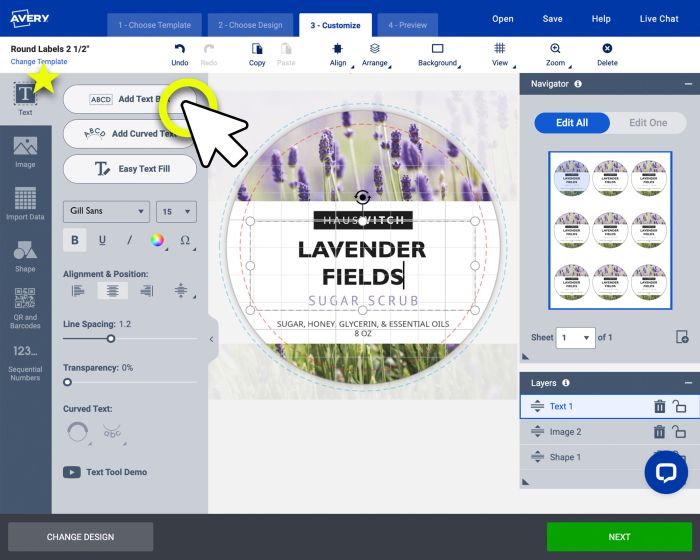
Navigate to the options toolbar on the left side of the screen and select the Text button to access text editing options. You can easily modify placeholder text using the Easy Text Tool, or customize your design further by adjusting the font, size, color, and alignment.
If you require more customization, you can choose from the various options to personalize your text as needed. For our example, we edited the existing text layout but chose to center it to create the presentation that works best for our design. We also chose to change the typeface, adjust the font size, and tweak the font color.
Edit images
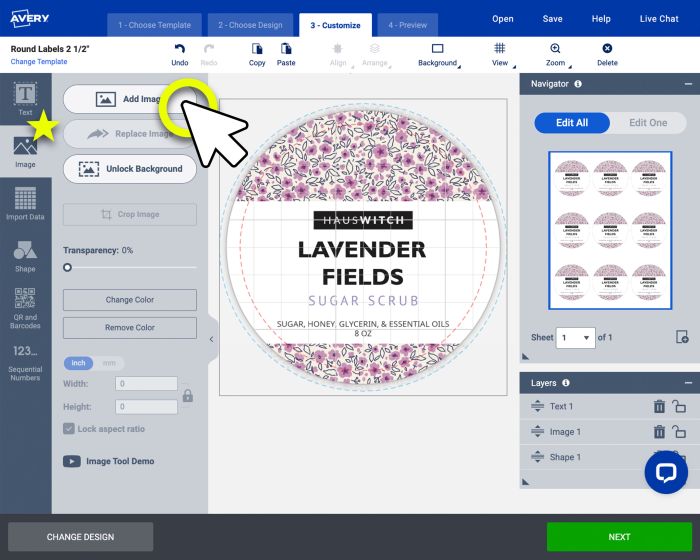
To modify images, click the image icon in the options toolbar. You can replace, add, or remove images as needed. Our editing tools also let you adjust transparency, change colors, and resize while maintaining the original aspect ratio or unlocking it for freeform adjustments. For our example, we replaced the existing image with a new background image to enhance the design.
Edit individual labels

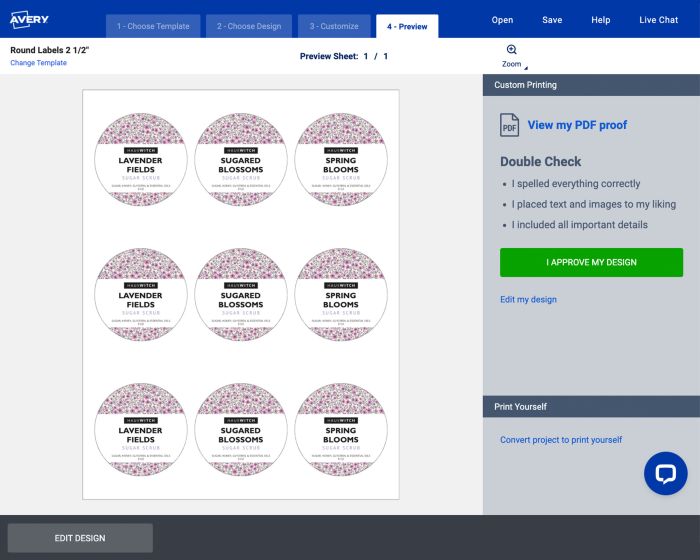
Want different designs on the same sheet? Select the Edit One button in the Navigator window on the right side of the screen. Click on any label to make changes—perfect for updating product variations, such as different scents for a body scrub. You can slightly modify an existing design or create a completely new one for each label. This feature also allows you to print just one or two labels at a time. For our example, we chose to update the scent of our body scrub. We selected each label we wished to update and applied our changes.
Step 4: Preview and print
Click Preview & Print to review your design. To make adjustments, just click the Back button. When your design is ready to go, just click Print to start printing yourself, or click Let Us Print for You to order professionally printed labels from Avery WePrint.
Step 5: Save your design
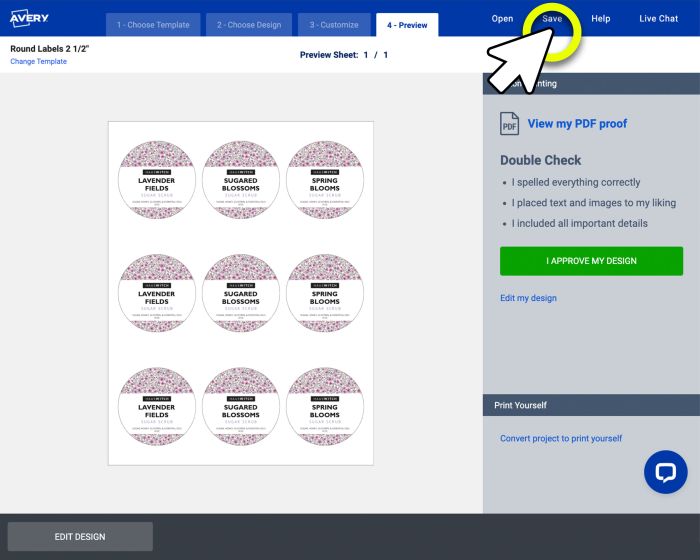
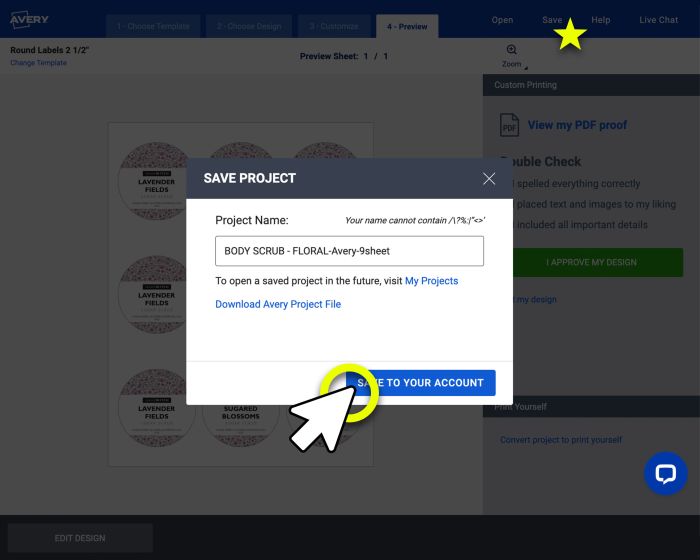
To use your design later, click Save, name your project, and store it in your free Avery account or on your computer. To edit it in the future, log into your Avery account.
Step 6: Apply your design to more products
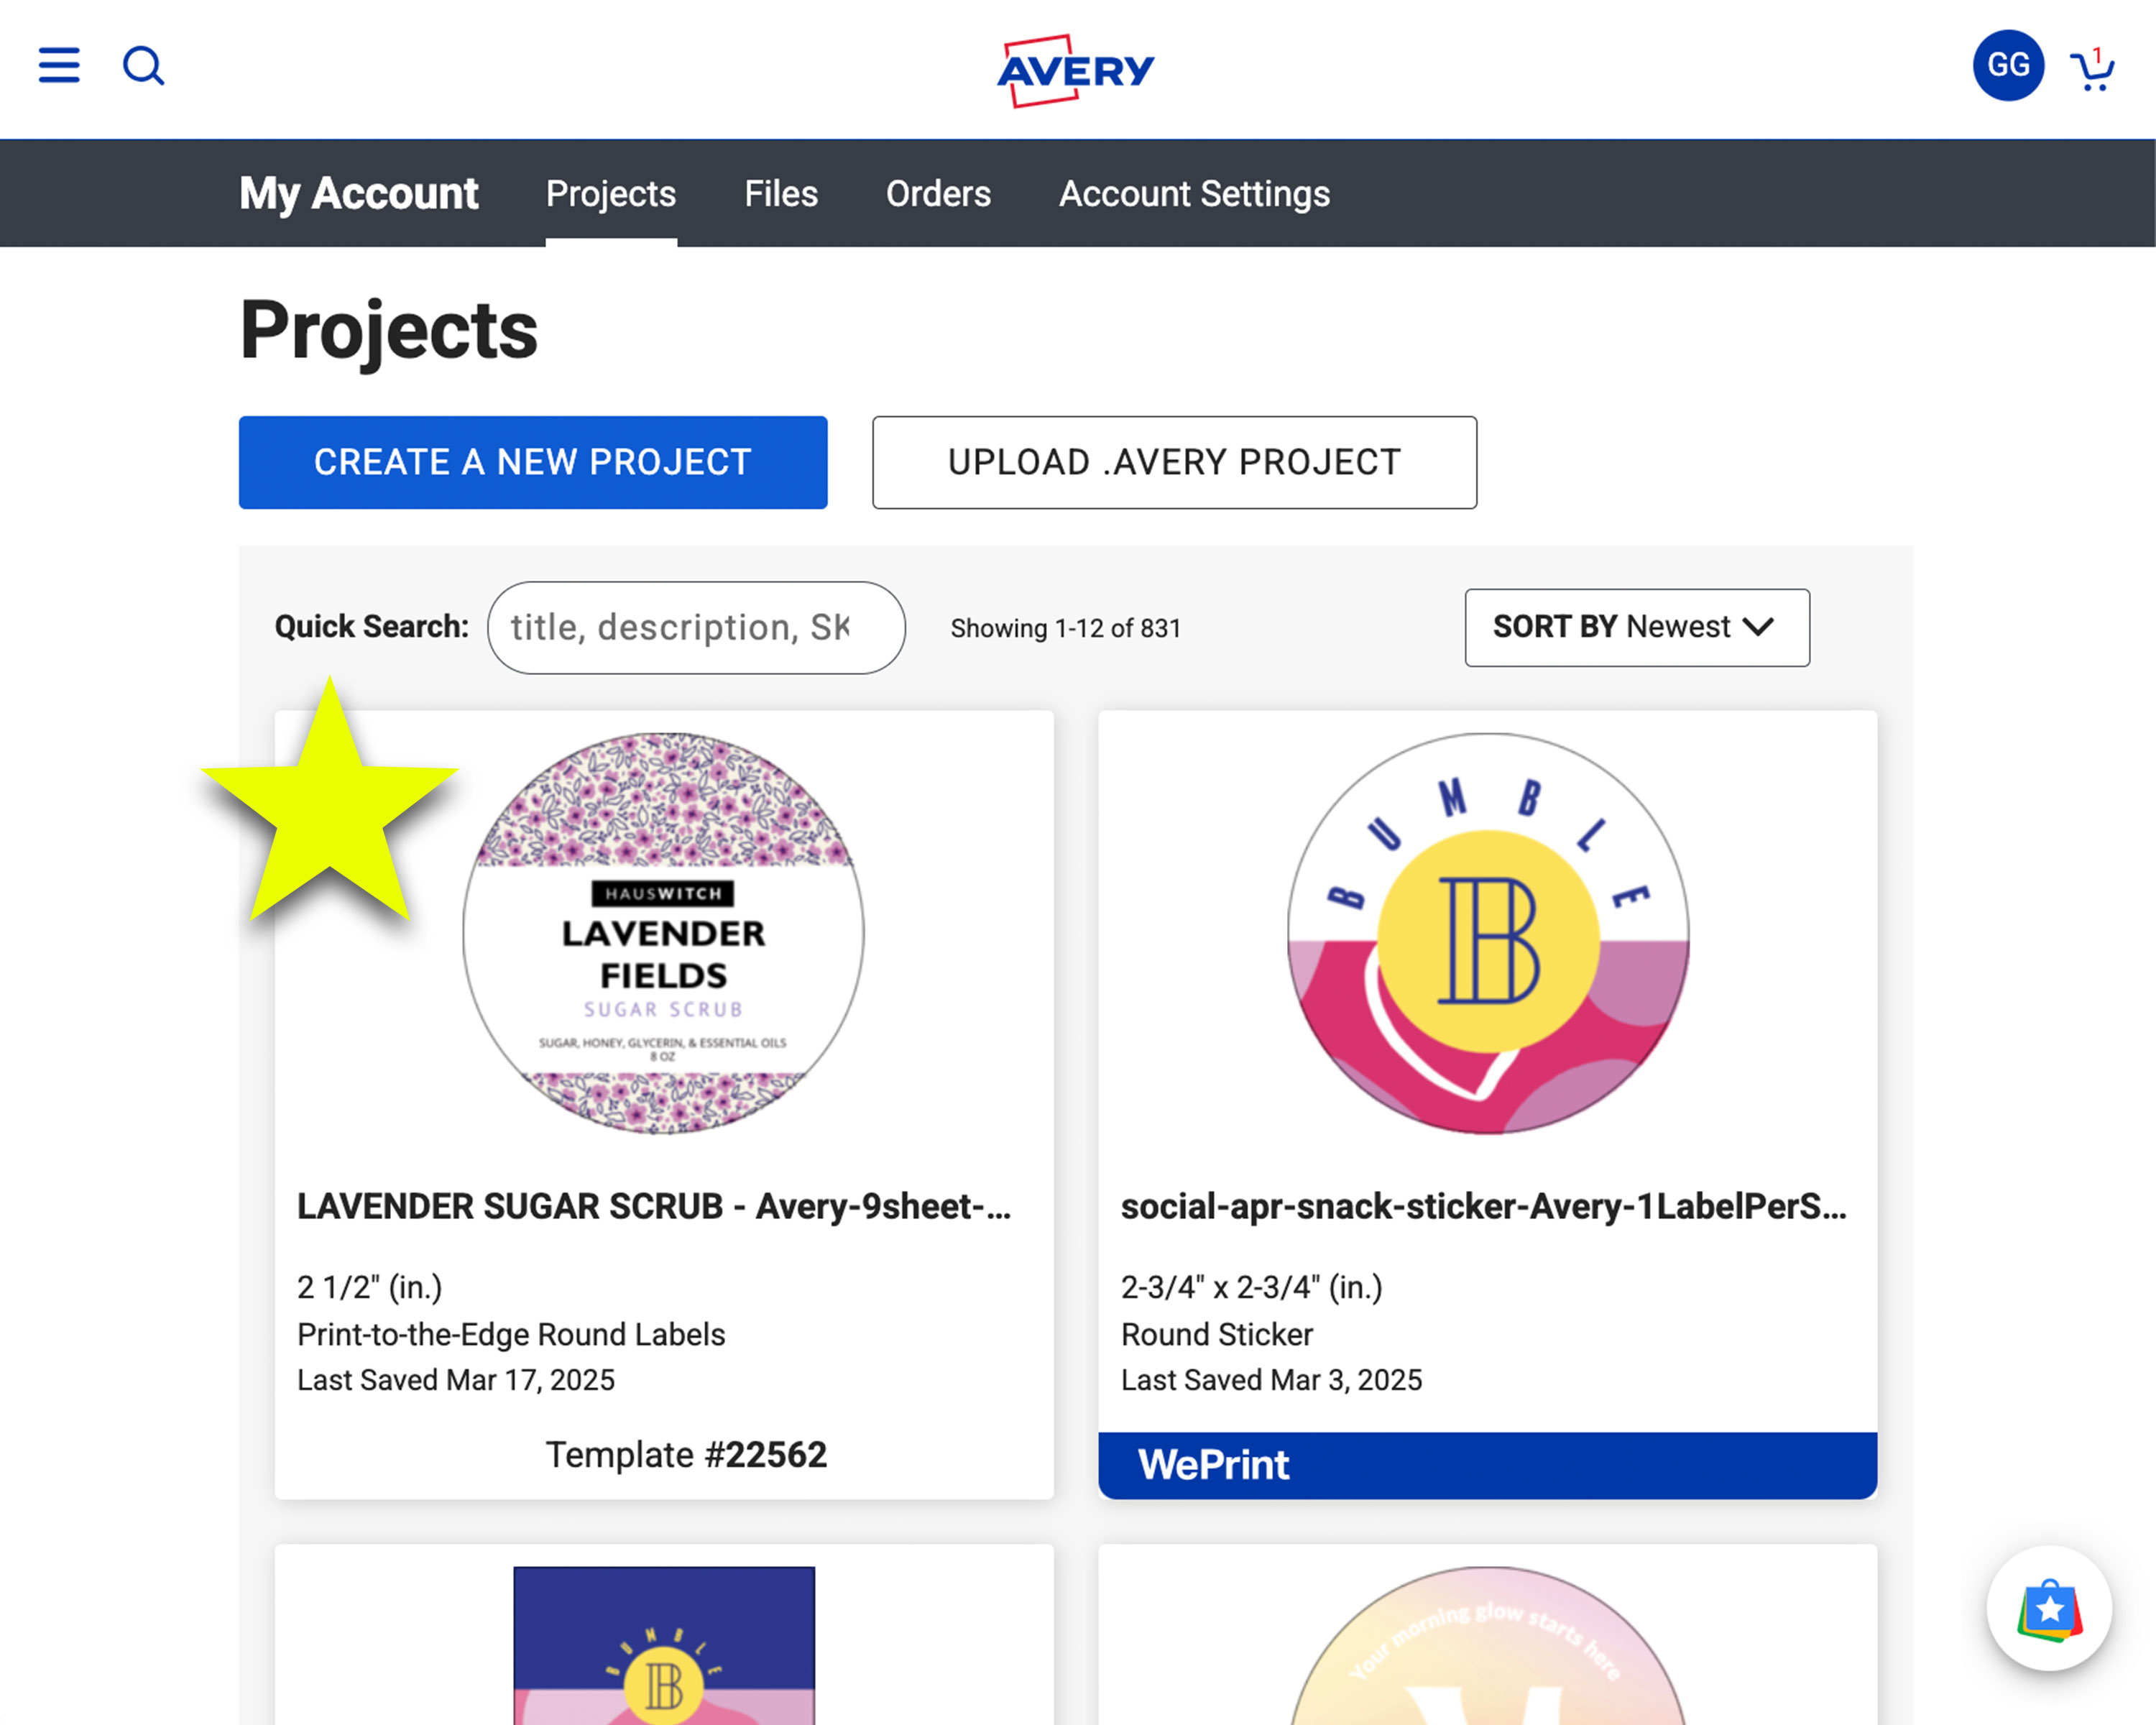
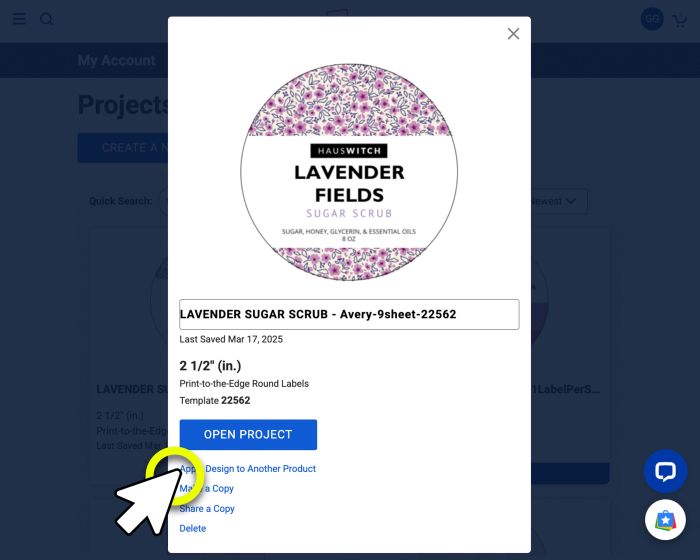
Love your custom labels? You can easily apply the same design to other Avery products. Log in to your Avery account and go to Projects. Select your saved design, then choose Apply Design to Another Product from the pop-up window. You’ll be directed to the template selection menu, where you can pick from a variety of Avery products.
If you’re ordering professionally printed labels, select Custom Printing under the Avery logo. If you’re printing at home, make sure Print Yourself is selected.
We hope this article has taught you how to make labels. As always if you need any help, the Avery Care Team is here to answer your questions. They can even help you design by working alongside you to complete your products. Just call us at (800) 942-8379 or chat and they can walk you through how to make personalized labels for your next project.