Add pictures to address labels and more
As a small business owner who also enjoys sending cards to family and friends, I find photo address labels to be a very appealing idea. I think using photo labels or picture labels is a creative way to personalize business or personal mail. Whether it’s adding a logo or a festive touch to direct mail marketing or a favorite image to holiday card envelopes, I know I can customize my labels using Avery Design and Print Online (ADPO). Follow along as I break down the steps to create your own perfect design.
More articles you might like:
1) Start creating your picture labels
Making any type of label, card, or tag starts with choosing what you’re going to print on and finding the matching template. It’s important to always use the template that matches your Avery product. Personally, I usually take a short-cut to designing by going straight to the template from the Avery product page. However, it’s super easy to get templates for any Avery product using our template finder.
Find the right Avery template for photo labels
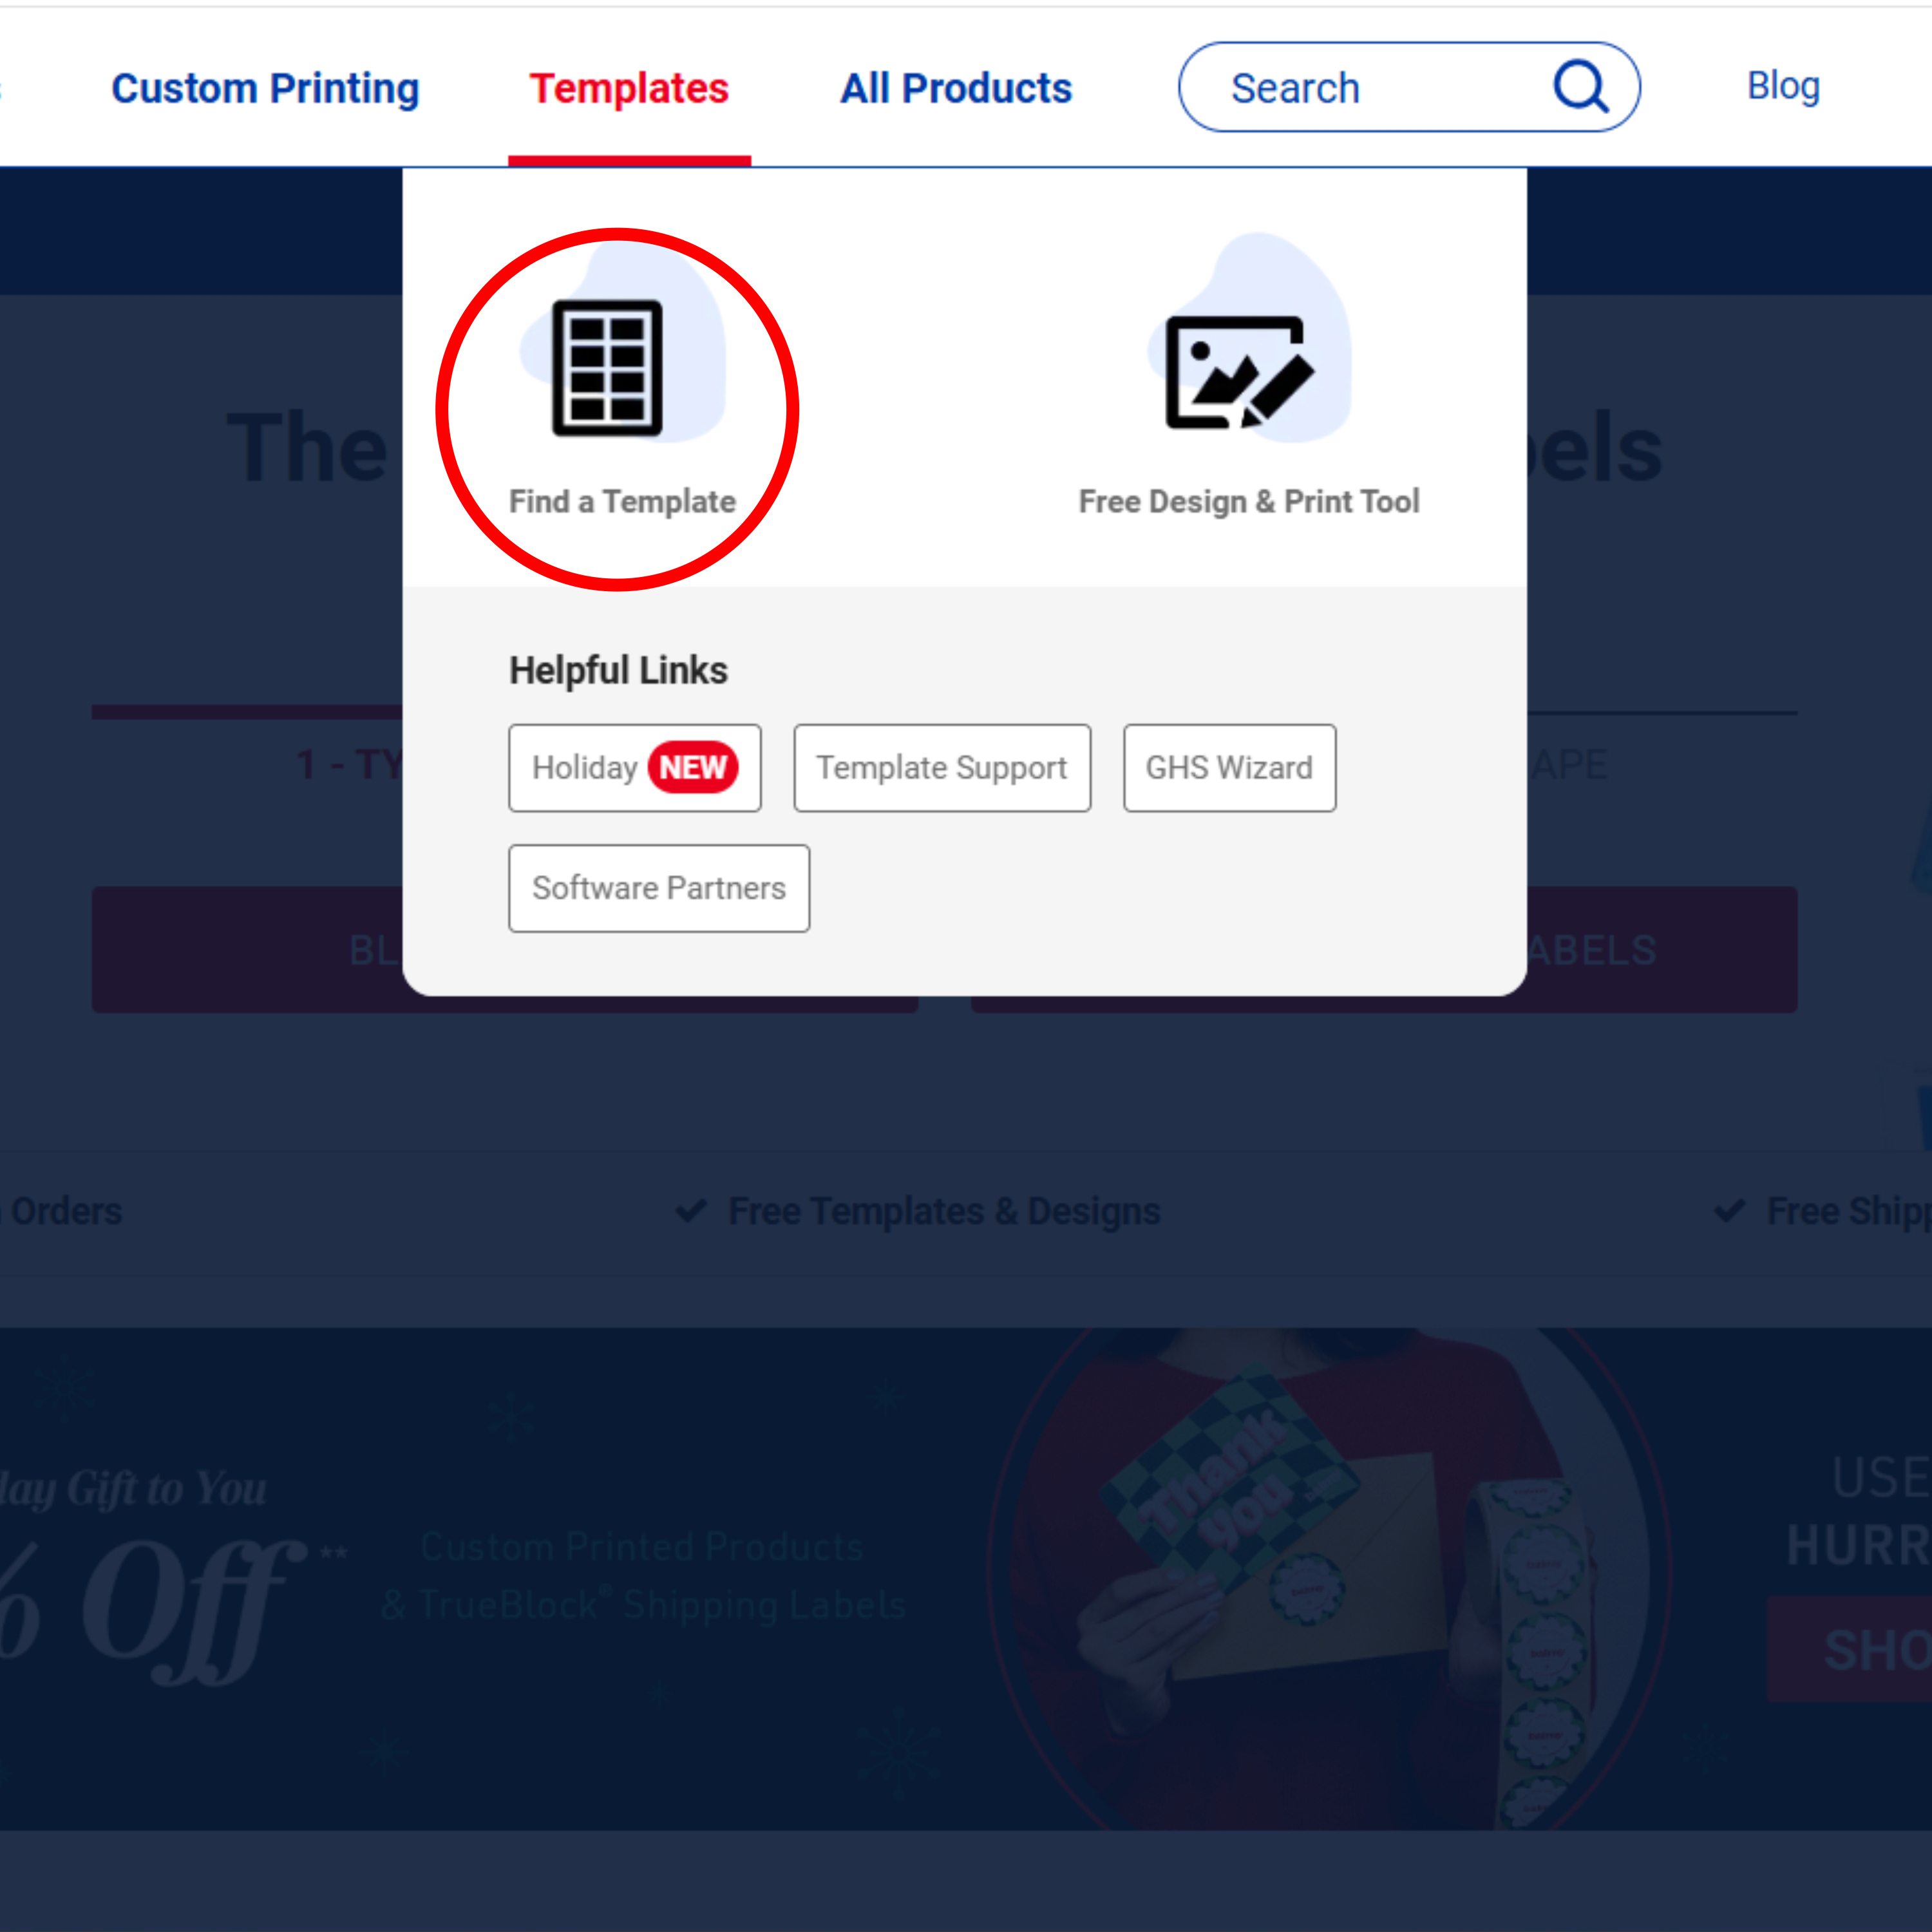
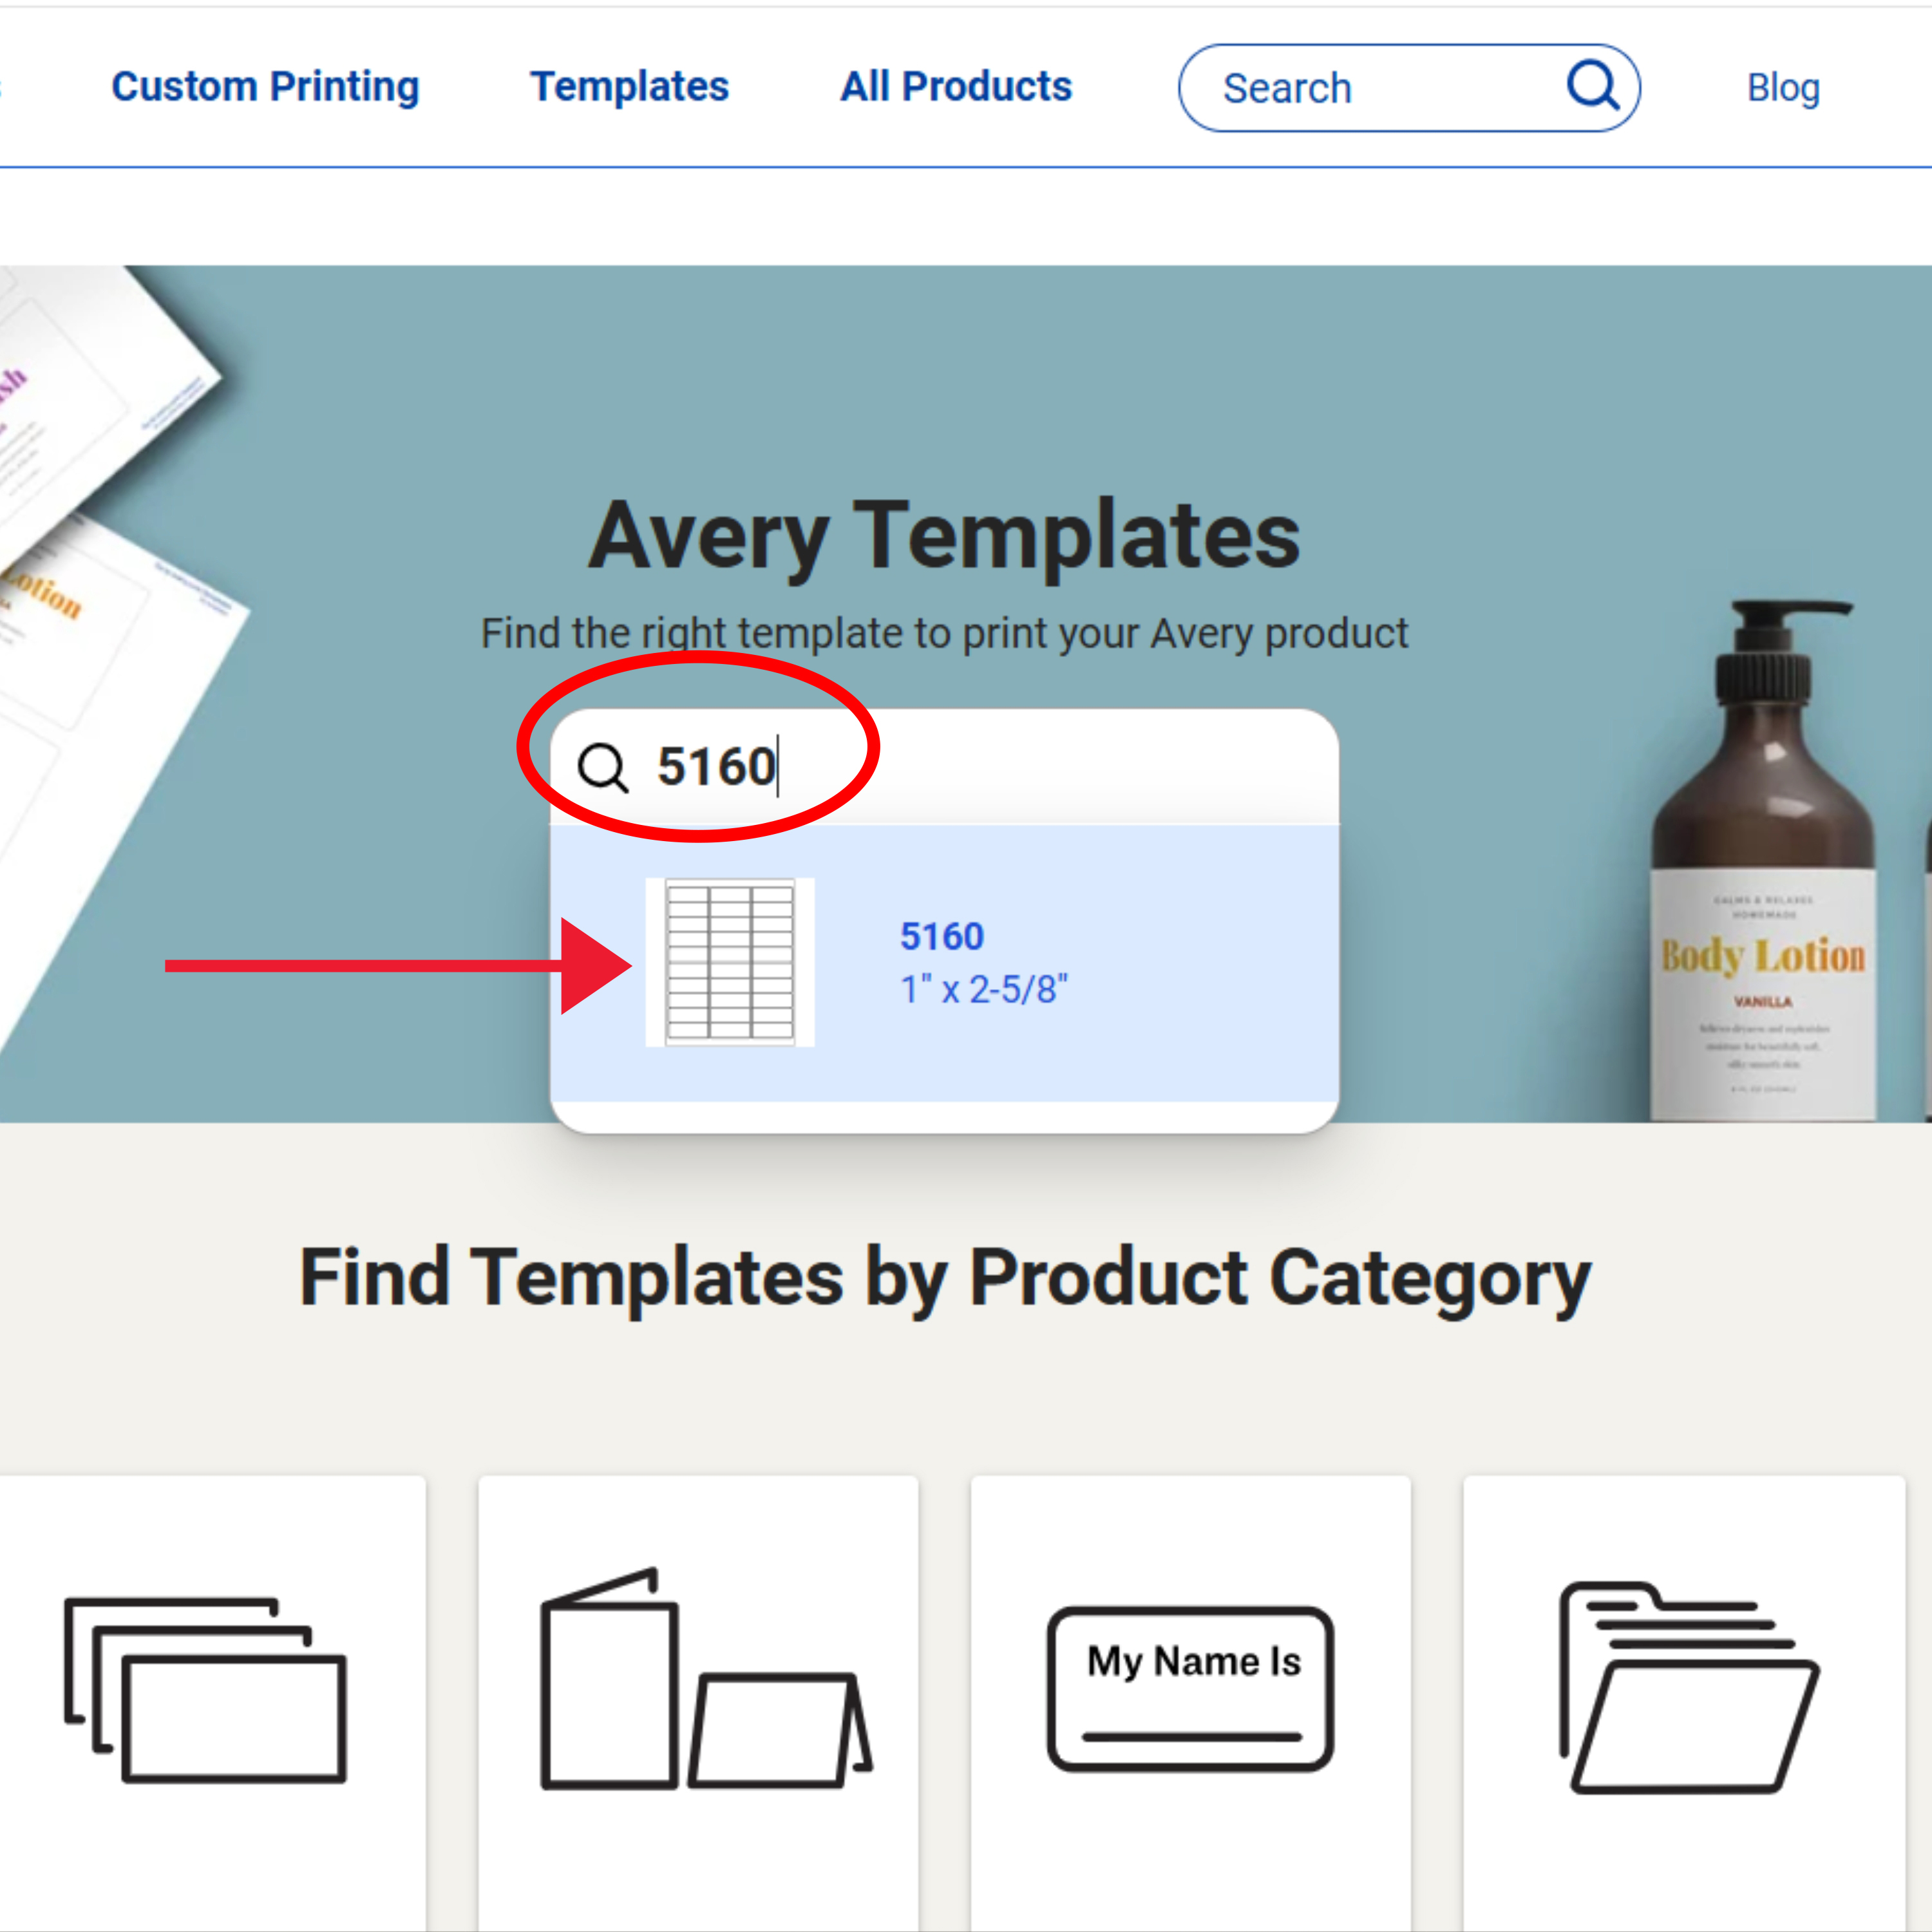
- Go to the Avery template finder page.
- Enter your Avery product number to locate the right template.
- This guide can help you find your product number, or you can give our Customer Care Team a call at 1 (800) 462-8379.
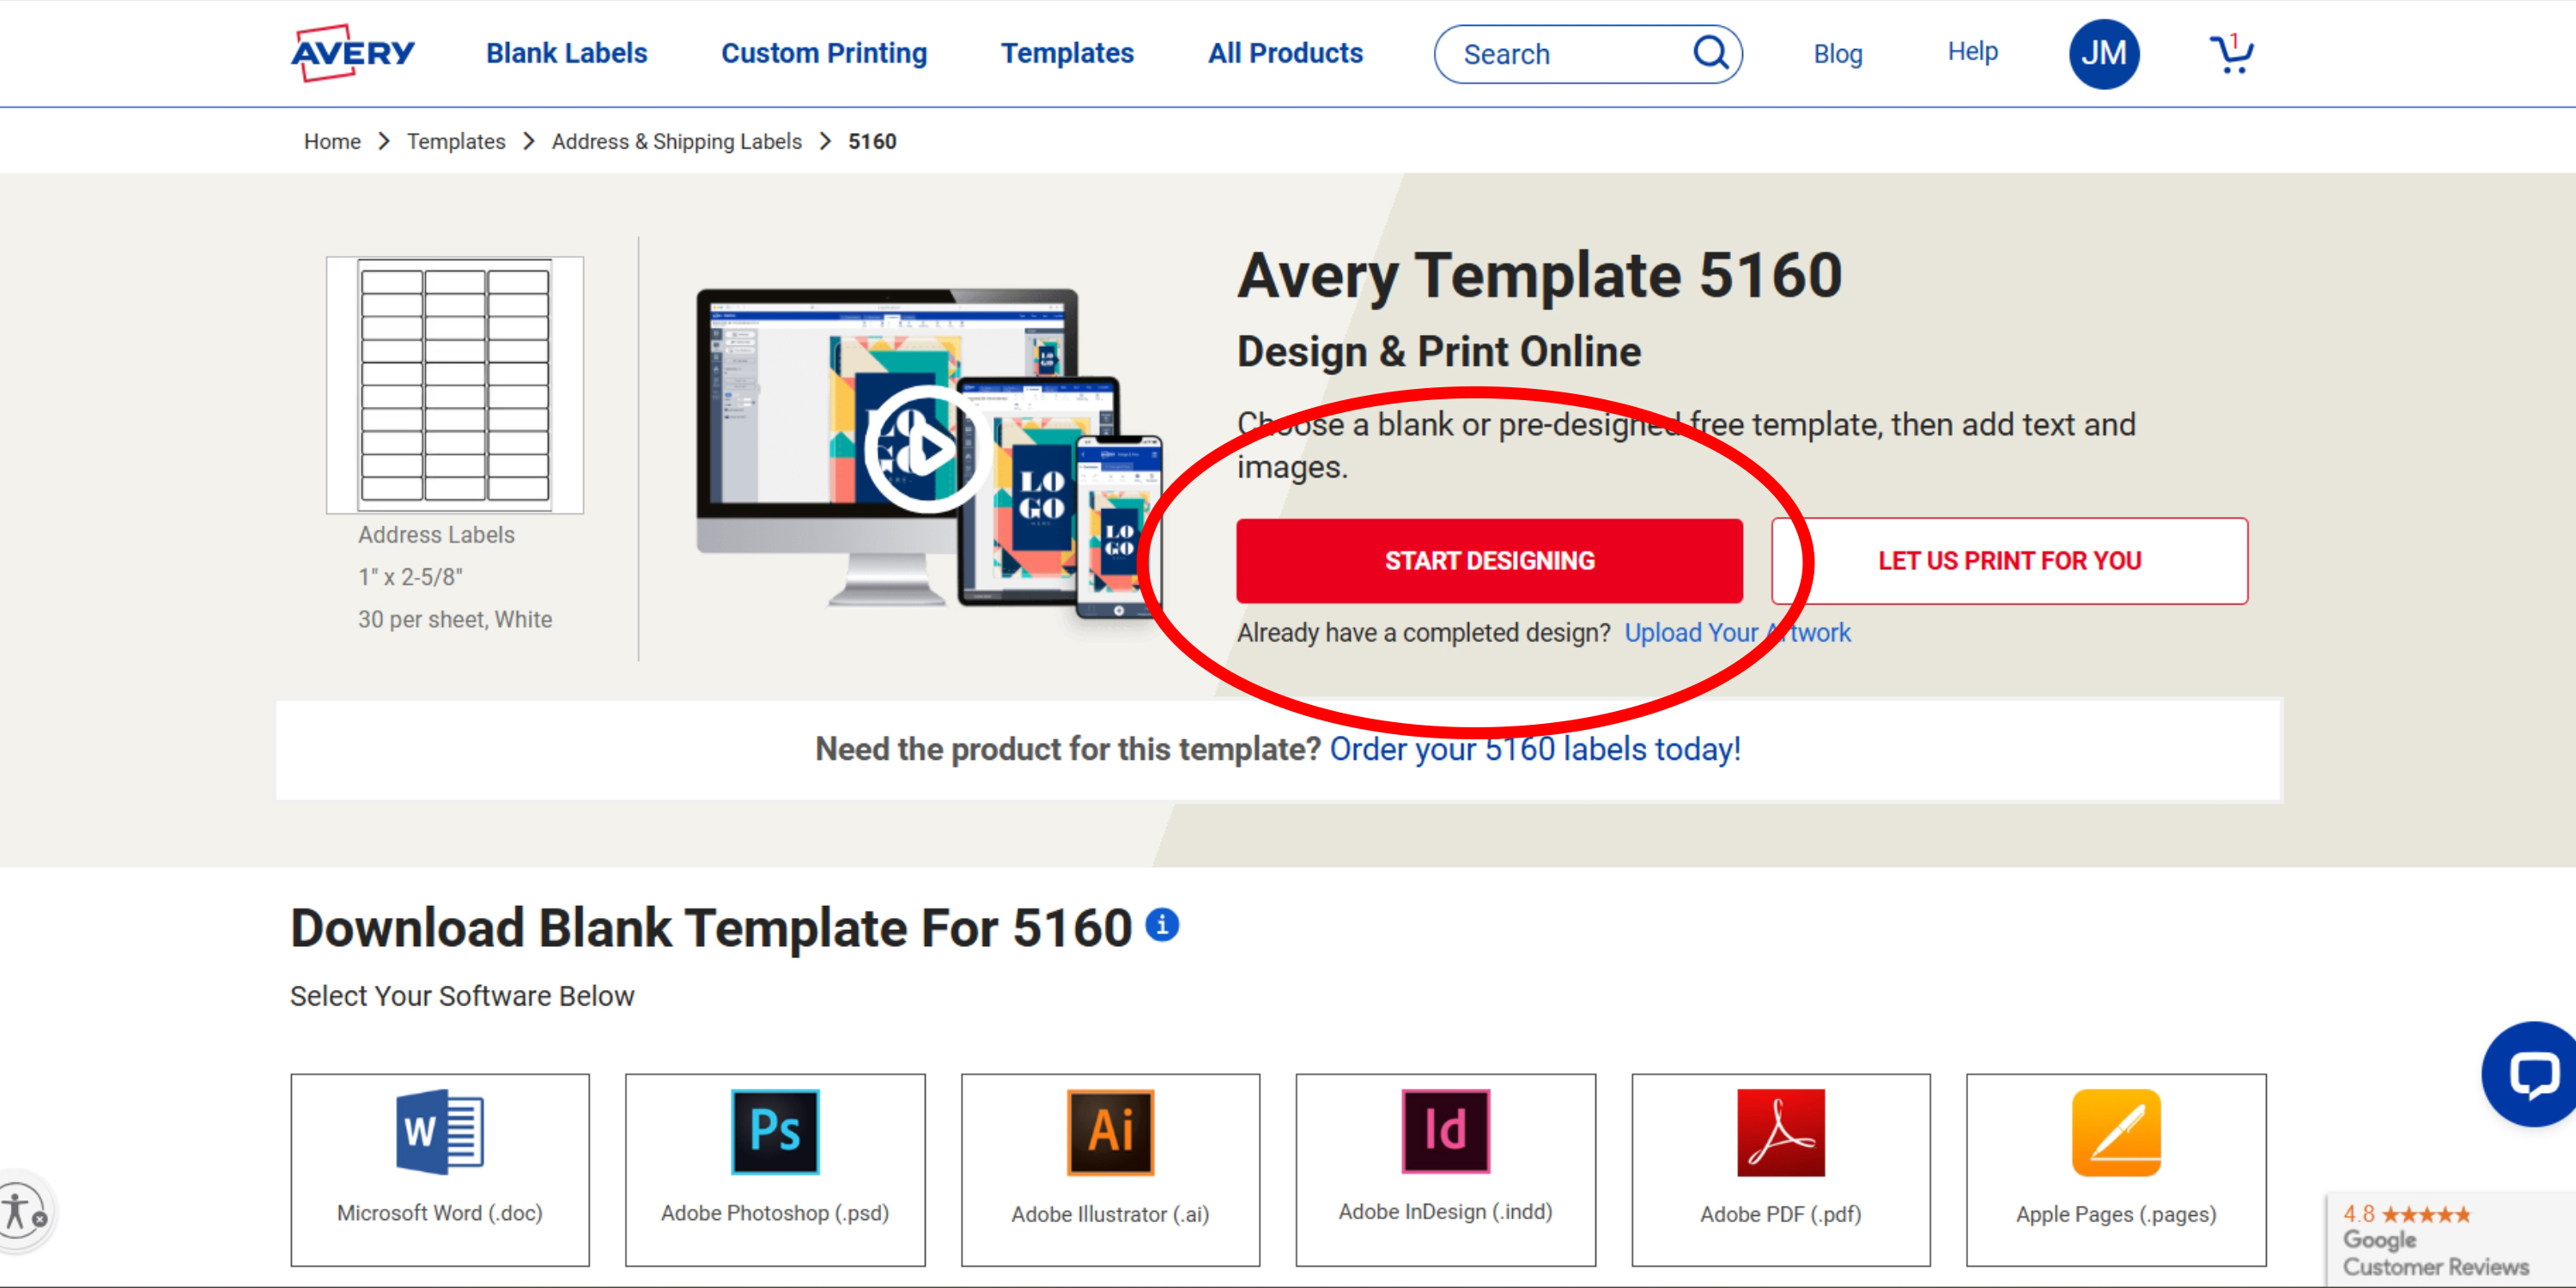
- Click “Start Designing” to access Avery Design and Print Online (ADPO) and view all template options for your labels.
2) Choose the best template for photo labels
Avery templates can be blank or have a design that you can modify. For most projects, I prefer a blank template because I can upload a complete design and make sure it will be perfectly positioned on my Avery product. The reason I like doing that is because it’s the best way to print Canva® designs on Avery labels, cards, or tags. Blank templates are also great for using with original artwork you make in Adobe Illustrator®. Even so, when I’m adding pictures to address and return address labels, I prefer using a predesigned Avery template.
Explore blank and predesigned templates
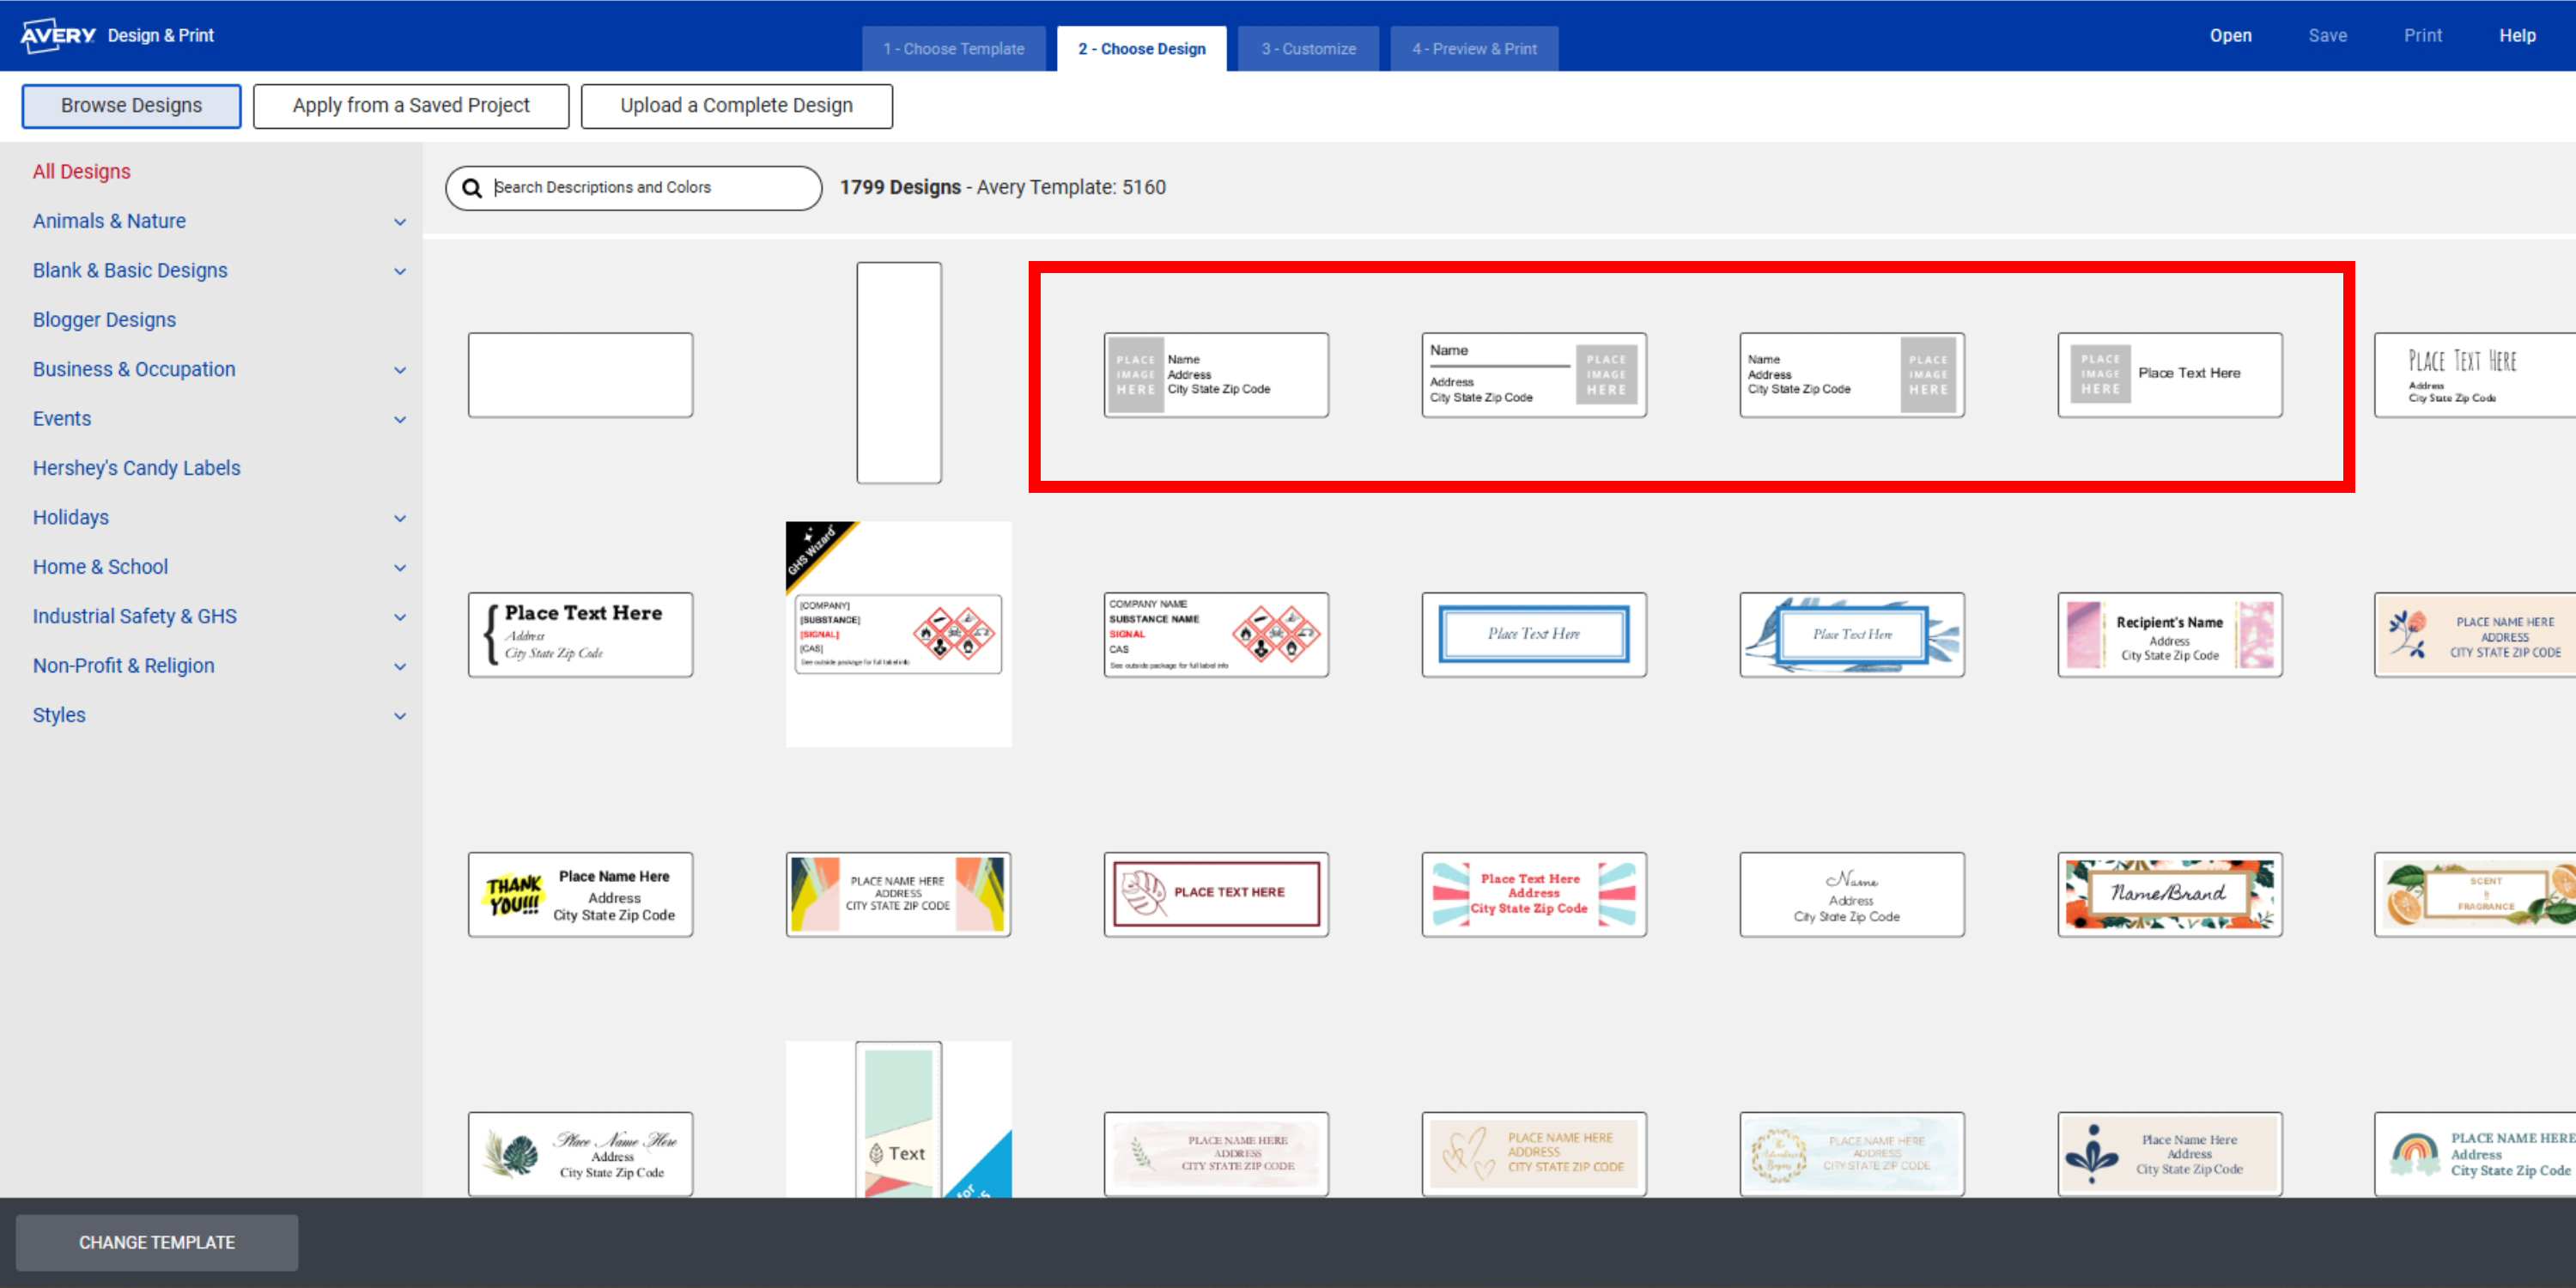
- Browse the available templates, including blank ones and predesigned templates with placeholders for photos.
- Predesigned templates for picture labels are ideal because the placeholders make it really easy to drop in your own photo.
Customize your picture label template
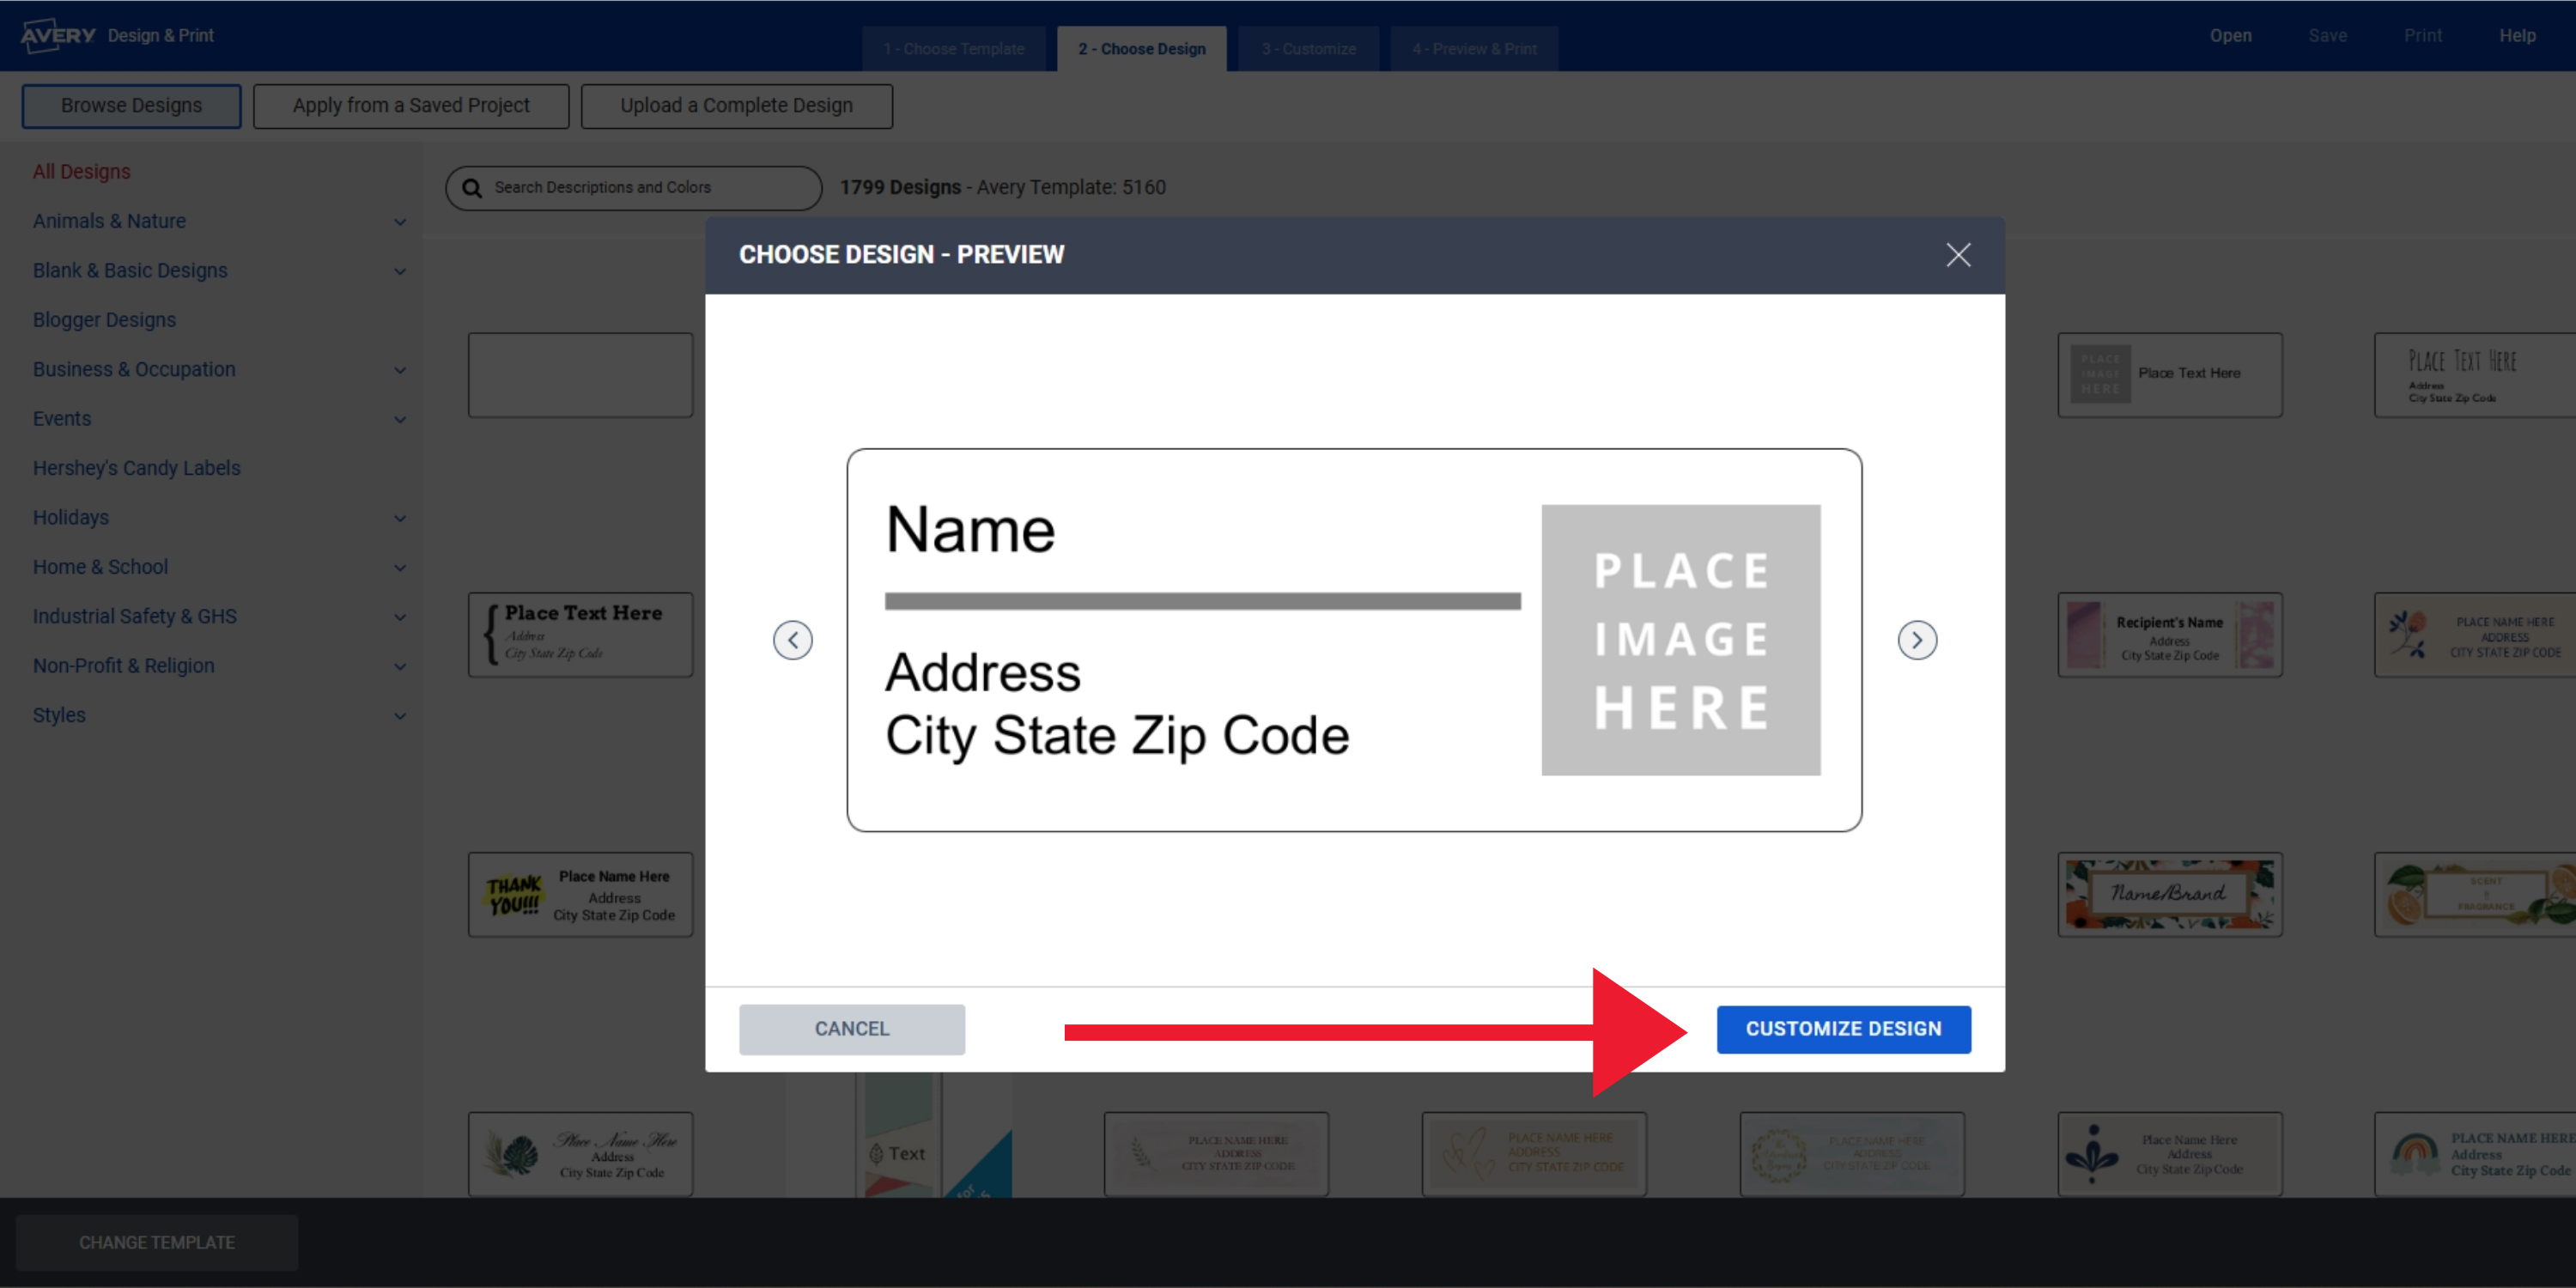
- When you click on a predesigned template, a preview will pop up. Click “Customize Design” to select the template and start personalizing your labels.
3) Add photos to your picture labels
Before I start my project, I usually have a pretty good idea of the image I want to use. It’s a good idea to put any pictures or photos you think you might want to use somewhere easy to find on your device. I use my download folder when I’m working on a laptop and a dedicated picture album when I’m using ADPO on my phone.
Upload photos for your labels
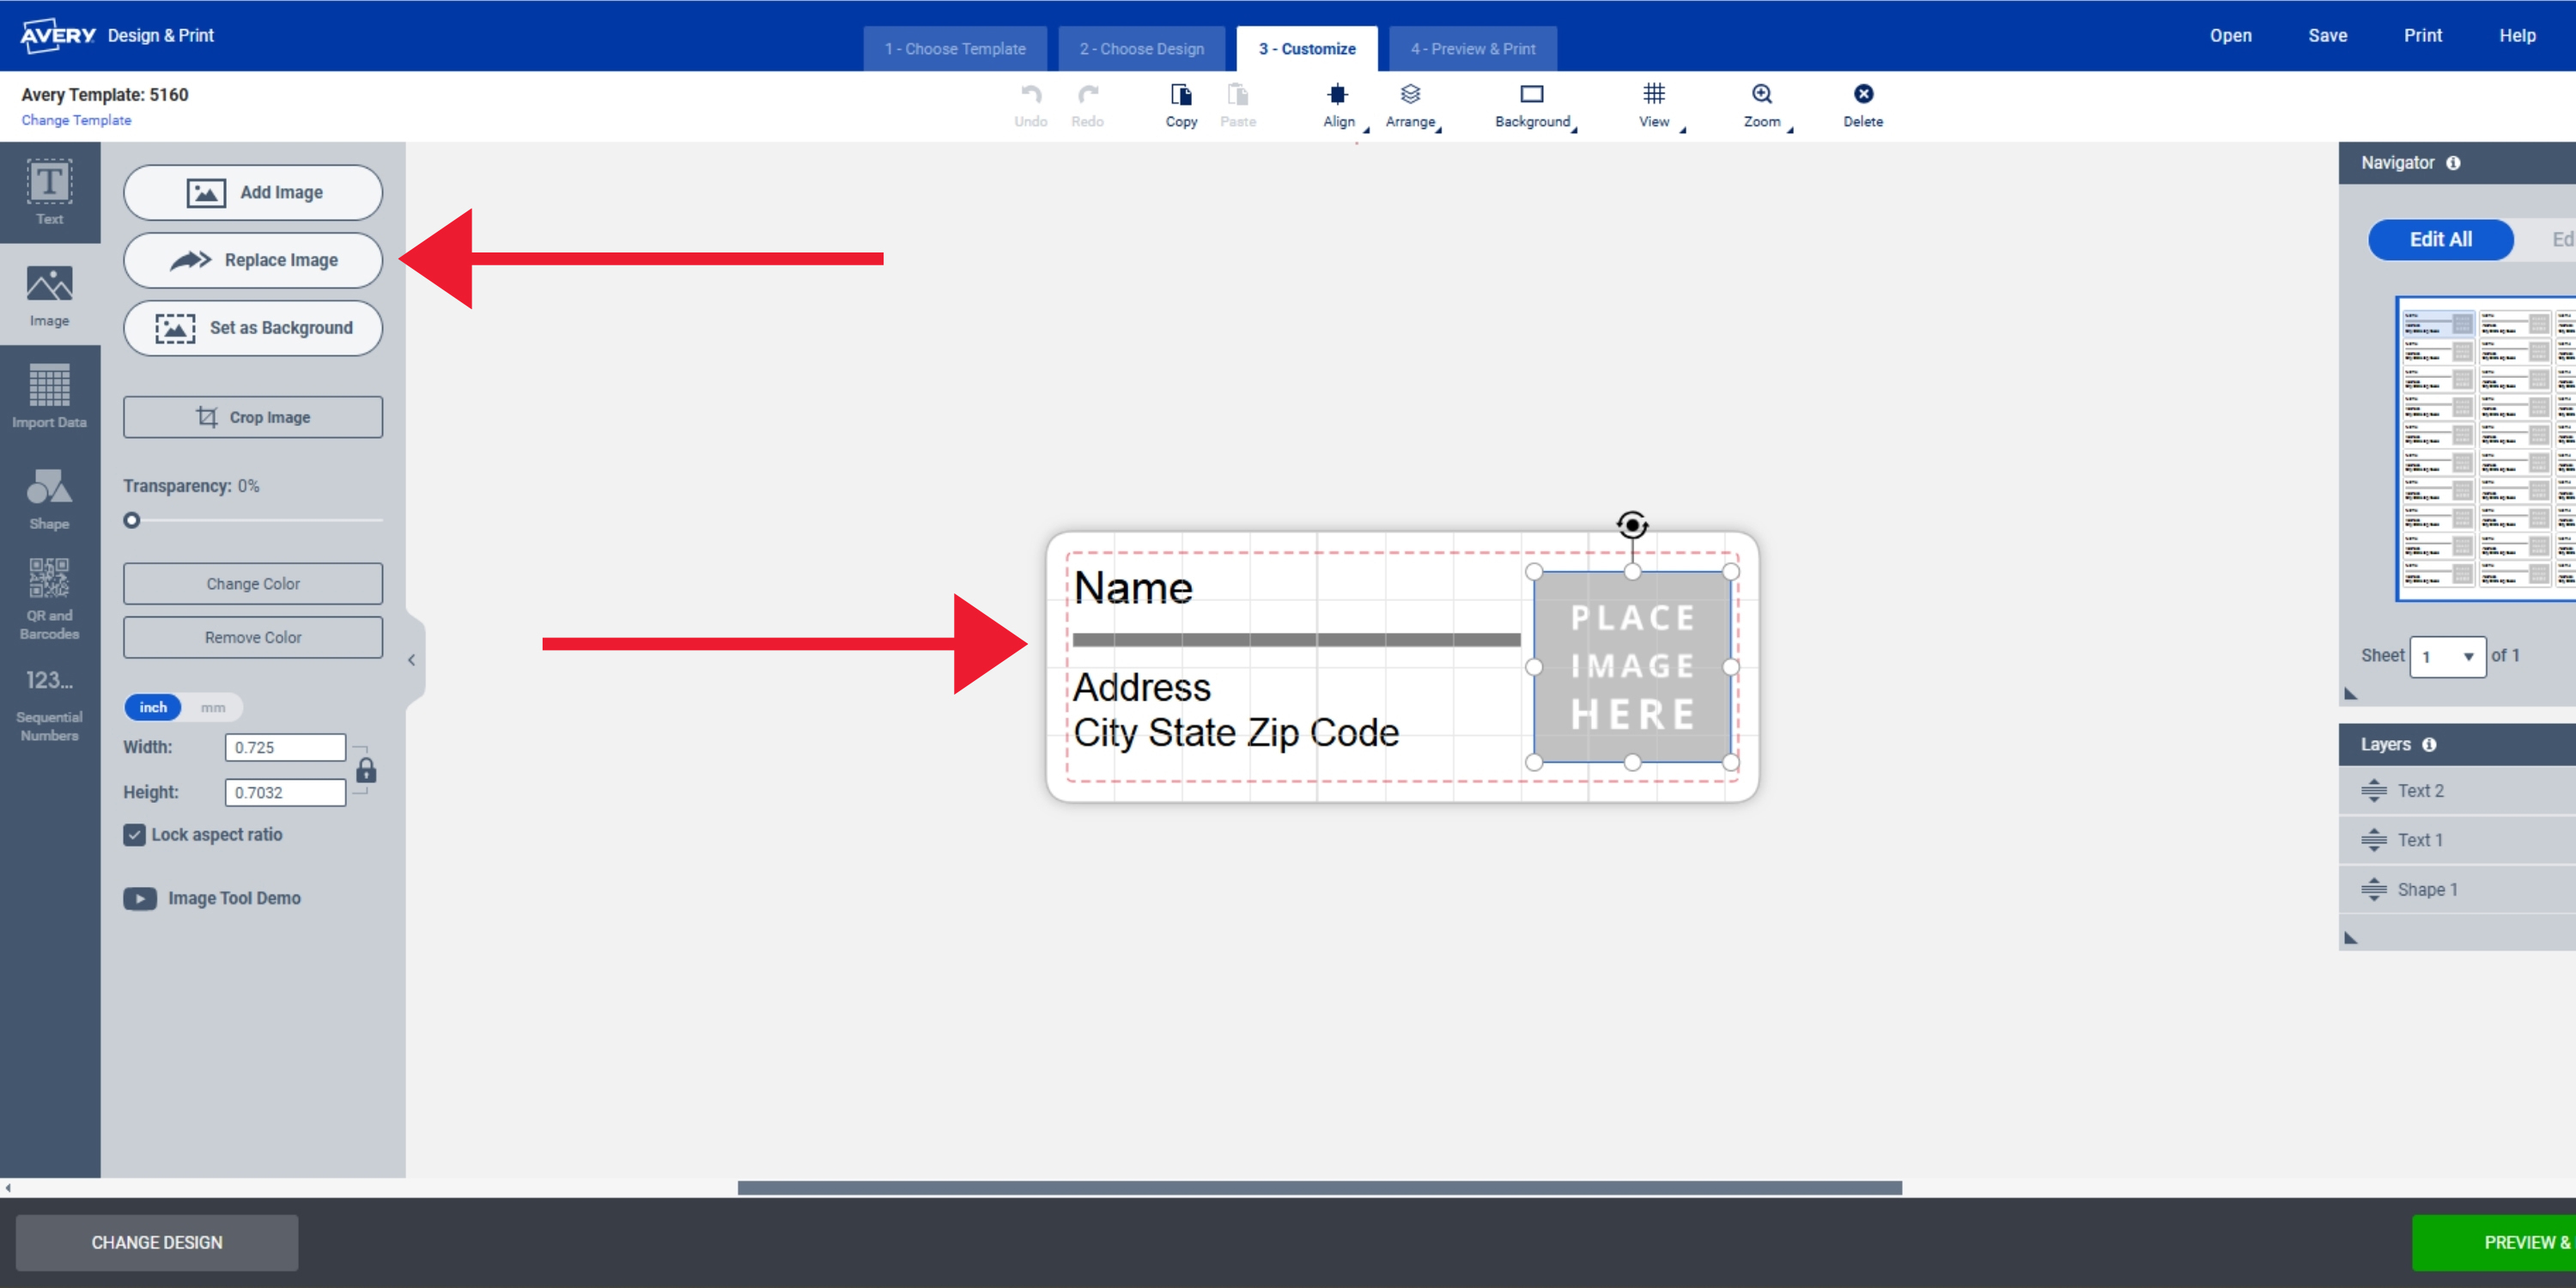
- Click on the placeholder image in your template to open the Image Tool Menu, then select “Replace Image.”
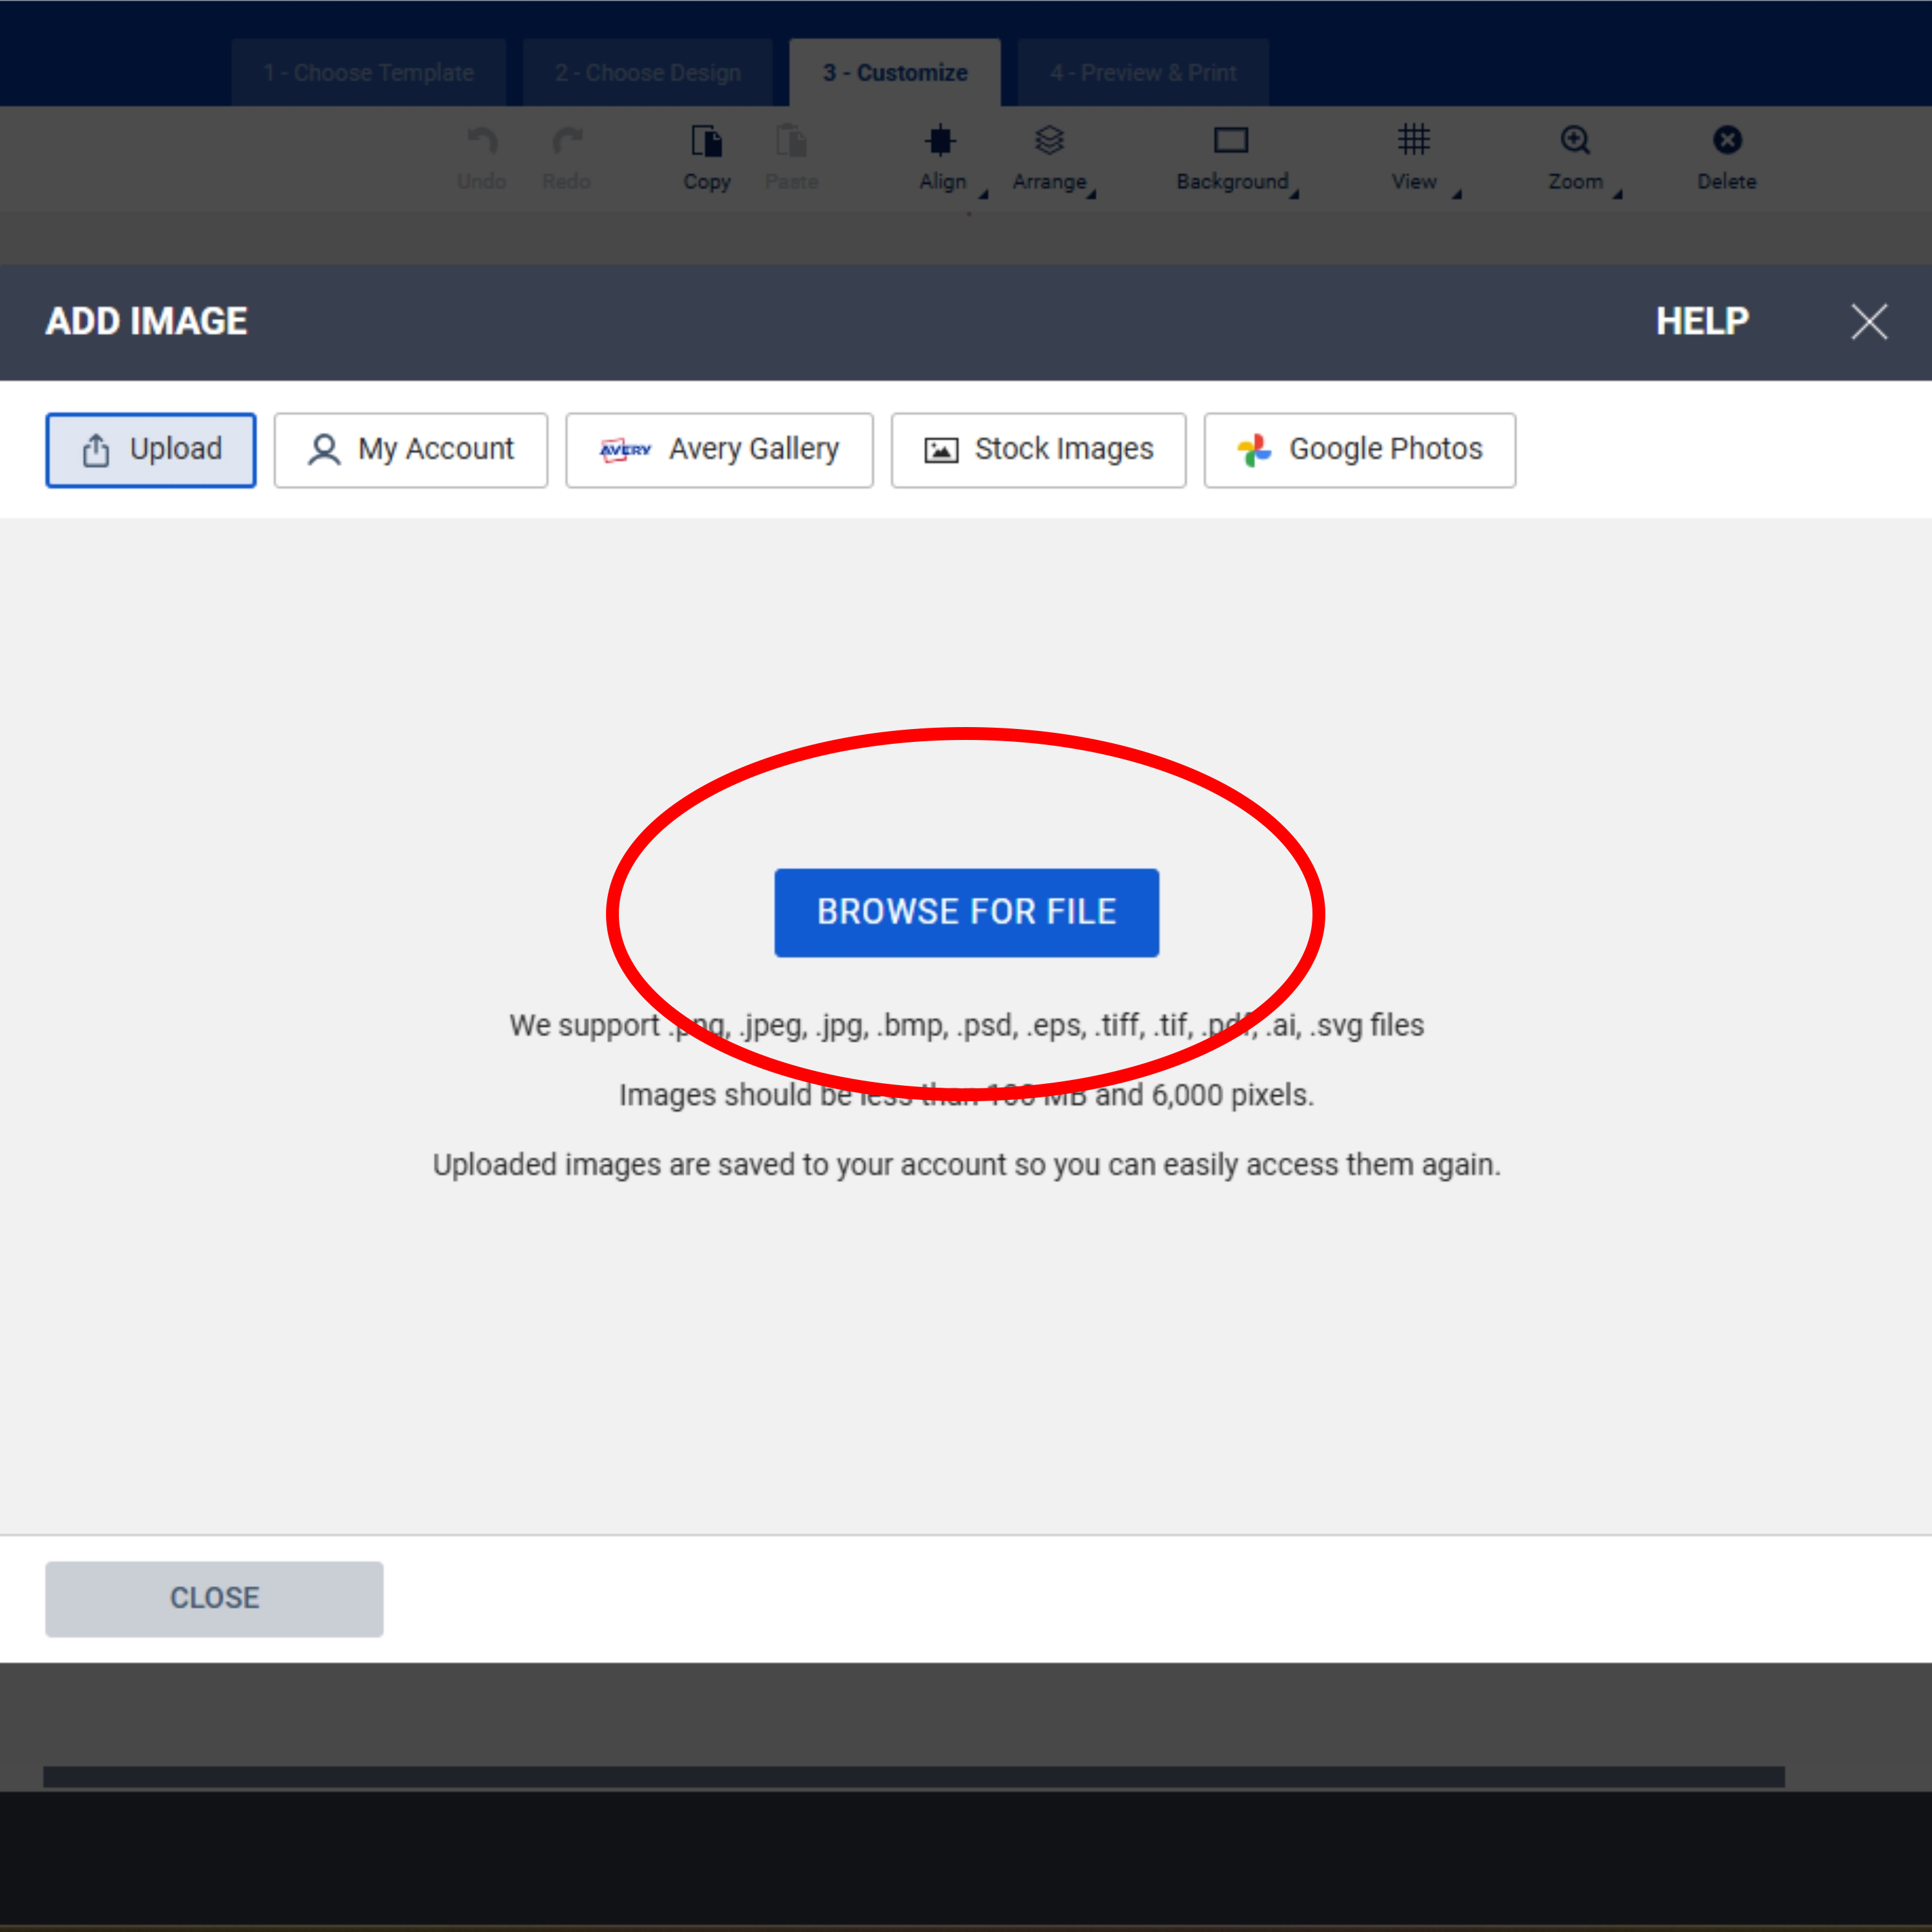
- Click “Browse for File” to upload a photo from your computer, tablet, or smartphone.
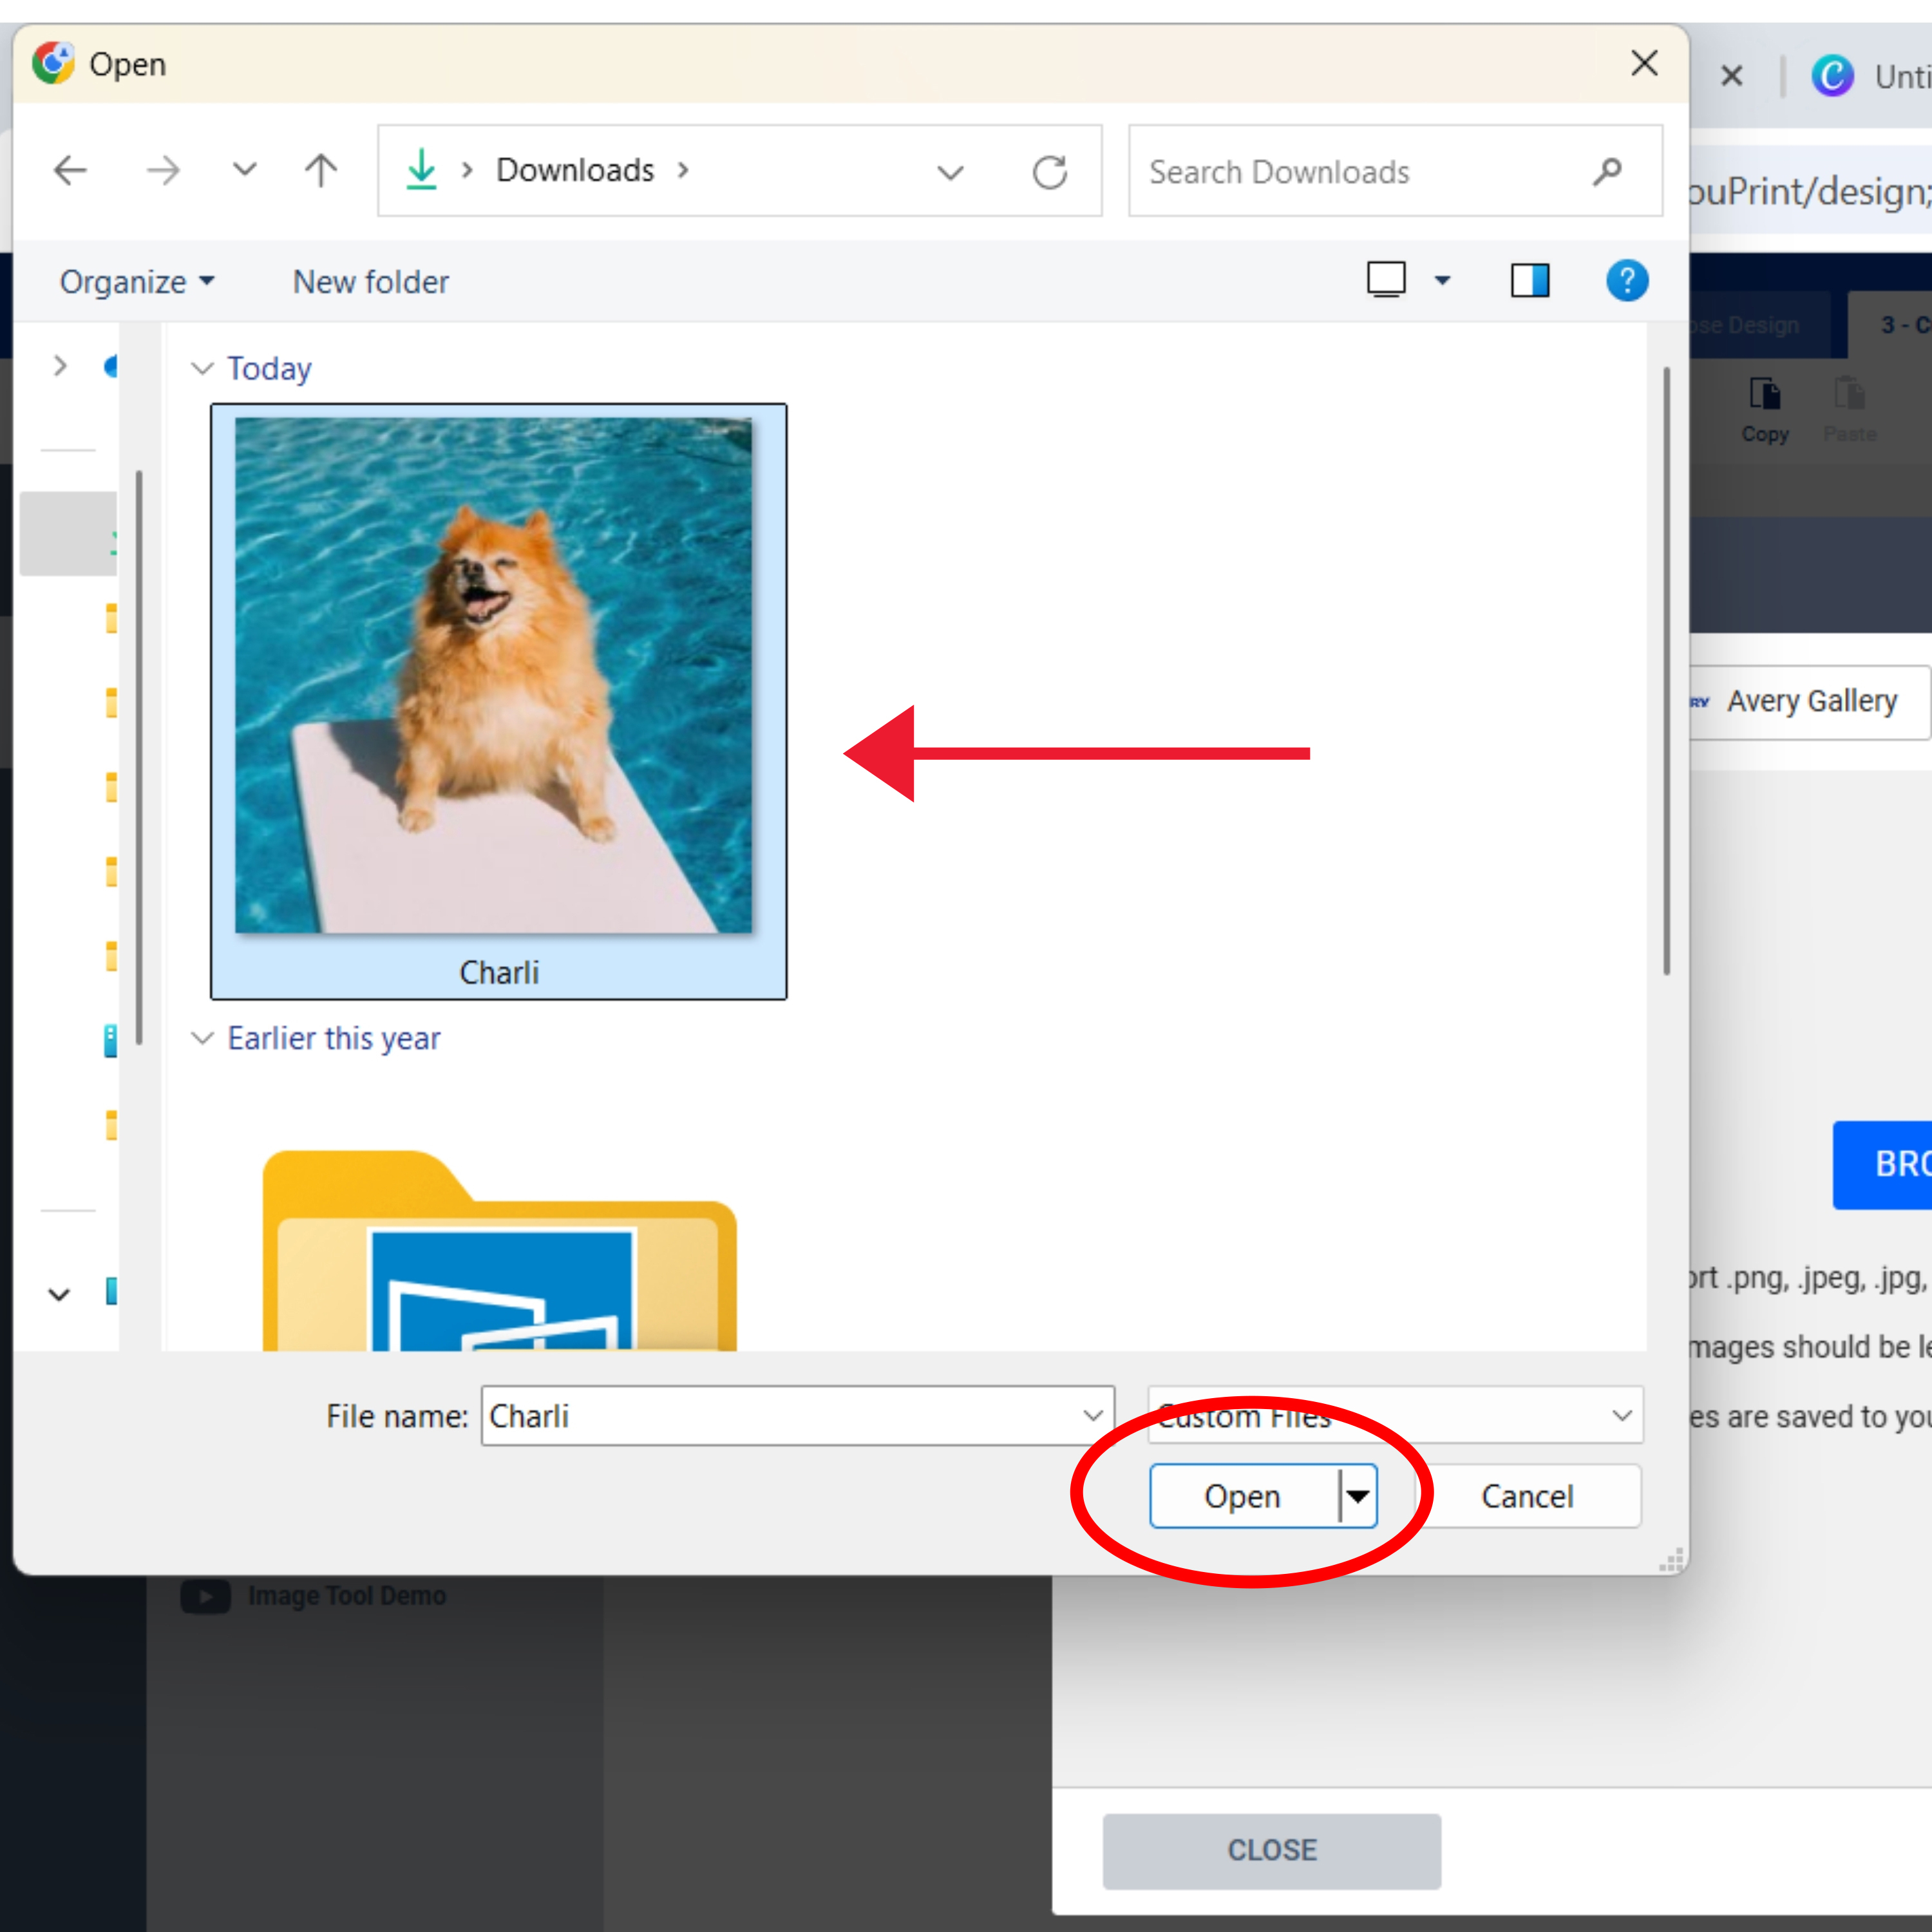
- Choose your photo, click “Open,” and watch it appear in the placeholder.
4) Personalize your picture labels with text
Depending on the type of picture labels you want to make, text (and how you add it) can be incredibly important. In this example, I’m making photo address labels similar to ones I might send to a huge list of family and friends or my business mailing list. In both cases, adding a lot of unique addresses can be a huge pain if you don’t know this one simple trick: Import Data/Mail Merge.
Trust me, once you get the hang of using the Import Data/Mail Merge feature, it’s such a game changer for so many projects. For example, I use it for adding names to gift tags and making name tags for parties and business events.
Adding text with Import Data/Mail Merge and formatting
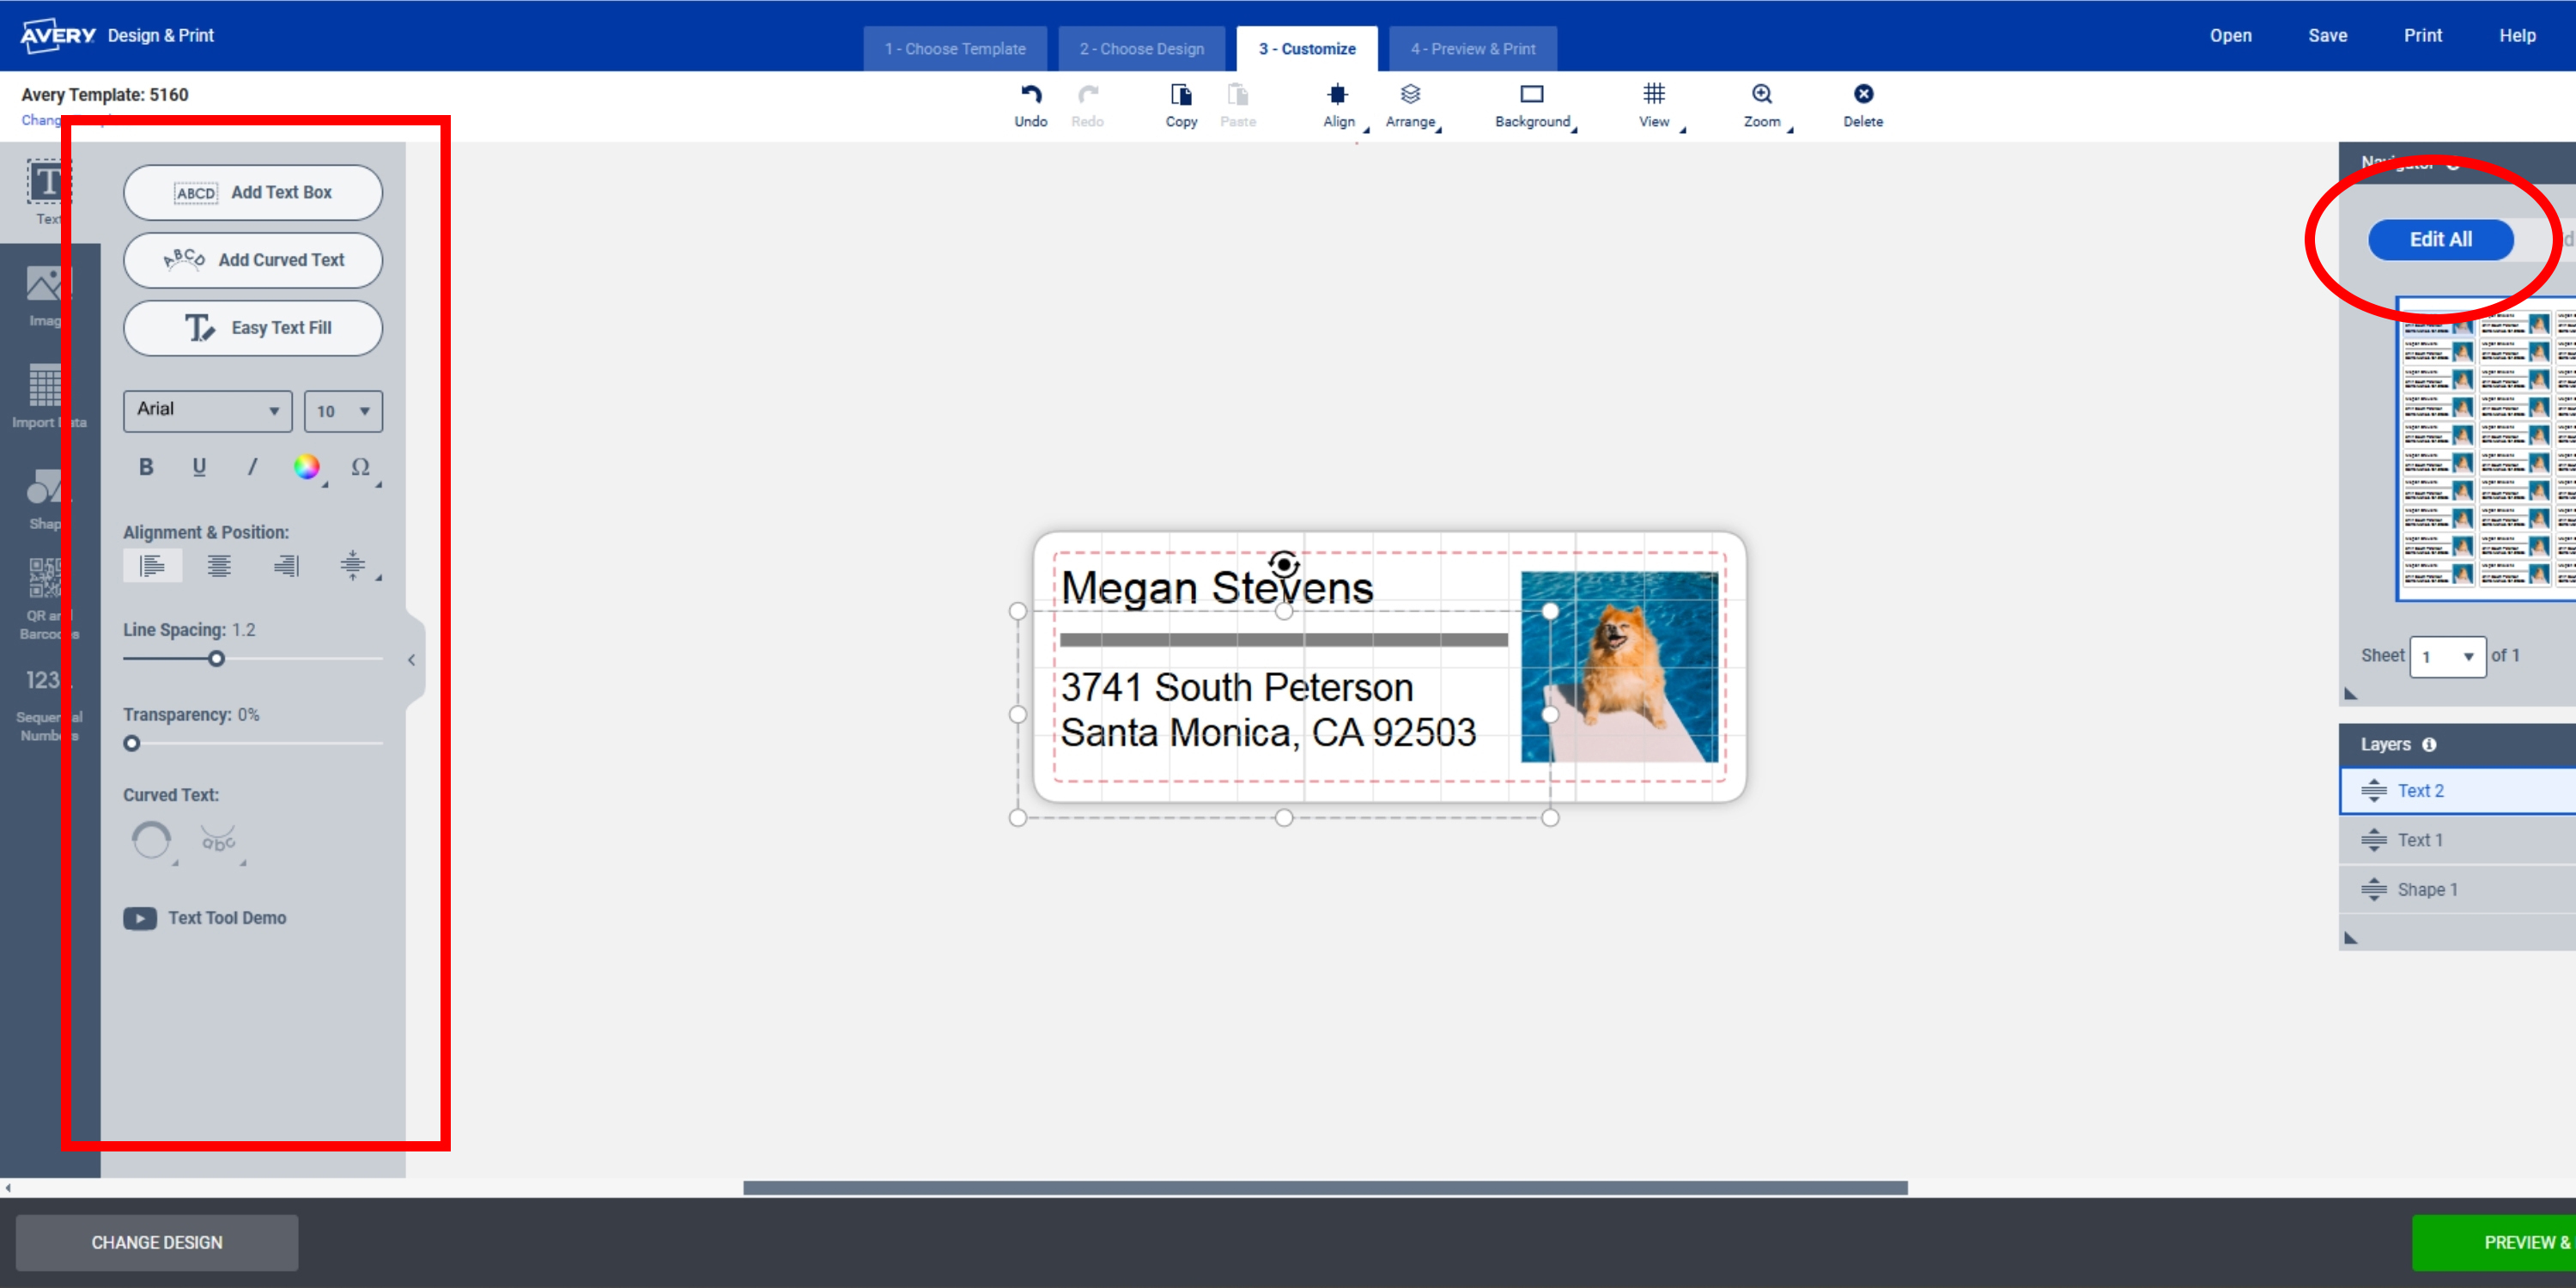
- Click on any text to open the Text Tool in the left-hand menu.
- Double-check that the Edit All button on the right-hand side is selected.
- Make any desired changes to the font style, color, and/or size.
- If you’re making return address labels (all the same address), type in the information and skip ahead design elements.
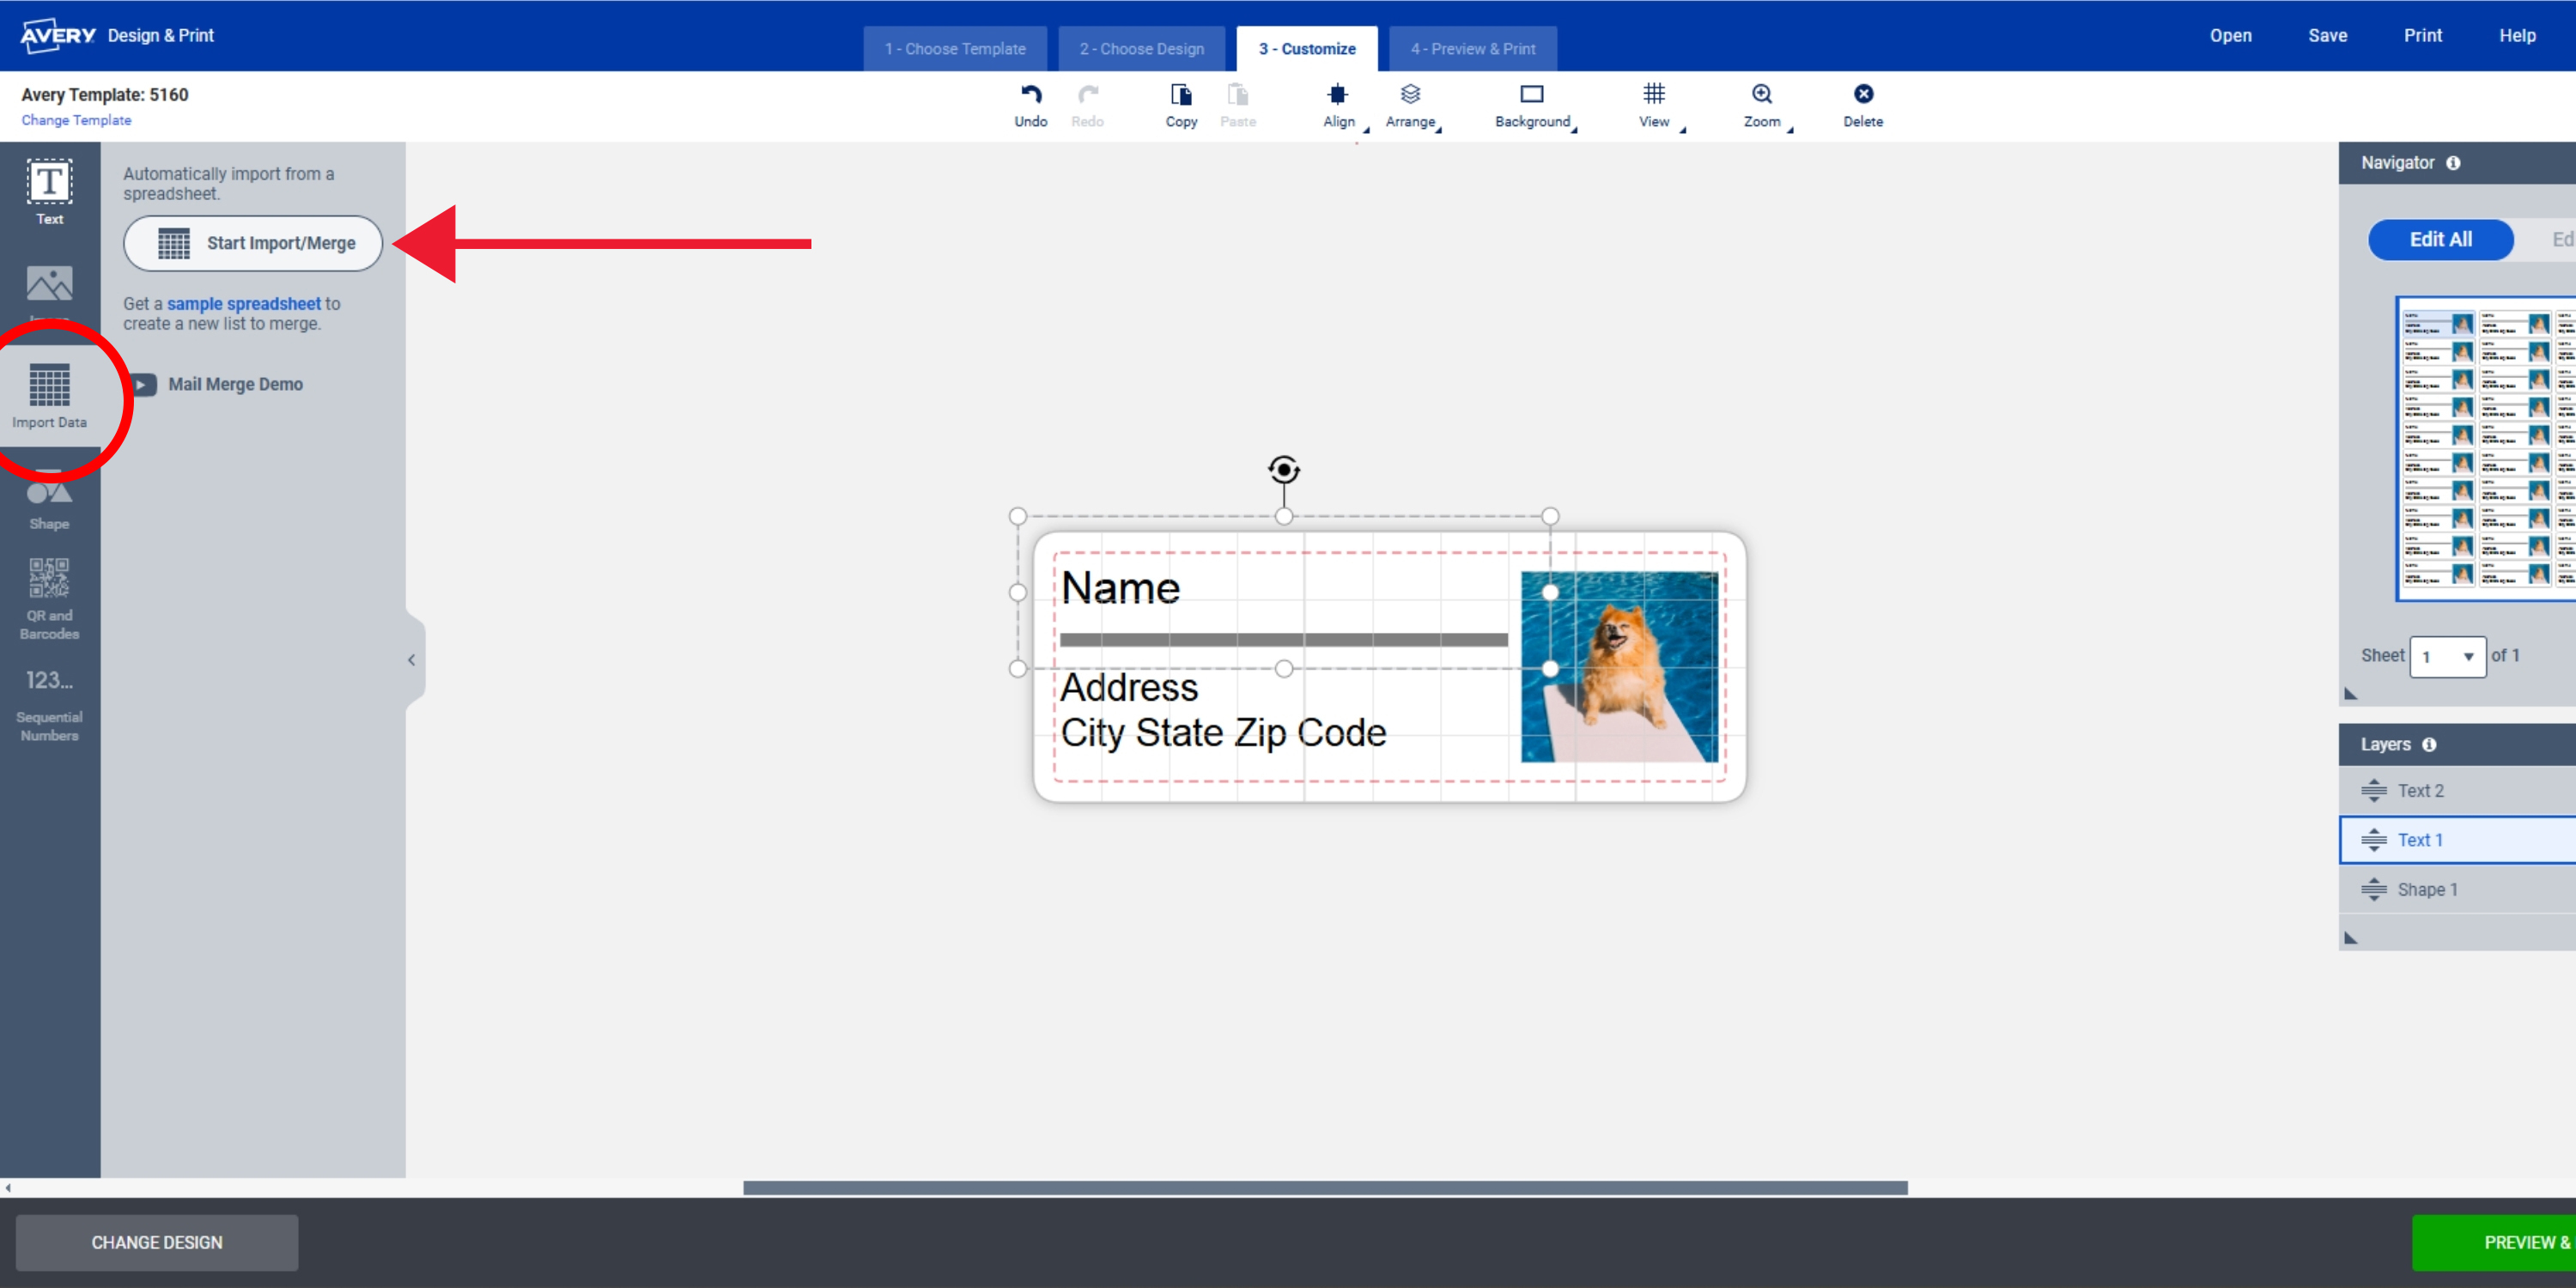
- For bulk photo labels, use Import Data/Mail Merge feature to apply a list of addresses to individual labels.
- Keep in mind you will need to have your addresses stored in a spreadsheet (for example, Microsoft Excel® or Google Sheets™) and with the information correctly formatted.
- If you’ve never done this before, try this detailed Mail Merge walkthrough.
Enhance your labels with design elements
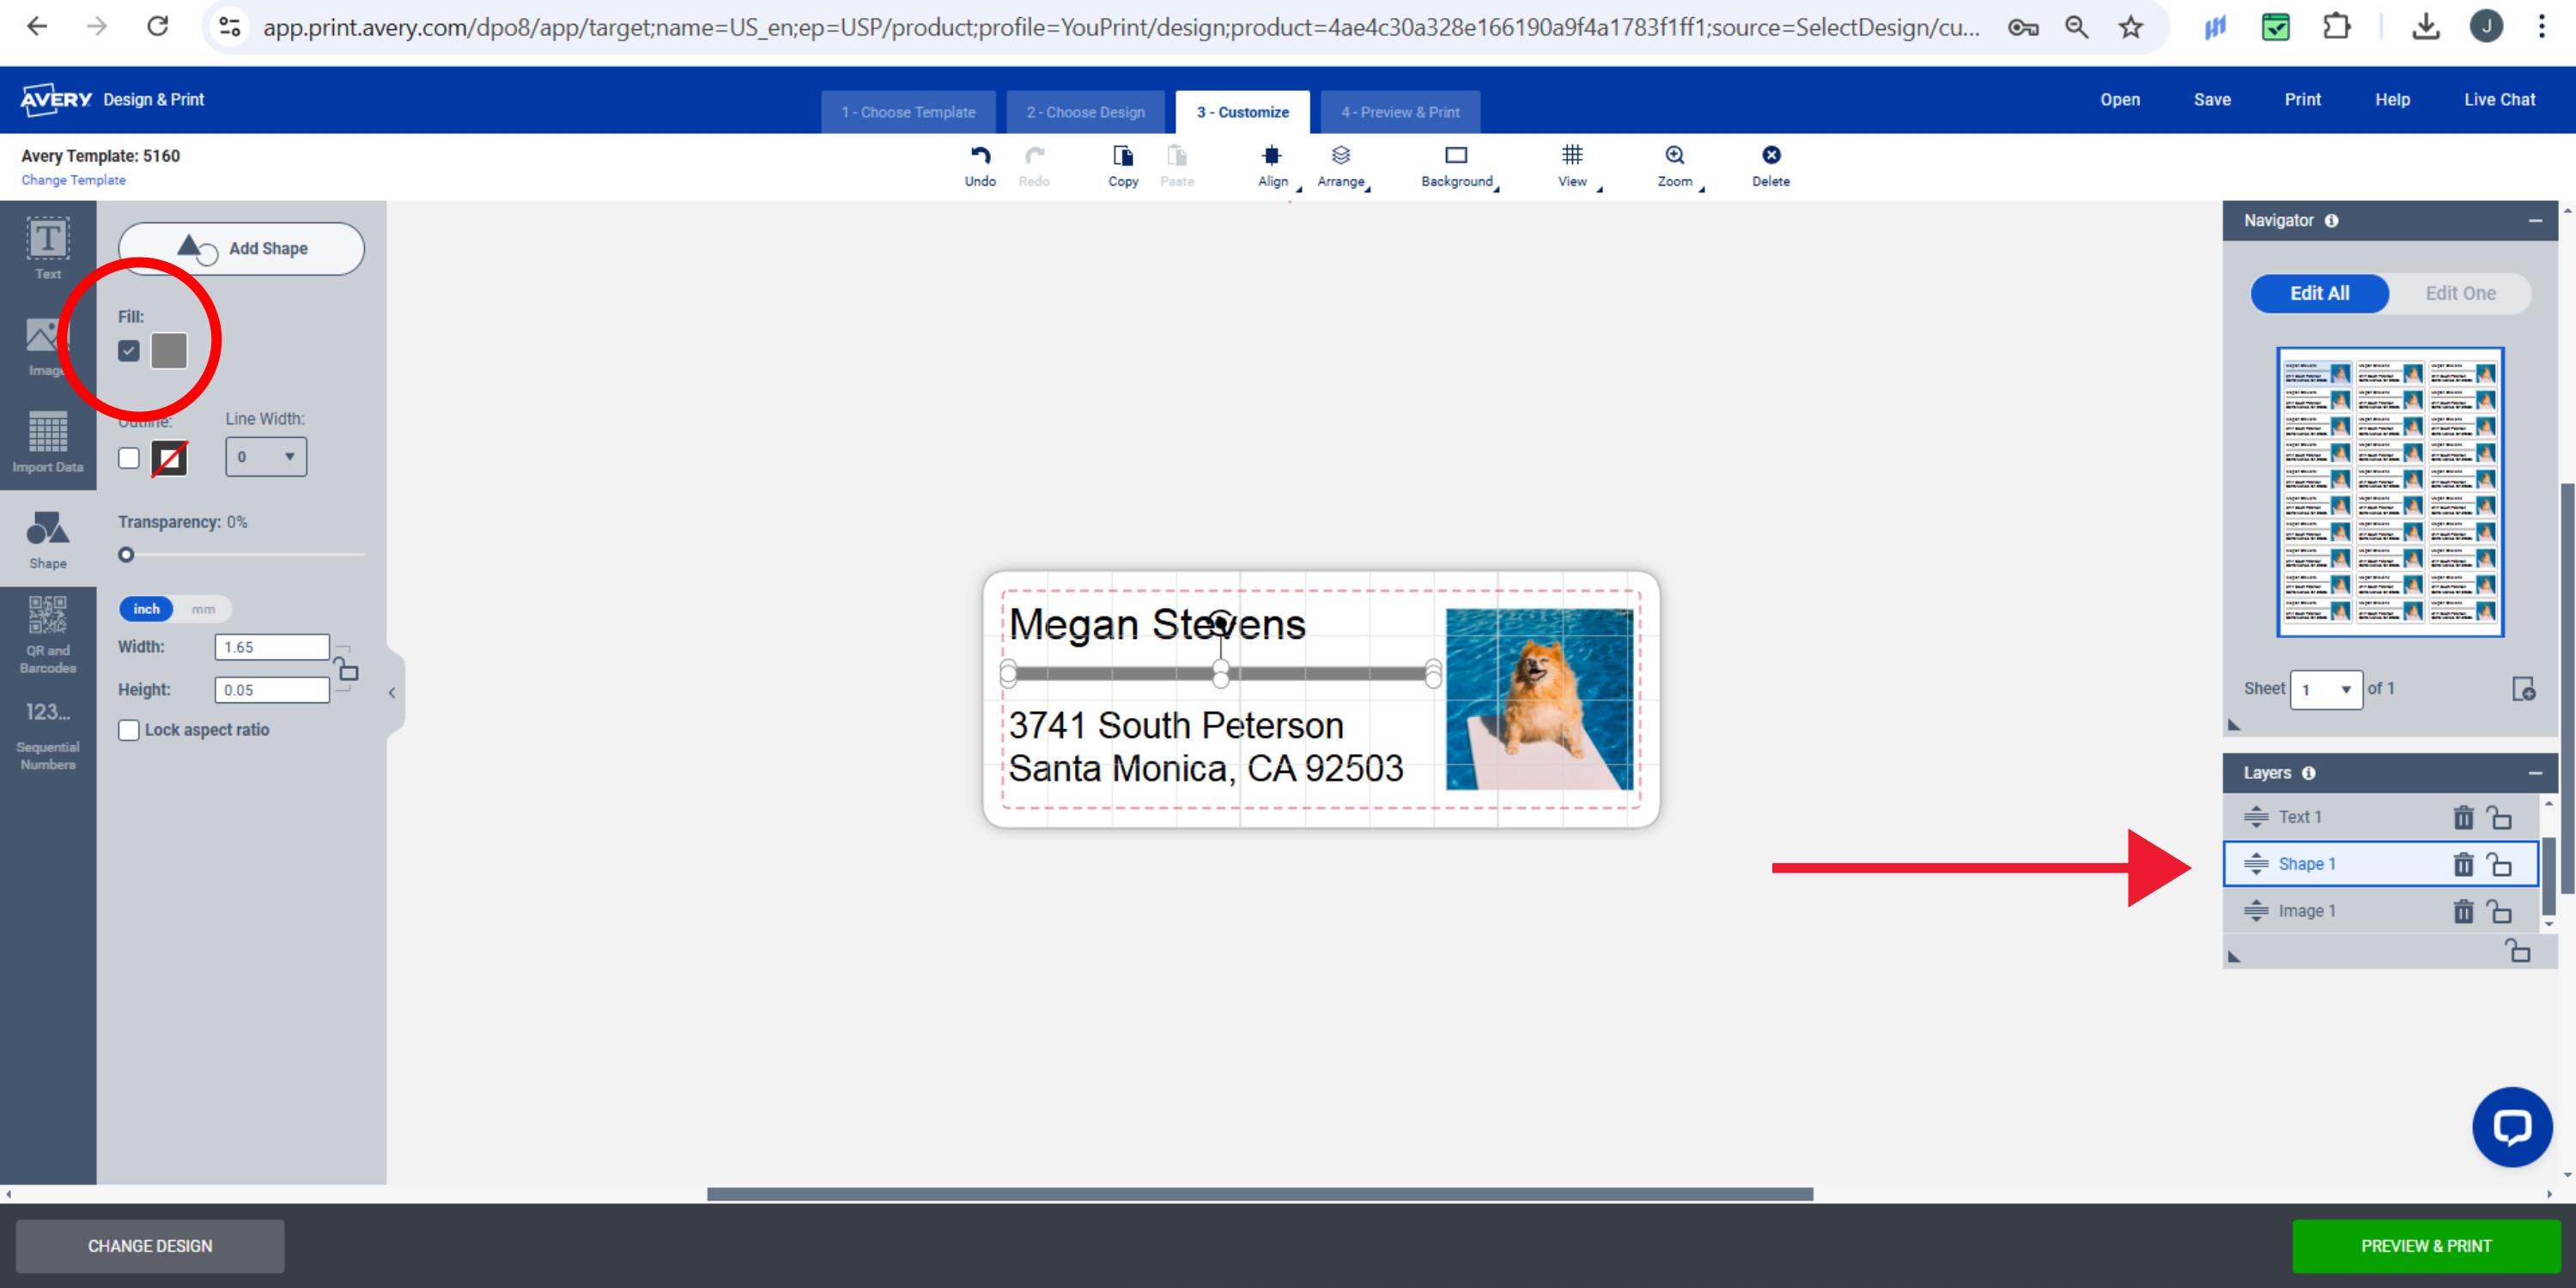
- Use the left-hand menu to select, add, or edit other design elements on your labels.
- Easily select the element using the layers on the right side.
- In this example, I want to change the color of a line shape in the predesigned template.
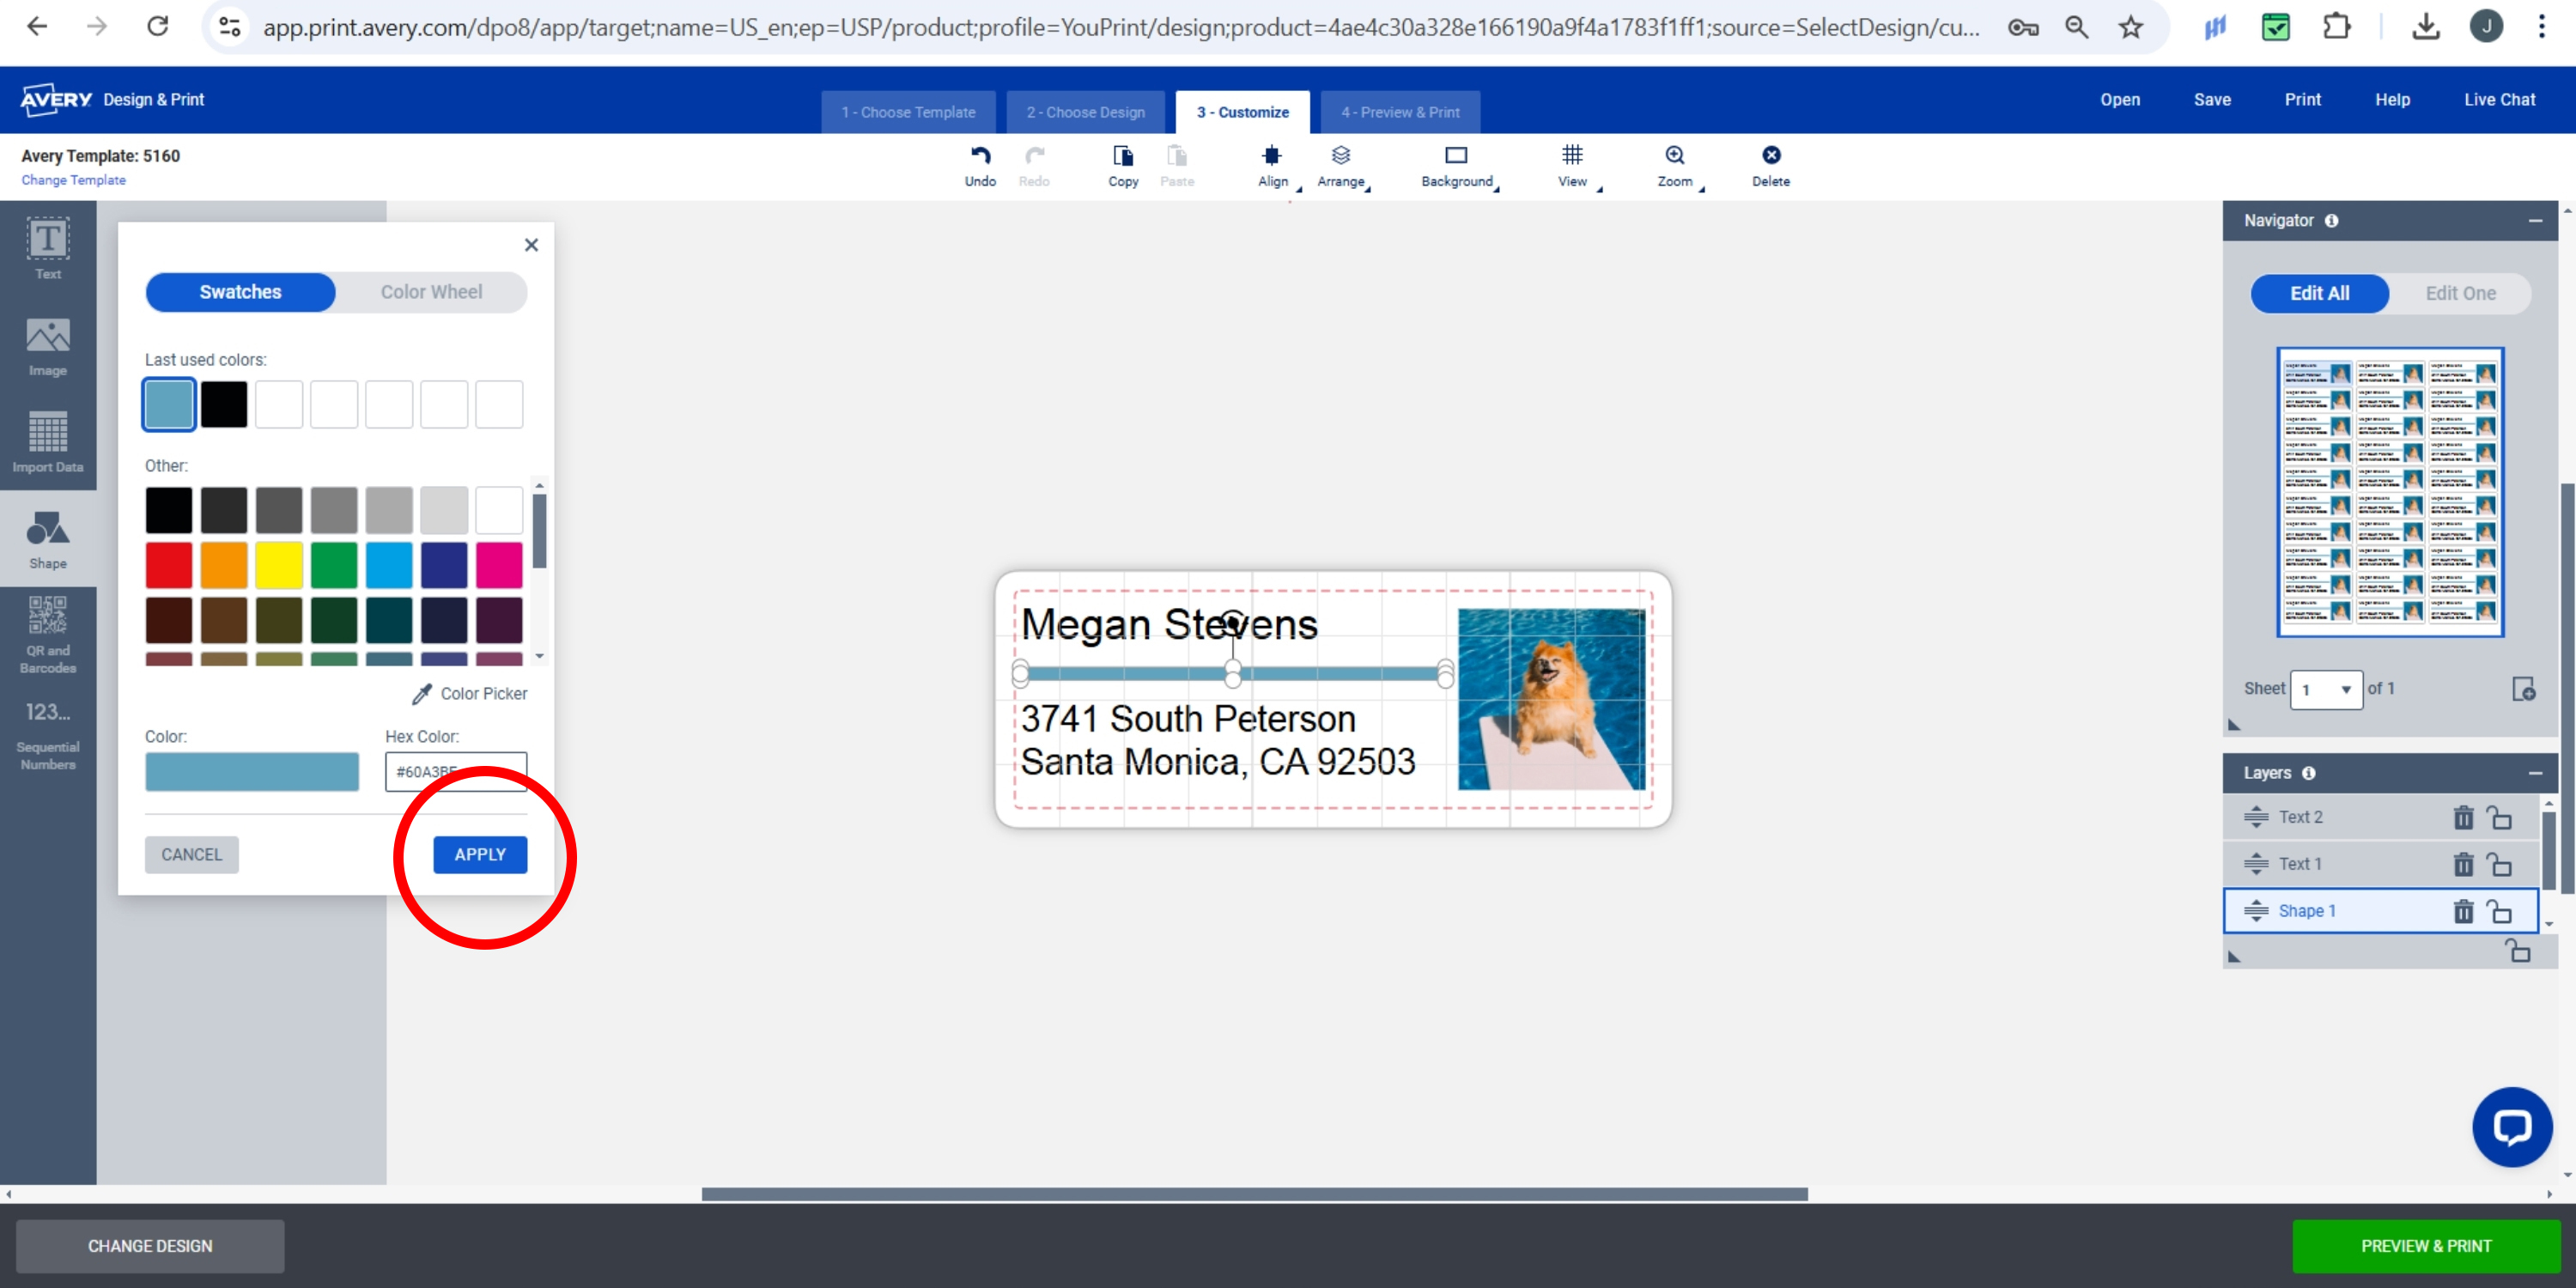
- Select the color of your choice and then click “Apply.”
- Click the green “Preview & Print” button when you’re ready to move on.
5) Preview and print your photo labels
When I’m making labels, I tend to favor the Avery WePrint® service because I don’t like using my home printer. For me, custom printing is much easier, but many of my friends that sell on platforms like Etsy® and Shopify® love the flexibility of printing on their home or office printers. One of the reasons I love to recommend using Avery products and ADPO to other small-business owners is that it’s so easy to print both ways.
Ensure your picture labels look perfect
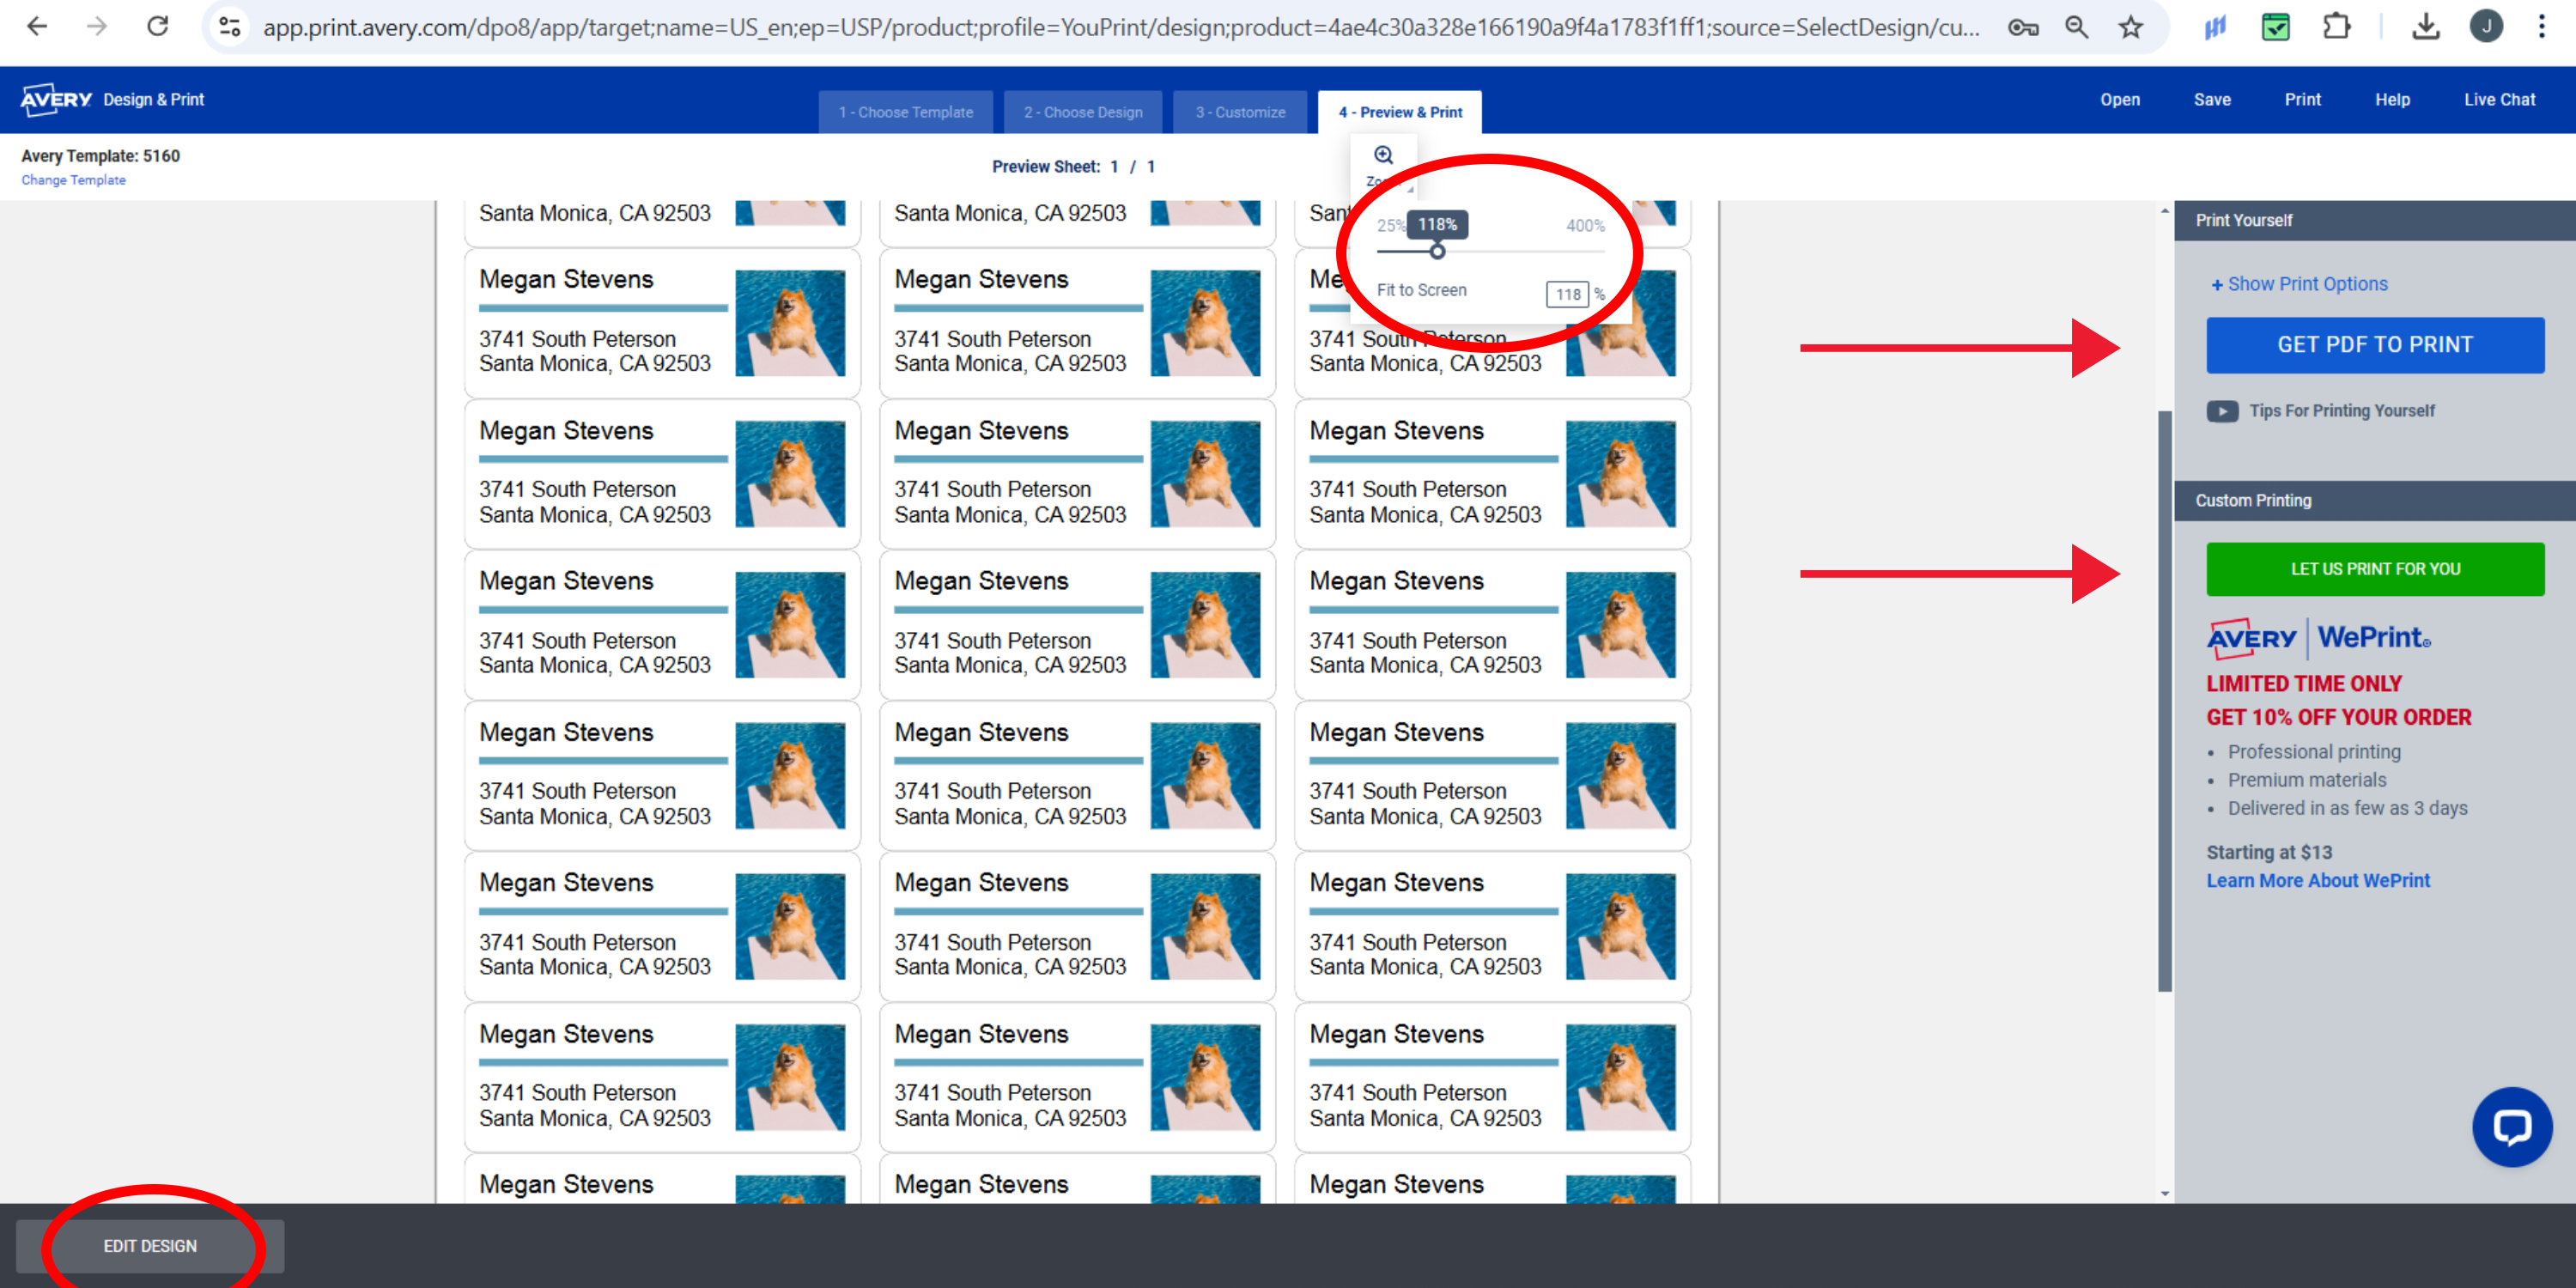
- Once you’re on the preview page, you can zoom in and out to review your labels.
- Choose “Get PDF to Print” to print picture labels yourself.
- Click “Let Us Print for You” to order custom-printed photo labels.
Print and save your labels
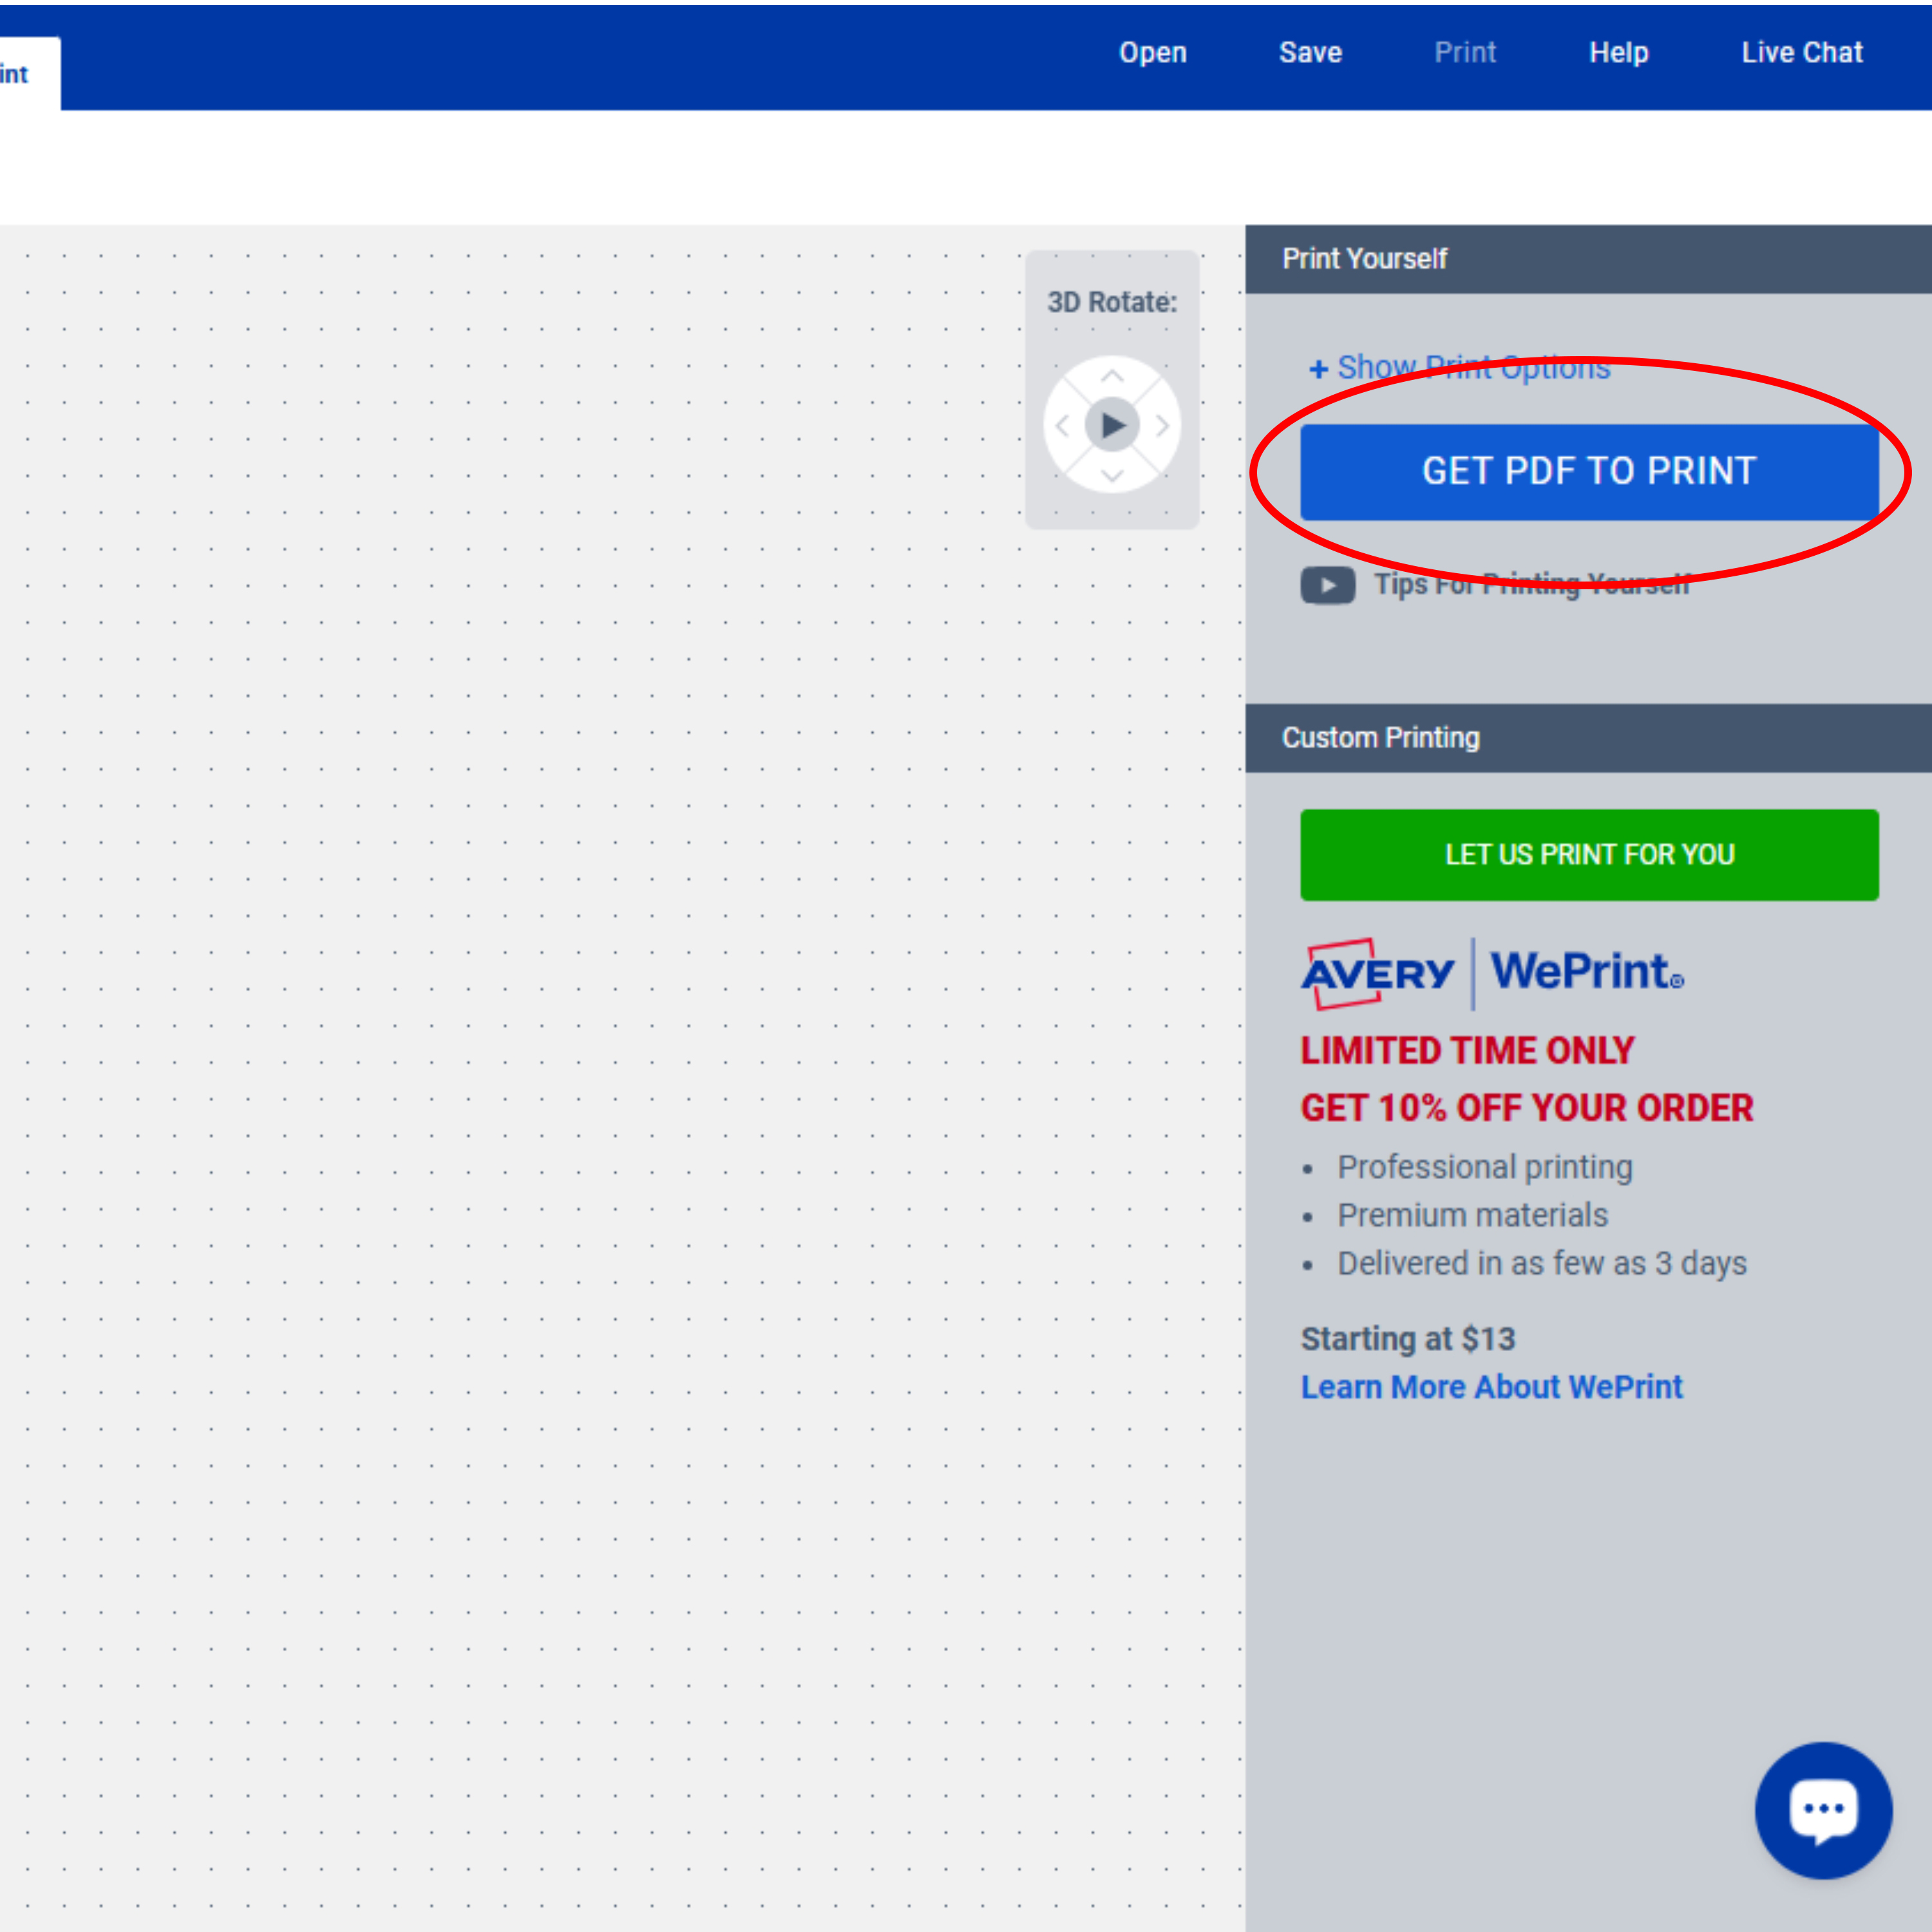
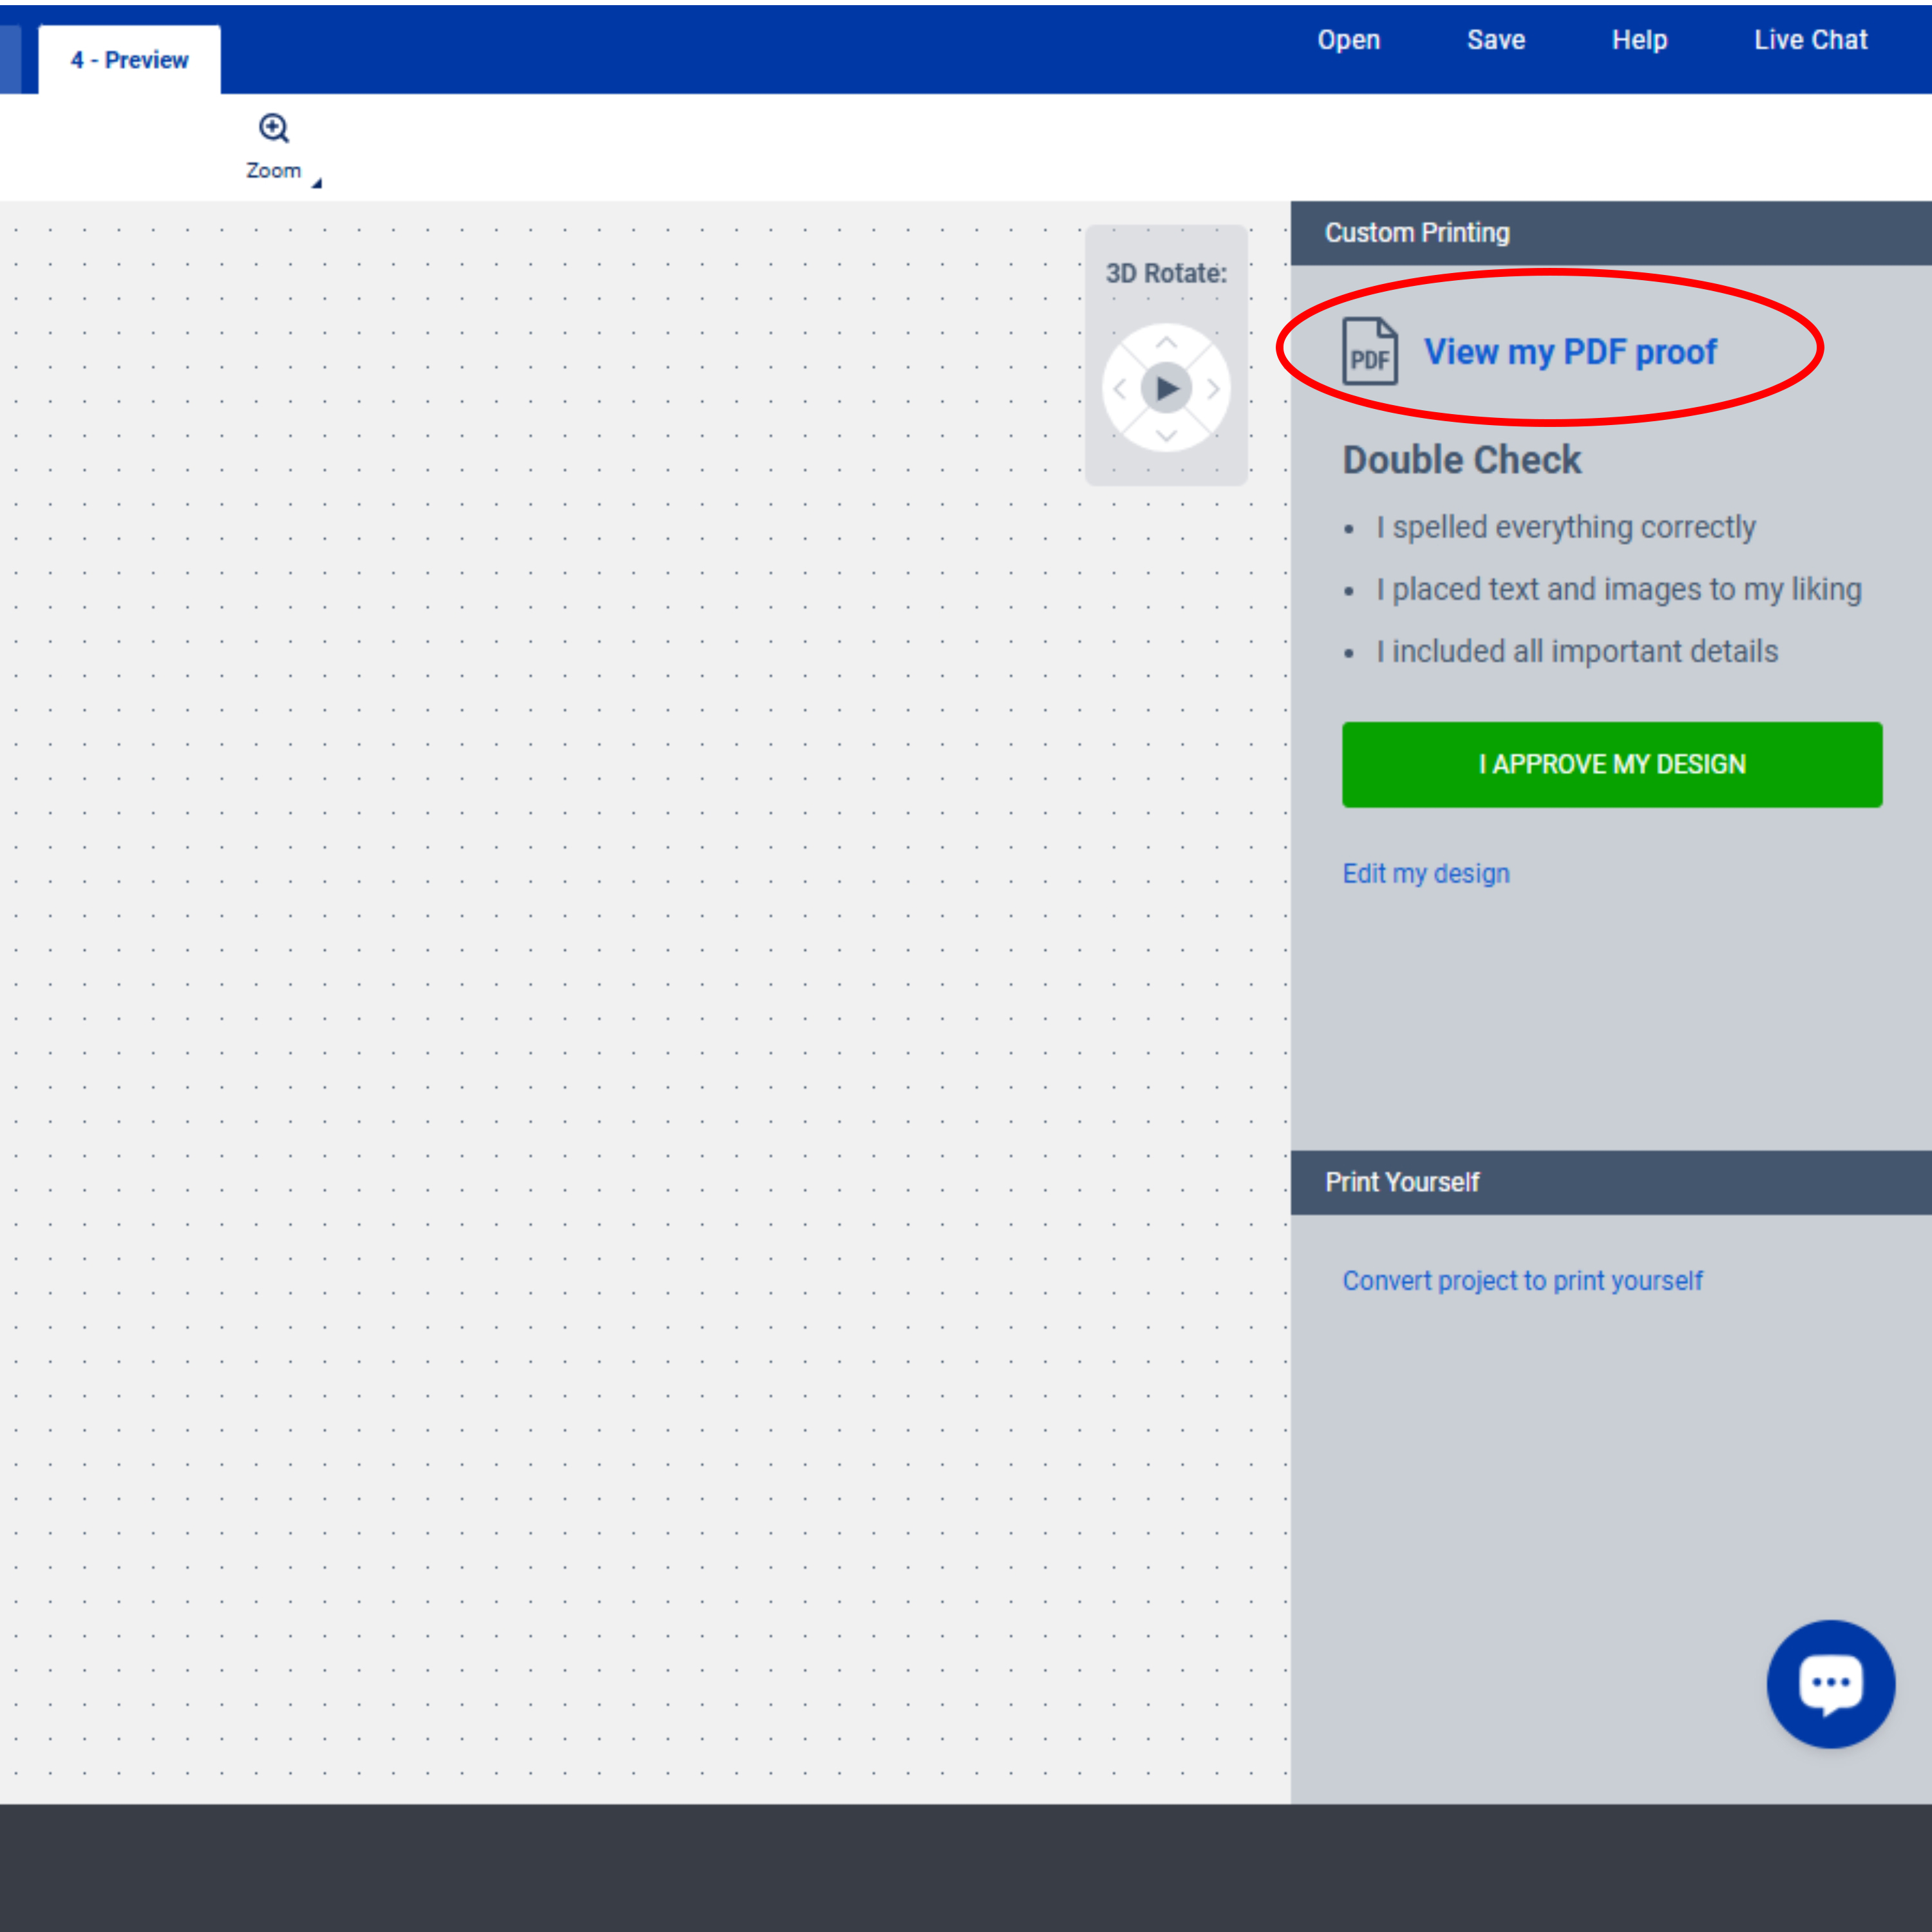
- Whether you choose custom or at-home printing, the next prompt will be to save your project.
- Before printing, make sure you review the PDF because it will show you the most accurate preview.
Expert tips and resources
Best resource: Printing tips for Avery Labels (Video)
Pro Tip: I recommend that you always save your design to your free Avery account. To sign up, you just enter your email address and create a password. Once you have an account, I really love these useful (and free) benefits!
- Save projects in the cloud.
- Access saved projects from any device with an internet connection.
- Share saved projects via email or link.
- Apply saved designs to other Avery products.
Bring your ideas to life with custom photo labels
Throughout this blog post, I’ve shared how I use photo labels to bring a personal touch to everything from business mail to holiday cards. I like using Avery Design and Print Online (ADPO) because the process is simple, free, and packed with options. From adding pictures to address labels for a festive touch to customizing bulk labels for your small business, the possibilities are endless. Start your project today and see how easy it is to design labels that perfectly reflect your style and needs. Whether you print at home or order custom prints, your photo labels will be as unique as you are!
Once you’ve created your picture labels, share your designs with us on social media! Tag us on TikTok and Facebook, and use #averyproducts on Instagram—we’d love to see your creative projects and how you’re using photo labels to make an impression.



Hmmmm Alen, that is strange. Avery.com/templates is usually on the package and the label sheet. Would you please send an email to avery.com/help to let us know where and when you purchased these labels? Thank you so much! We’re so glad you like our labels and Avery Design & Print.
I was really struggling with Word/Powerpoint etc to create a simple label with a picture that had text on it. I did a Google search for a tool and just discovered that Avery supplies one.
I tried it and it works like a dream. In a couple of minutes I created my label which fit exactly into the Avery 5620 form with no fuss and muss. Wish I had known before that it existed.
You really should put this info on the packages.
Thanks again for making this task so easy now. Will be using Avery labels and this tool exclusively in the future!!!